How to Add a Digital Signature to an MS Word Document
Today's TipsMake will show you how to use the Signature Line tool in Microsoft Word to insert a digital signature into a Microsoft Word document on a Windows computer, or convert a file into PDF format and add a signature. using the Preview app on a Mac computer.
Table of Contents
On Windows
Open the document in Microsoft Word. Double-click the Word document where you want to add a signature.
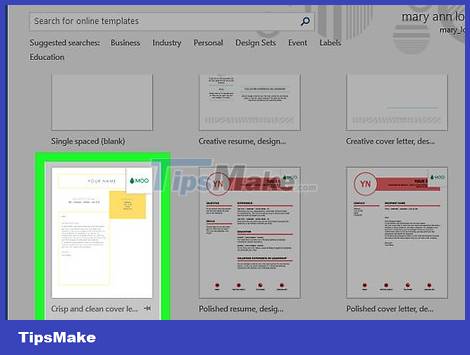
If you want to start a new document, open Microsoft Word and click File , then select New Document .
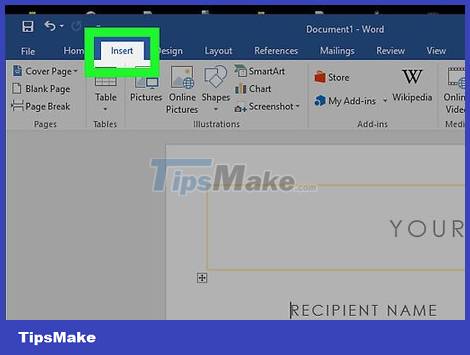
Click the Insert tab . It's at the top of the window.

Click Signature Line in the toolbar, above, to the right of the Text section of the Insert ribbon.

Click Microsoft Office Signature Line .
If you haven't saved the document yet, you'll first need to click File , select Save As , then name the file and click Save .

Add signature details. Type the information that will appear below the signature line in the Signature Setup dialog box, such as name, title, email address, and any other instructions you want to leave for the signer. You can also:
Check the Show sign date in signature line box if you want the signature date to be automatically inserted.
Check the Allow the signer to add a comment in the Sign dialog box if you want to enable the comment feature for anyone who will sign the document.

Click OK .

Right-click on the signature line and select Sign .
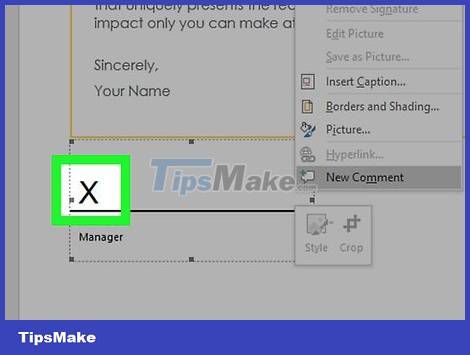
Type your name in the box next to the X.
If you have a photo file of your handwritten signature, click Select Image , then select the file that contains the image of your signature.

Click Sign . A "signature" indication will appear next to the word count at the end of the document, indicating that the document has been signed.
On Mac
Open the document in Microsoft Word. Double-click the Word document where you want to add a signature.
If you want to start a new document, open Microsoft Word and click File , then select New Document .

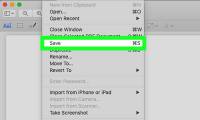
Click File at the top left of the menu bar at the top of the screen and select Save as .
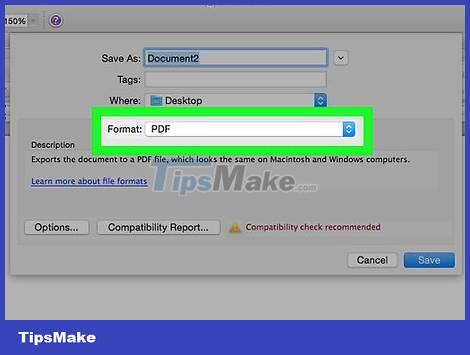
Click the "File Format" drop-down box and select PDF .
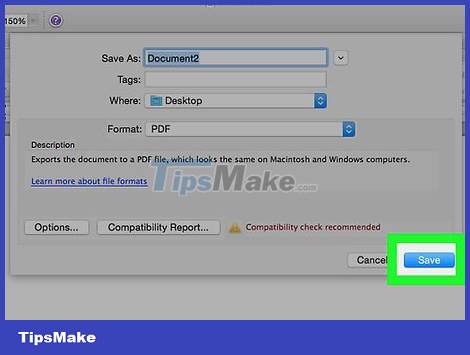
Click Save .

Open Finder and navigate to the file you just saved. Finder has a blue and white human face icon, located at the bottom, left side of the dock.
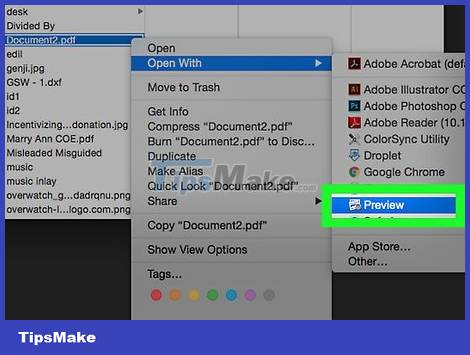
Right-click the PDF file and select Open With , then click Preview . The PDF file will open in the Preview application.

Click the toolbox icon to the left of the search bar.
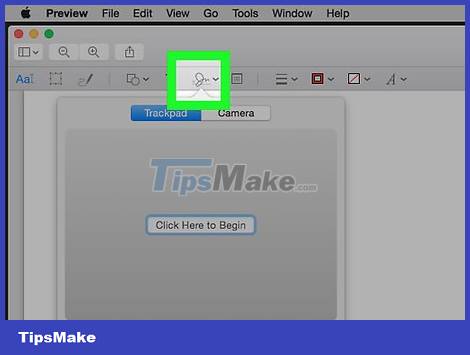
Click the Signature action, which looks like a curvy handwritten signature on a small line, an option to the right of the "T" icon.
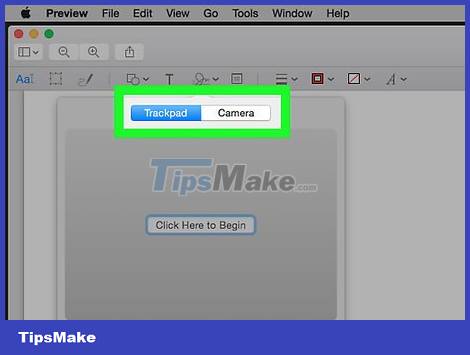
Click Trackpad or Camera . If your laptop uses a built-in trackpad, trackpad, or external trackpad, you can click Trackpad . If you don't use a touchpad but have a webcam, select Camera .
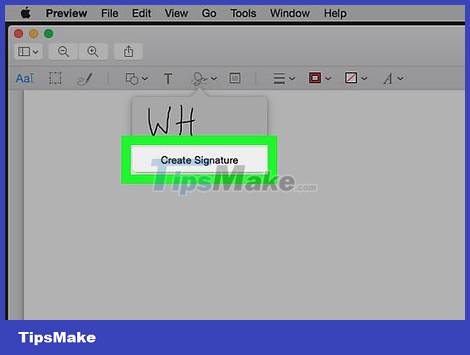
If the digital signature is already saved, you may need to click Create Signature first.

Create a signature.
For Trackpads:
Click Click Here to Begin.
Use your finger to write your signature on the touch pad.
Press a key on the keyboard.
Click Done .
For Cameras:
Sign your name on a blank piece of paper.
Hold the paper up to the camera.
Align the signature so it is straight.
Click Done .
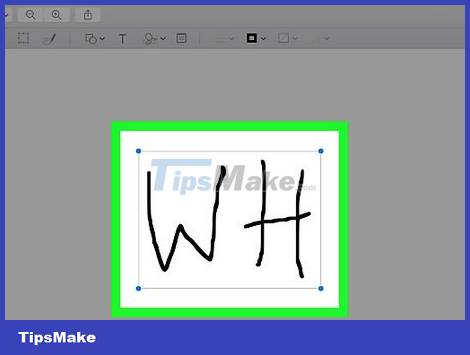
Click on the newly created signature located in the drop-down menu. Your signature will be in the middle of the document.

Drag the mouse to change the signature position. Click in the middle of the signature and drag it to the desired location.
You can resize it by clicking on the corners of your signature and dragging it in or out of the signature center.
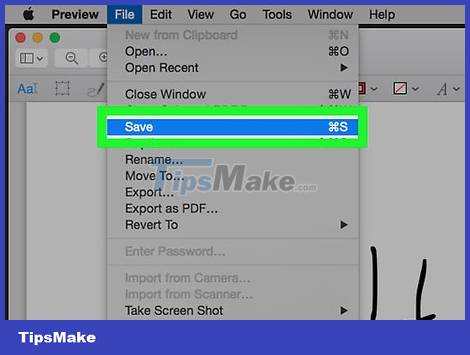
Click File and select Save . The document with your digital signature will be saved.
Was this article helpful?
Your feedback helps us improve.
Related Articles
 How to Add a Digital Signature in an MS Word Document12 minutes read
 How to insert a signature in Word5 minutes read
 How to insert a signature into Word 2010, 2013, 2016, 2019, 20205 minutes read
 How to create a digital signature in Word simply and quickly3 minutes read
 How to create document signature on iPhone3 minutes read
 How to quickly and beautifully remove signature background in Word3 minutes read
Reader Comments 0
Sign in with email or Google to join the discussion.