Table of Contents
This updated guide examines Insert Signature into Word: How to Insert a Signature in Word and organizes the essential facts, background, and practical takeaways in clear American English.
- How to insert watermark, logo sink into Excel
- How to create watermarks in PowerPoint
- How to stamp copyright on PDF files
- How to insert pictures into Word 2007
Instructions for inserting digital signatures in Word
Step 1:
For documents that you want to give to someone to ask for a signature, you need to first add periodic lines to the document . We need to place the mouse where we need to autograph. Continue to click Insert> Add a Signature Line to add a signature line.

Now show the interface for us to enter the information of the person who wants to sign the signature , name, position and click OK to save.

Immediately the end of the text displays a section for inserting the signature as below. The section marked with an X is where the recipient enters their signature.
Now you need to save this document and send it to the person who needs to be signed.

Step 2:
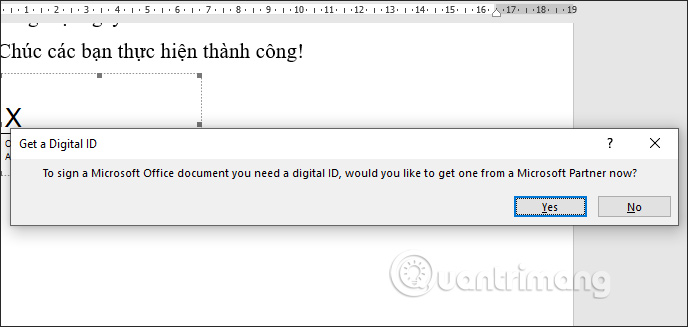
When you receive a document that needs your signature, when you want to fill in a Word signature, you will be asked to become a Partner of Microsoft. It is quite confusing, so we will use the Selfcert tool available when installing the Microsoft Office suite.
Users access the following path to C: Program Files (x86) Microsoft OfficerootOffice16 .
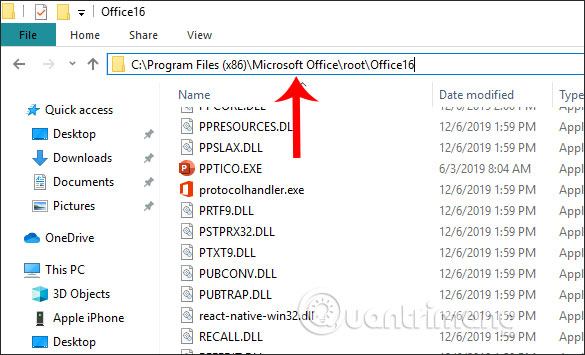
Then we find Selfcert.exe file in this folder as shown below and then activate.

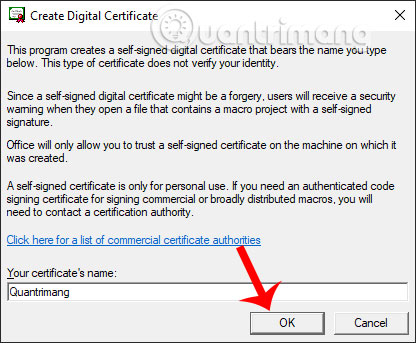
Display the interface to create a digital certificate name, enter your name and then click OK.
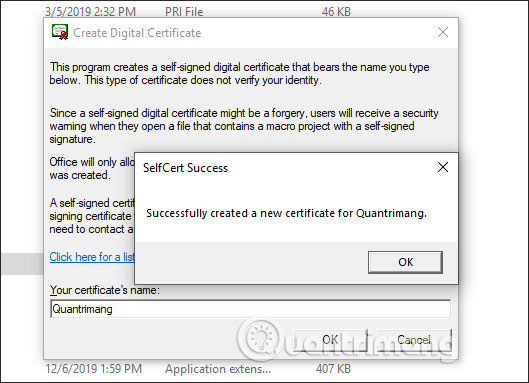
At this time, the message interface will display the name of the certificate successfully .
Step 3:
Now we will return to the document to sign for confirmation. Click the signature box in the document and then display Sign interface as shown below. You enter your signature and click Sign below to sign the document.
Note to users that if you edit the document after signing, the signature will not be valid and we must sign again.
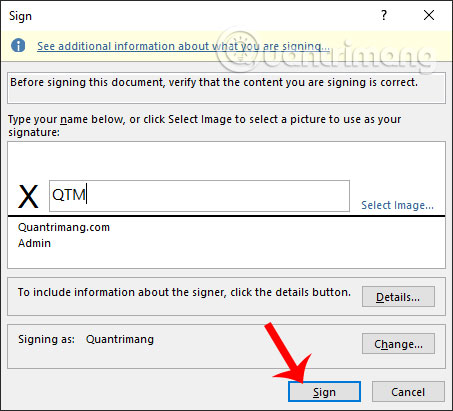
Confirm the signature has been used, click OK to exit this interface.

As a result, you see the digital signature we signed for the Word document as shown below.
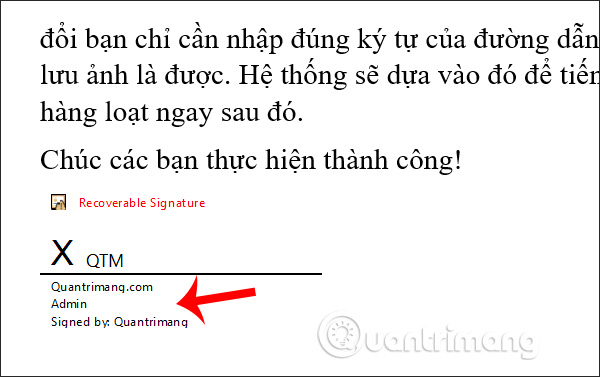
Step 4:
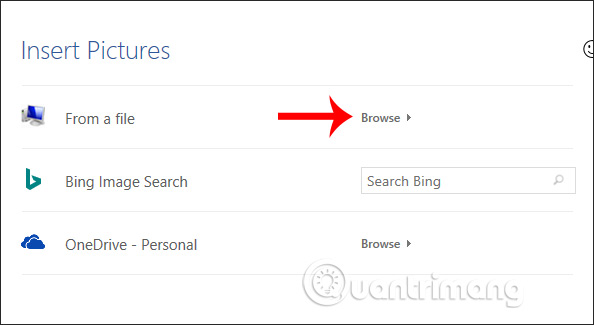
In case the user wants to change to an image signature , in the Sign signature insert frame, click on Select image as shown below.

Display the place to get the image to use as a signature, in From a file click Browse and then you find the signature image saved in the computer folder.
Finally click on the Sign box to sign the document.
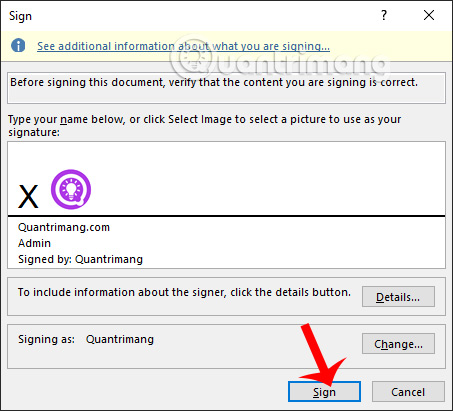
Document with signed images will look like below.

As such, the document with the signature inserted will not be able to edit the content. If others deliberately insist on Edit Anyway, the signature will disappear, the document will not be signed for confirmation.
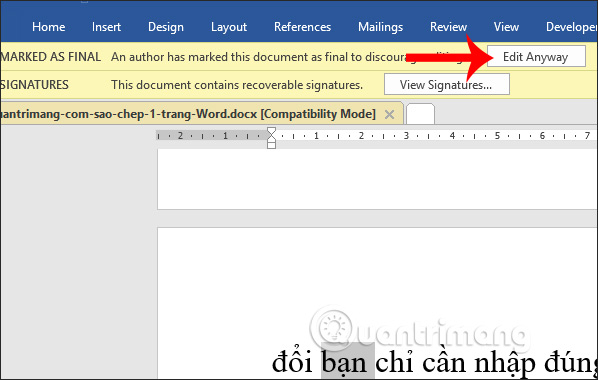
At this time, the Word interface will send warning information as shown.
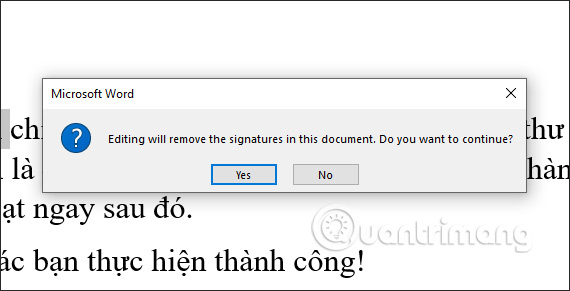
If you press Yes to continue, the signature completely disappears, leaving only the previous signature line.
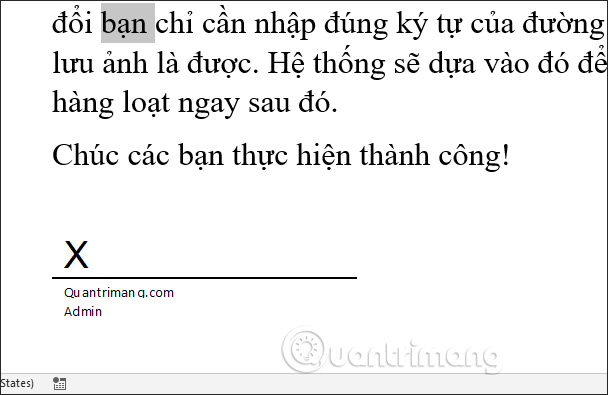
So we have more ways to protect the Word document, prevent others from editing and confirming ownership of the document when there is a confirmation signature from others. If you want to edit the content, you must remove the previously applied signature.
I wish you successful implementation!
FAQ
What is Insert Signature into Word: How to Insert a Signature in Word about?
It provides a structured overview of insert signature into word, explains the main context, and highlights practical takeaways for readers.
Why does this topic matter?
Understanding the main concepts helps readers evaluate the issue, avoid common mistakes, and make better-informed decisions.
How should readers use this information?
Use the guidance as a practical starting point, confirm details that may have changed, and follow current product, safety, or security recommendations.
Related Articles
 How to Insert a Signature into Word 2010, 2013, 2016, 20196 minutes read
 How to Add a Digital Signature to an MS Word Document: Practical Guide6 minutes read
 How to Add a Digital Signature in an MS Word Document12 minutes read
 How to Insert a Signature in Pages on Mac4 minutes read
 Quickly and Beautifully Remove Signature Background in Word: Step-by-Step Guide5 minutes read
 How to Create a Signature for Gmail and Insert Photos7 minutes read
Reader Comments 0
Sign in with email or Google to join the discussion.