How to enable and disable SuperFetch on Windows 10/8/7?
SuperFetch is available on Windows versions but very few users know. In the article below, Network Administrator will show you how to enable or disable SuperFetch on Windows 10/8/7..
SuperFetch is available on Windows versions but very few users know. In the article below, Network Administrator will show you how to enable or disable SuperFetch on Windows 10/8/7.
1. What is SuperFetch?
SuperFetch is a system memory management service on the operating system, first introduced by Microsoft Windows on Windows Vista. This feature is available on Windows Vista, Windows 7, 8 and Windows 10 versions . SuperFetch is designed to reduce the loading time of applications in memory. In short, SuperFetch supports improving Windows load time and all applications installed on Windows.
Understanding, SuperFetch is like a part of memory manager on your Windows computer.
However, according to some users, it is reflected that the SuperFetch service can affect the overall performance of some applications. And that is why many users want to disable this service.

2. Enable or disable SuperFetch on Windows 10/8/7
2.1. Use Windows Services to disable SuperFetch
The steps to disable SuperFetch with Windows are quite simple and do not take much time. Follow the steps below:
- First press the Windows + R key combination to open the Run command window.
- On the Run command window, enter services.msc there and press Enter or click OK to open the Windows Services window.
- Here, on the list of services you find the service named " SuperFetch ".
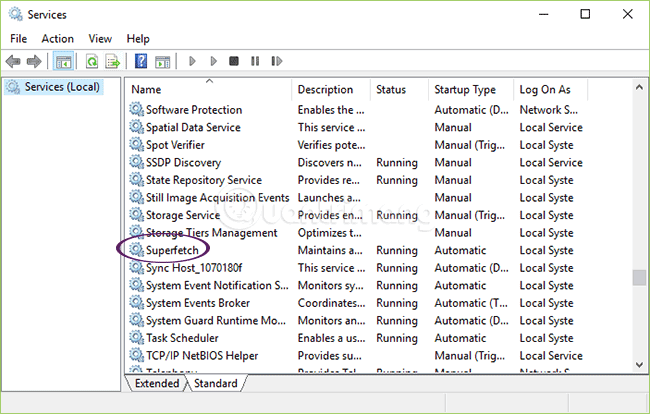
- Right-click the SuperFetch service and select Properties .
- Next click Stop to disable SuperFetch, then select the Disabled option in the Startup type section.

2.2. Enable or disable SuperFetch by using the Windows Registry
Follow the steps below:
- First press the Windows + R key combination to open the Run command window.
- On the Run command window, enter regedit there and press Enter or click OK to open the Windows Registry window.
- On the Registry window you navigate to the key:
H_KEY_LOCAL> SYSTEM> CurrentControlSet> Control> Session Manager> MemoryManagement> PrefetchParameters.
- Here in the right pane you find and double-click the option named: EnableSuperFetch .
- If this value is not found, right-click the PrefetchParameters folder and select New => DWORD Value .
- Next enter the value below to enable or disable SuperFetch:
+ To disable SuperFetch, enter a value of 0.
+ To activate SuperFetch when the program starts, enter a value of 1.
+ To activate SuperFetch boot , enter a value of 2.
+ To activate everything of SuperFetch, enter a value of 3.
- After entering the value, click OK and close the Registry Editor window .
Refer to some of the following articles:
- 10 common errors on Windows 10 and how to fix bugs
- To speed up the Windows 7 boot process, read this article
- No need to install any software, this is how to protect your folders safely
Good luck!