How to enable and disable Micro on Windows 10
In today's technological age, computer users are very vulnerable to personal data mining through computers' microphones. Because of that, we need to strictly control the output sources of the Micro to protect ourselves from the prying eyes of the bad guys. On Windows 10, there are many different ways for you to turn on and off the Micro quickly. In this article, Software Tips will guide you how to turn on and off Micro on Windows 10.
1. Turn on / off Micro on Windows 10 using Settings
In the Settings of Windows 10, we can adjust everything related to your computer system.
Step 1: you right click on the icon Speaker on the Taskbar and choose Open Sound Settings .

Step 2: After that, select the Sound tab and navigate to the Manage Sound Devices section .

Step 3: Next, click on Microphone in Inpute Devices section and select Disable to turn off Microphone.

To turn on the Microphone again in Settings, repeat the steps above and select Enable at Step 3 and you 're done.

2. Turn on / off Micro on Windows 10 with Control Panel
Control Panel allows you to freely customize the output / input devices on the computer and including the Micro.
Step 1: you right click on the icon Speaker on the Taskbar and choose Open Sound Settings.
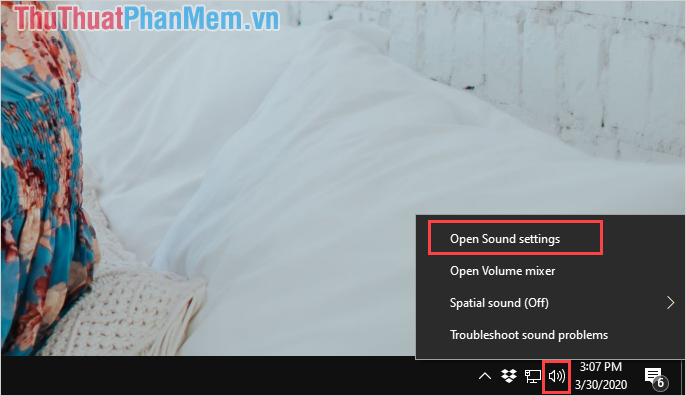
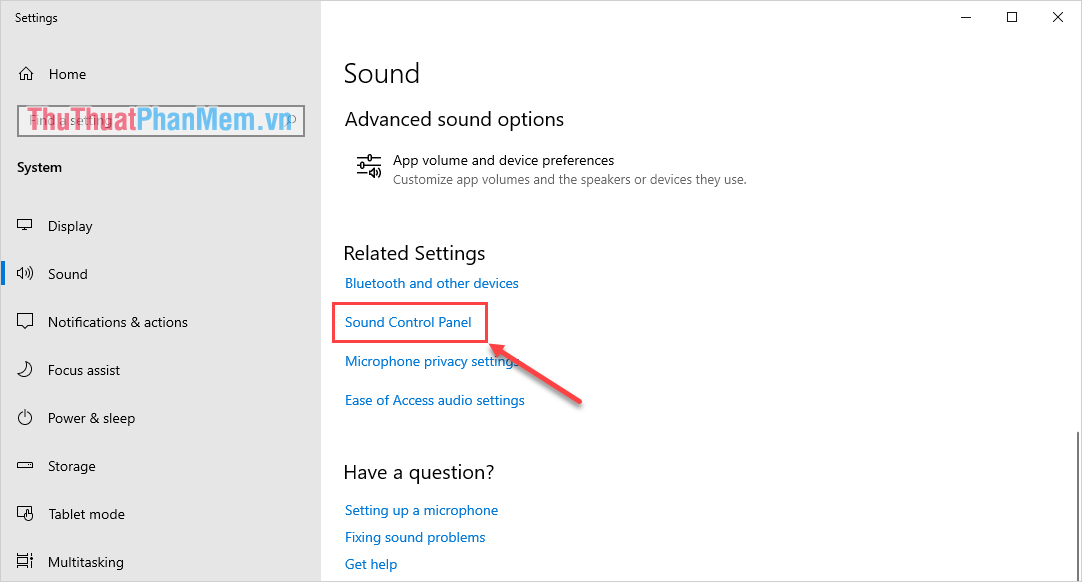
Step 2: After that, select the Sound tab and scroll down to the bottom to select the Sound Control Panel.
Step 3: Next, you select the Recording and right click on Microphone -> Disable to turn off the microphone.
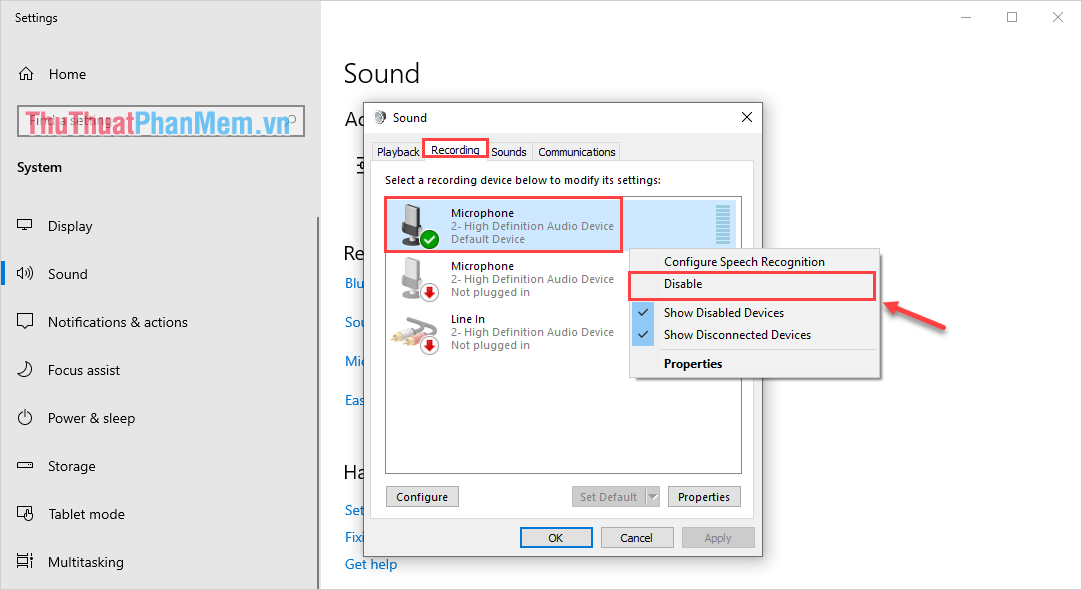
To turn Micro back on in Control Panel, you just repeat the above steps and select Enable in Step 3 is done.

3. Turn on / off Micro on Windows 10 with Driver
Interfering with the Driver on Windows 10 also helps you turn off the Micro but you restrict this option because they are relatively time consuming by the user.
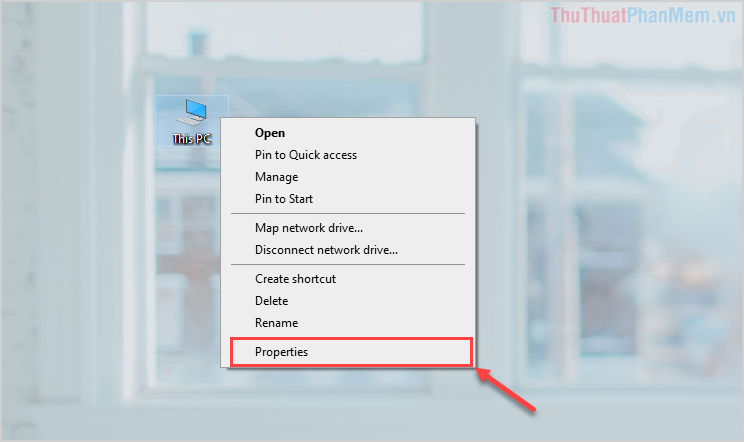
Step 1: you right click on This PC and select Properties to open the set.
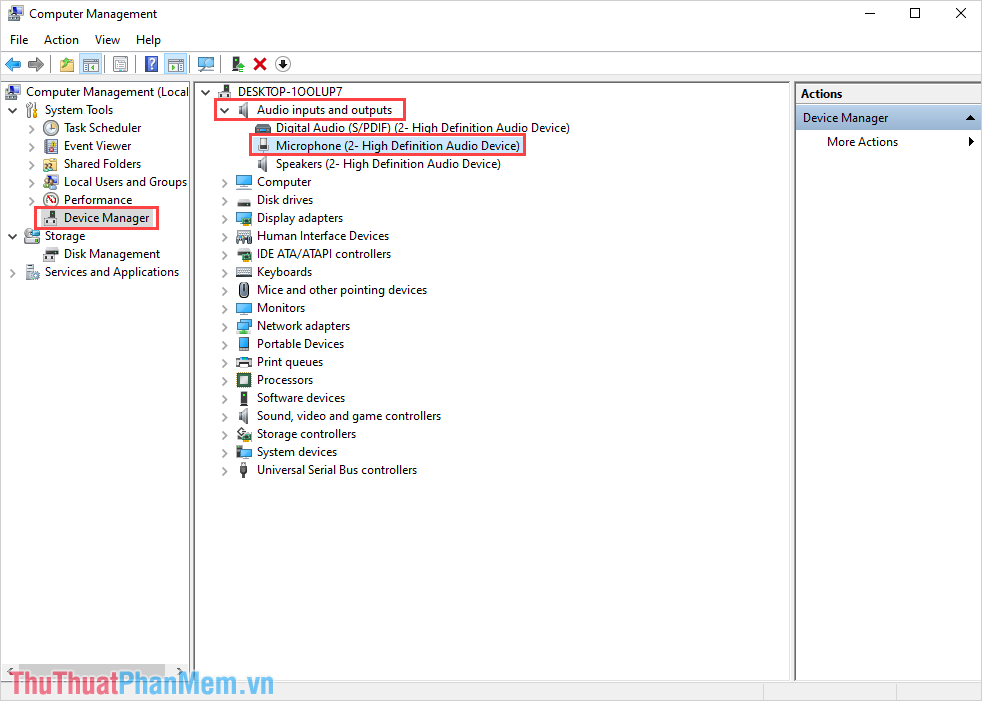
Step 2: After that, select the Device Manager tab and navigate to Audio inputs and outputs -> Microphone (2 - High Definition Audio Device) .
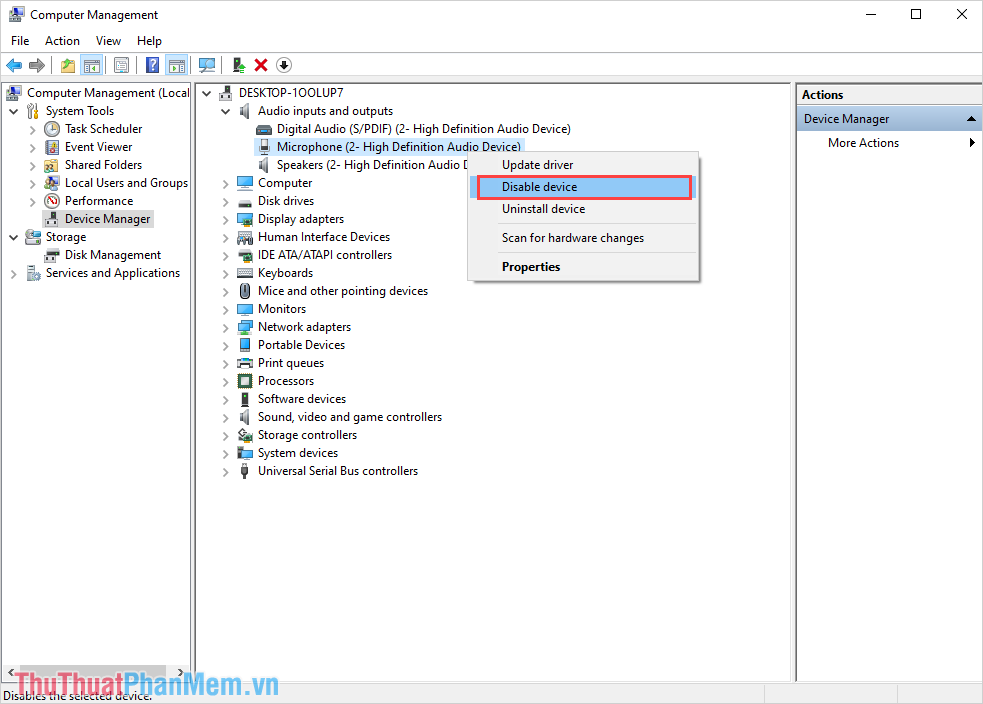
Step 3: Next, right- click the Microphone (2 - High Definition Audio Device) and select Disable Device to turn off the Microphone.
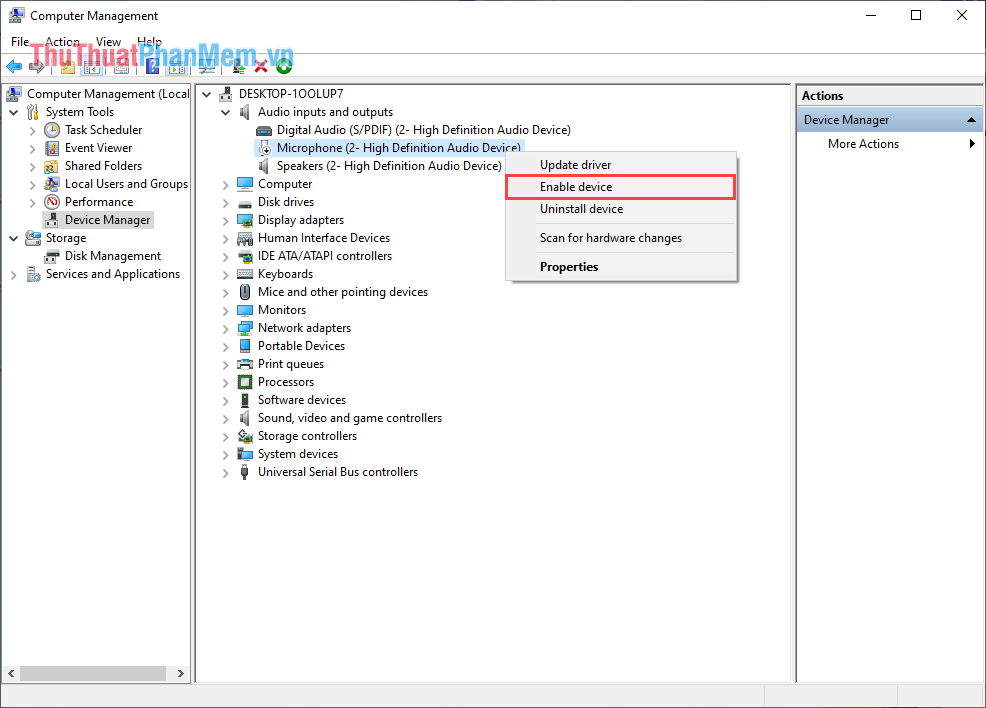
To reopen Driver Micro on Windows 10, repeat the above steps and select Enable Driver in Step 3 .
4. Authorize applications to use Micro
If you do not want to turn off Micro completely on Windows 10, you can choose to grant permission to applications that are allowed to use Micro.
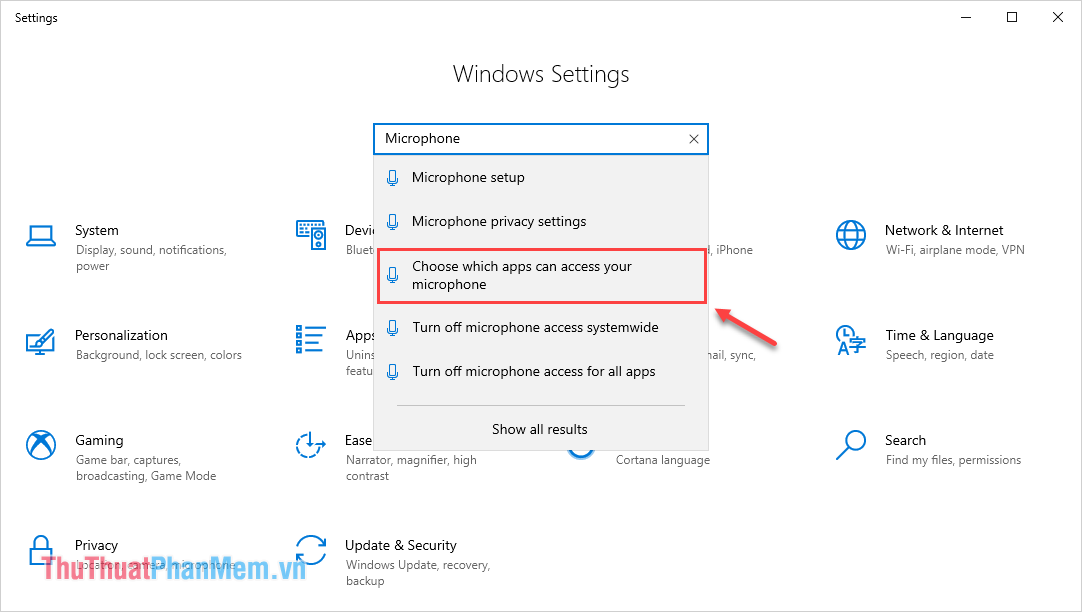
Step 1: Open MenuStart and enter Settings to open the settings.

Step 2: Then, enter Microphone in the search bar and select Choose which apps can access your microphone .
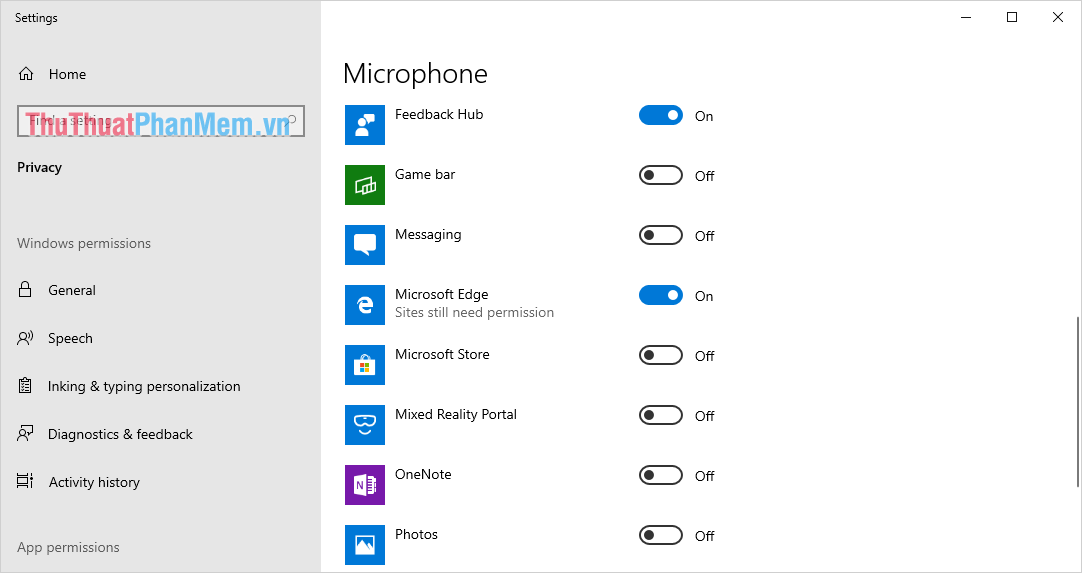
Step 3: Next, you can turn on / off the right to use Micro for each application on Windows.
In this article, Software Tips have shown you a lot of different ways to turn on / off Micro on Windows 10. Wish you success!
You should read it
- ★ How to enable / disable clipboard sharing with Windows Sandbox on Windows 10
- ★ Enable / disable Windows Recovery Environment (WinRE) in Windows 10
- ★ Summary of some simple ways to disable USB ports on Windows computers
- ★ Trick to enable / disable Windows Updates on Windows 10 quickly and easily
- ★ How to choose a microphone on Windows 11