Table of Contents
This guide explains how to enable and Disable Secure Sign-In in Windows 10, with clear steps, practical tips, and important checks before you begin.

Method 1: Turn on - off Secure Sign-in using netplwiz
Step 1: Press Windows + R key combination, in the Run dialog box type "netplwiz" and press Enter .

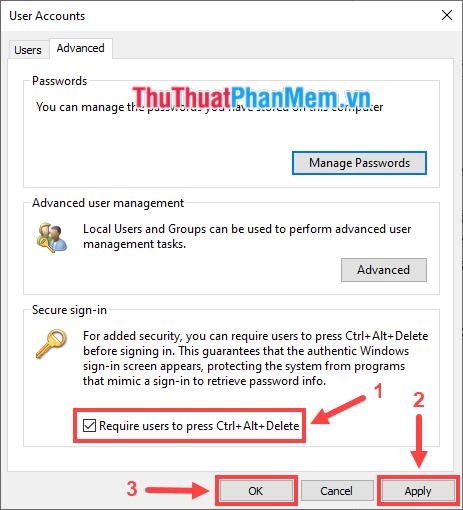
Step 2: Display the User Account window. Switch to the Advanced tab, check the box Require users to press Ctrl + Alt + Delete to turn on the Secure Sign-in feature (uncheck to turn off). Then click on Apply > OK .
Method 2: Turn on - off Secure Sign-in in Local Security Policy
* Note: This method does not work in Windows 10 Home version because there is no Local Security Policy .
Step 1: Press the Windows + R key combination, in the Run dialog box type "secpol. msc" and press Enter .

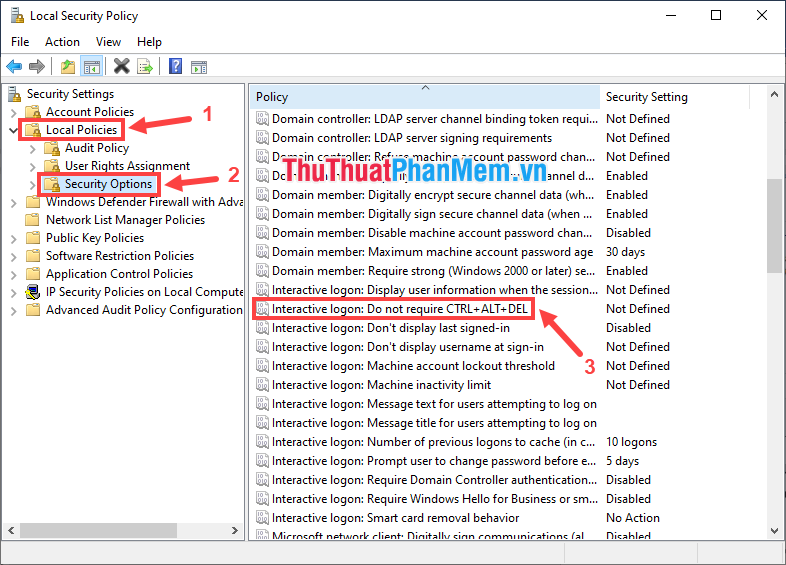
Step 2: In the Local Security Policy window, in the left pane, expand Local Policies , click on Security Options . Look to the right panel, double click on the line Interactive logon: Do not required CTRL + ALT + DEL .
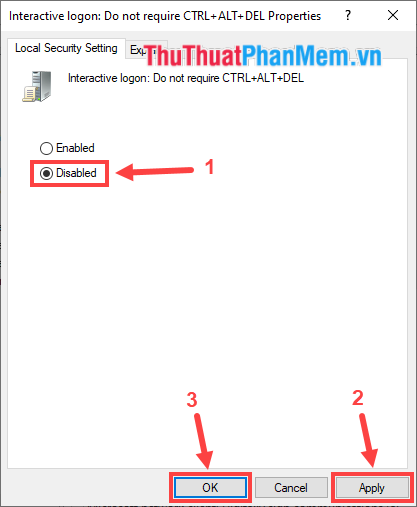
Step 3: A new window appears, select Disabled to enable Secure Sign-in (or select Enabled to turn off), then click Apply > OK .
Method 3: Turn on - off Secure Sign-in using Registry Editor
* Note: Registry Editor is a recommended editor for people who are knowledgeable about information technology, so to ensure system safety, before you edit, you should back up the Registry to restore it. If the operation has errors.
Step 1: Press the Windows + R key combination, in the Run dialog box type "regedit" and press Enter .

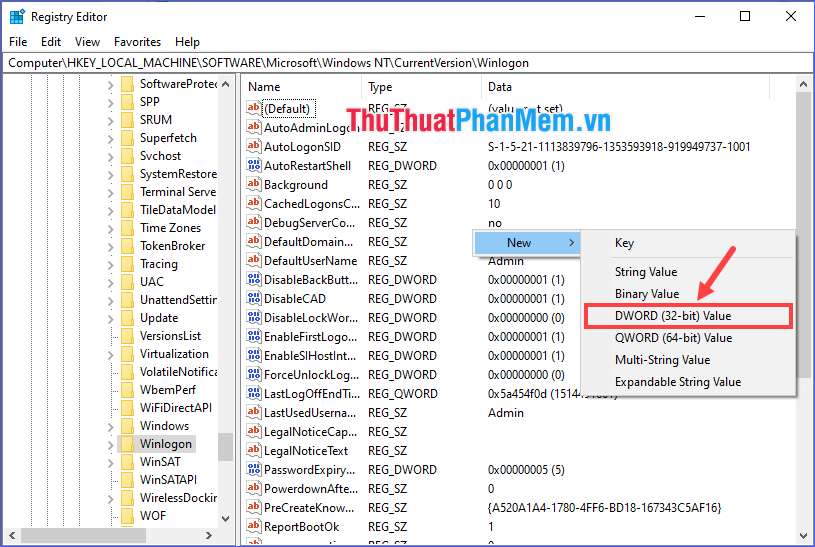
Step 2: In the left panel, access HKEY_LOCAL_MACHINE > SOFTWARE > Microsoft > Windows NT > CurrentVersion > Winlogon . On the right panel, double click on the line of DisableCAD .
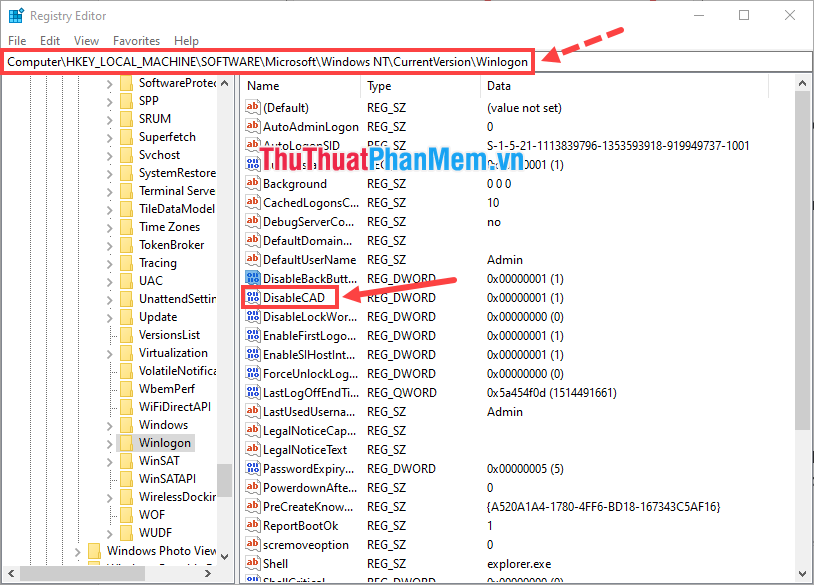
* If DisableCAD can not be found, you can create it yourself by right-clicking on the table area on the right, selecting New > DWORD (32-bit) Value , and naming it DisableCAD .
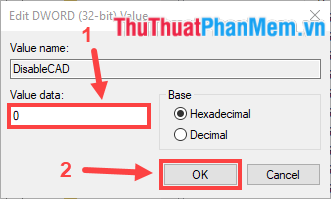
Step 3: Set Value data to 0 to enable Secure Sign-in (or set to 1 to turn off), then click OK .
The next time you boot Windows 10, you will be Secure Sign-in before you sign in.

Through the above article, I have shown you some ways to enable - disable the Secure Sign-in mode in Windows 10 to enhance the security of the computer. I wish you success and always keep your computer safe!
FAQ
What should I know about Enable and Disable Secure Sign-In in Windows 10?
Focus on the key features, requirements, limitations, and practical use cases explained in this guide.
How do I get the best results with Enable and Disable Secure Sign-In in Windows 10?
Follow the recommended steps, use current software or information, confirm compatibility, and review settings before major changes.
Are there any risks or limitations?
Potential limitations depend on compatibility, data quality, cost, privacy, support, and how the product or method is used.
Related Articles
 How to Enable or Disable Secure Sign-in on Windows 105 minutes read
 Enable or Disable Secure Sign-In on Windows 10, Windows 11: Step-by-Step Guide8 minutes read
 How to Disable // Enable Uefi Secure Boot in Windows 105 minutes read
 How to Check Secure Boot Has Been Enabled on Your Computer or4 minutes read
 How to Enable or Disable UEFI Secure Boot in BIOS8 minutes read
 Enable or Disable Secure Boot via the Asus Uefi Bios Utility6 minutes read
Reader Comments 0
Sign in with email or Google to join the discussion.