Table of Contents
This guide explains how to enable and Disable the Standby Screen Mode in Windows 10, with clear steps, practical tips, and important checks before you begin.

If you still like the Screen Saver feature on Windows 10, let's find out how to open this feature on Windows 10!
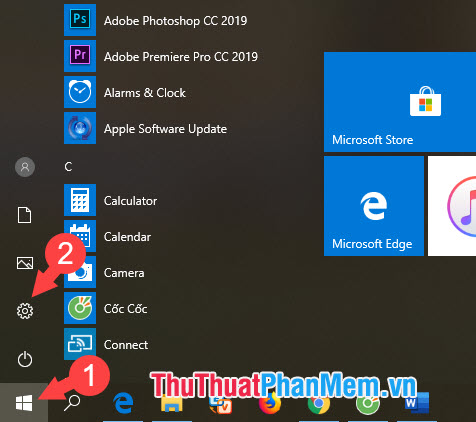
Step 1: Go to the Start menu (1) => select Settings (2) .
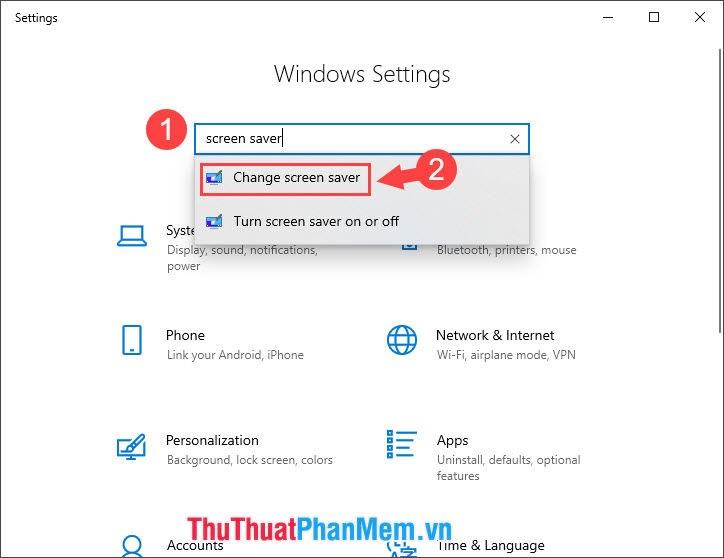
Step 2: You type the keyword Screeen Saver (1) into the search box of Windows Settings => Change screen Saver (2) .
Step 3: Screen Saver window appears, we select the standby screen pattern by clicking on the arrow in Screen saver (1) . To preview the standby screen, click Preview (2) . If you want to turn off the standby screen feature, let's select (None) (3) on the Screen Saver menu.
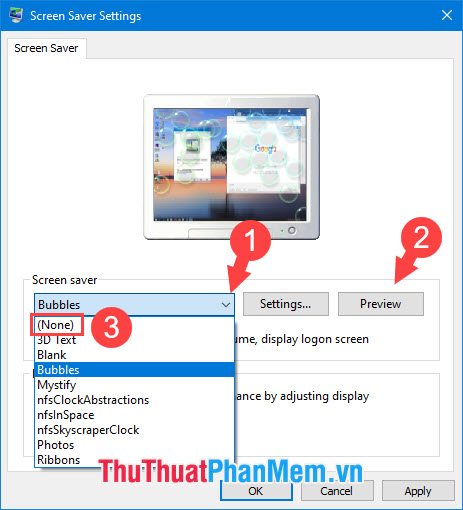
Step 4: After selecting a satisfied screen, you adjust the time for the standby screen to appear in the Wait (1) section . To protect the computer from intrusion, set the password request mode after leaving the standby screen (2) . Then click Apply and OK (3) to save the settings as done.

With a quick and simple guide to turn on and turn off the standby screen on Windows, we can use this feature and use the sample standby screens on the Internet such as a clock screen, animation to make the computer. ours become more vivid and interesting. Good luck!
FAQ
What should I know about Enable and Disable the Standby Screen Mode in Windows 10?
Focus on the key features, requirements, limitations, and practical use cases explained in this guide.
How do I get the best results with Enable and Disable the Standby Screen Mode in Windows 10?
Follow the recommended steps, use current software or information, confirm compatibility, and review settings before major changes.
Are there any risks or limitations?
Potential limitations depend on compatibility, data quality, cost, privacy, support, and how the product or method is used.
Related Articles
 How to Disable Modern Standby on Windows 10/119 minutes read
 Enable Smart Rotation of iPhone Standby Mode Utility: How-To Guide2 minutes read
 How to Use Standby on iOS 17 to Turn iPhone into a Smart Watch4 minutes read
 Windows 10's New Standby Can 'Kill' Laptop Batteries3 minutes read
 How to Turn Off Notifications in Standby iPhone Mode3 minutes read
 How to Enable and Disable Full Screen Mode on Google Chrome3 minutes read
Reader Comments 0
Sign in with email or Google to join the discussion.