Table of Contents
This guide explains how to draw Shapes in Word 2013 and 2016, with clear steps, practical tips, and important checks before you begin.
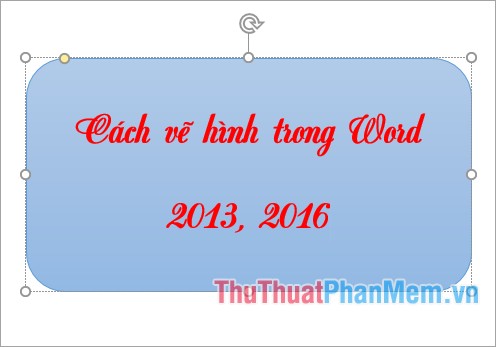
Here's how to draw pictures in Word 2016, for Word 2013 you do the same.
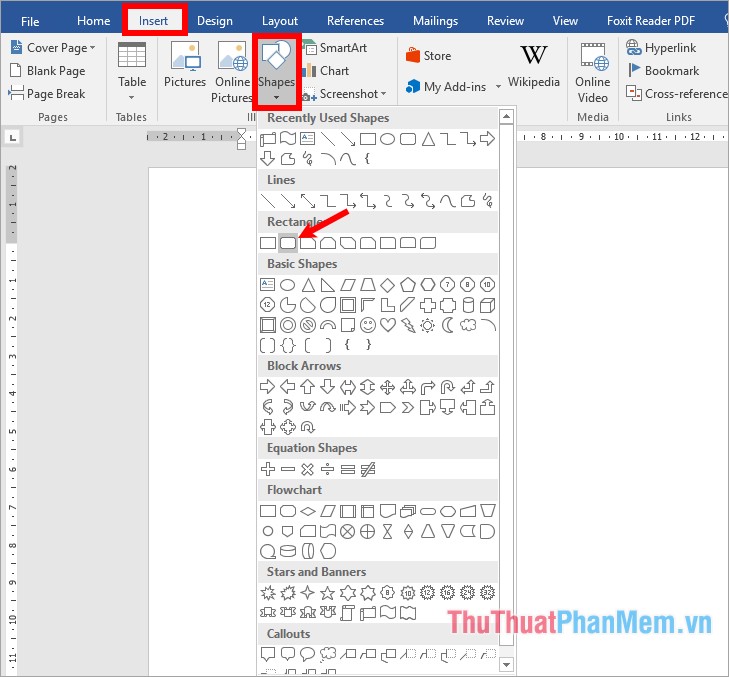
Step 1 : On the Word interface, select Insert -> Shapes -> select the type of shape to draw.
In the Shapes section you will see a lot of parts, each part has a lot of shapes you can choose:
- Recently Used Shapes : recently used shapes.
- Lines : lines, curves, arrow lines, curves with arrows.
- Rectangles : rectangular blocks, including rectangles with 4 corners, cutting rectangles.
- Basic Shapes : basic shapes include triangles, circles, hearts, trapezoid, rhombus.
- Block Arrows : all arrow blocks including, left and right arrow shapes, two-way arrows, four-way arrows, curved arrows
- Equation Shapes : Math operations in figures including plus, minus, multiplication, division, equals, etc.
- Flowchart : flowchart drawings.
- Stars and Banners : stars and banners.
- Callouts : annotation images.
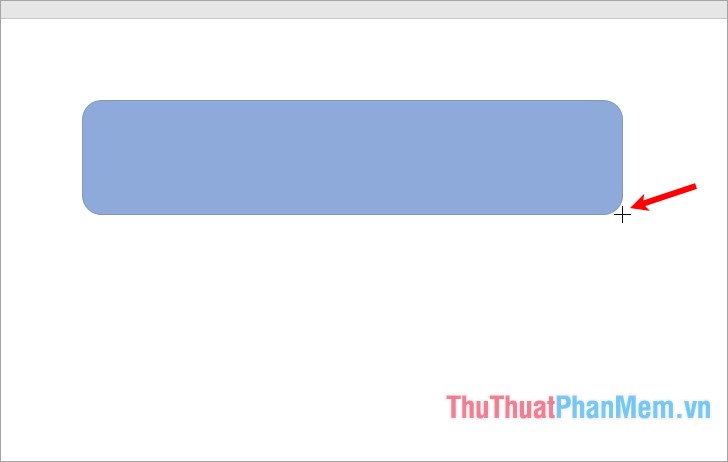
Step 2: After you select the picture you want to draw, the mouse pointer changes into a +, you press and hold and expand to draw the picture.
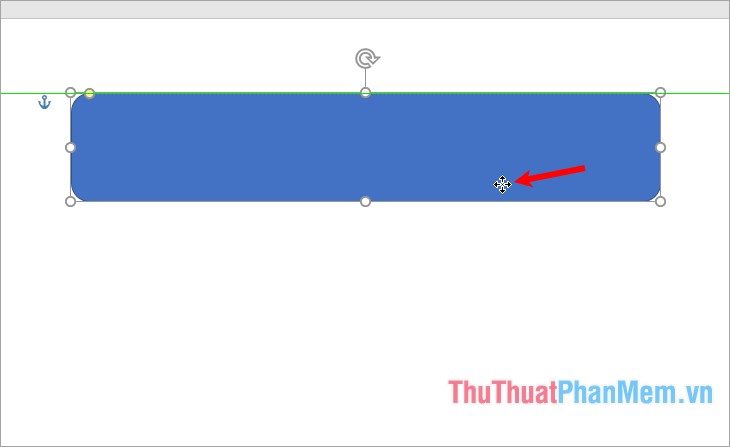
Step 3 : Move and resize the shapes.
- To move you select the shape just drawn, the mouse pointer changes to a 4-way arrow, then hold down the left mouse button and drag to the position you want.
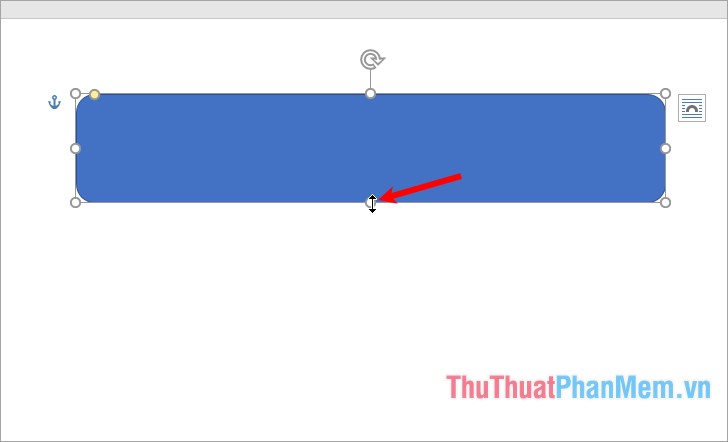
- To change the size of the puzzle, you move the mouse pointer on the handles around the edge of the puzzle, the mouse pointer appears two-way arrow icon, hold down the left mouse button and drag out if you want to enlarge, drag Click if you want to minimize the shapes.
Step 4 : Edit colors for shapes.
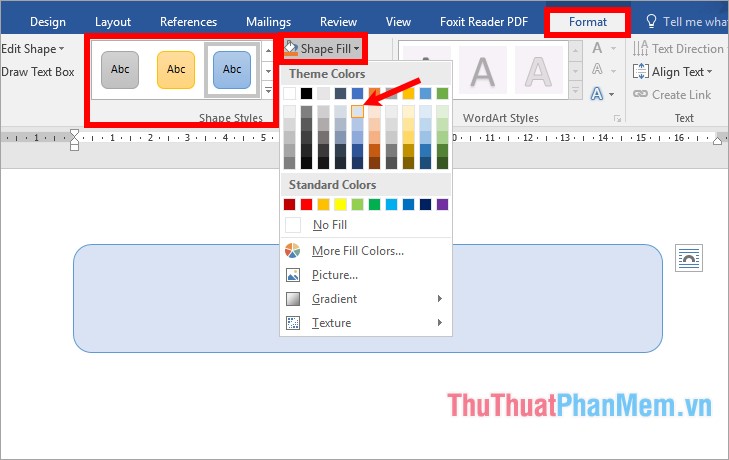
You choose the shape, in the Format tab you choose the shape of the shape in the Shape Styles section, you can also choose the background color for the shape in the Shape Fill section, the border color for the shape in the Shape Outline section.
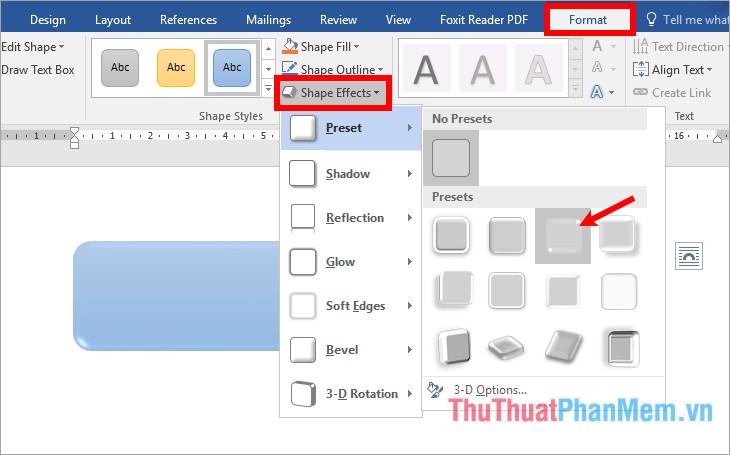
Choose effects for shapes in the Shape Effects section .
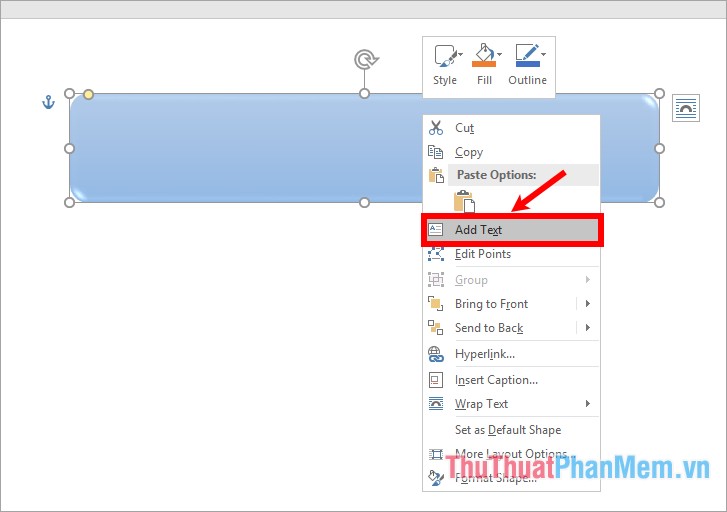
Step 5 : Write text on the cube, right-click on the shape and select Add Text.
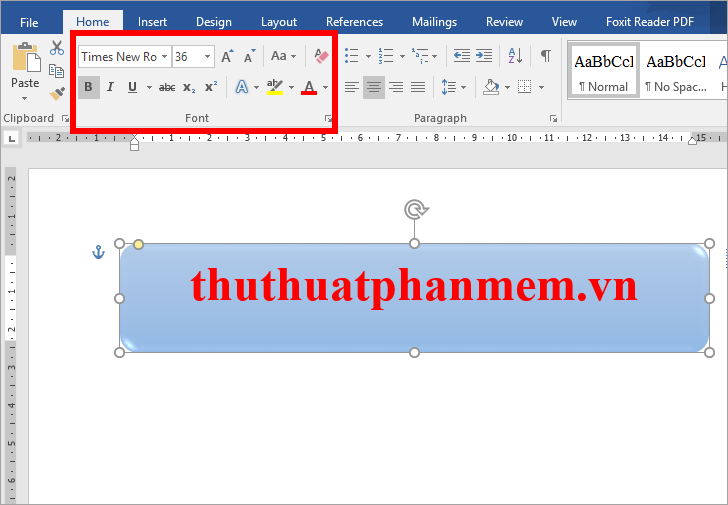
Then you enter text into the shape, highlight the text and edit the font, font size, font color. in the Font section of the Home tab.
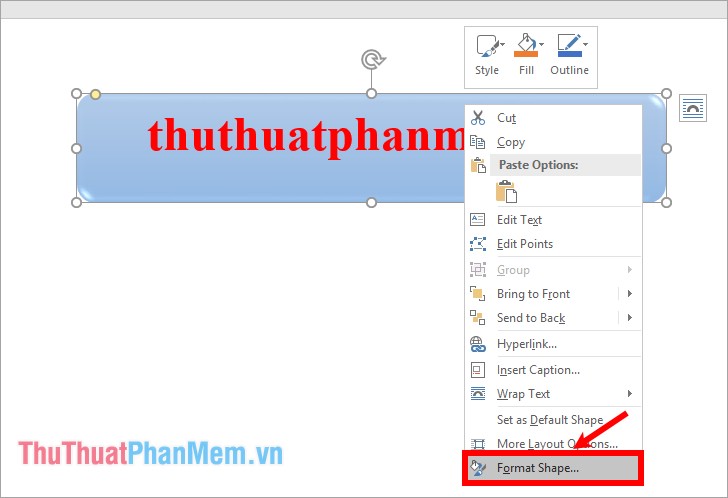
To edit the text in the cube in more detail, select the image -> right click -> Format Shape.
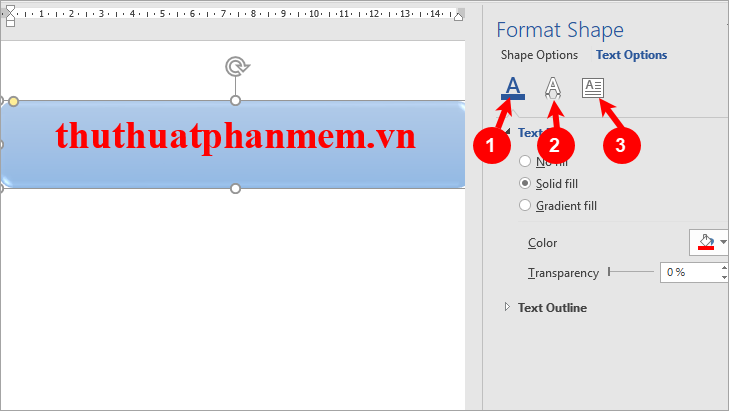
In the Format Shape section, select Text Options , then set the edit for the text in the sections: (1) font color and border color for the text, (2) effects and shadows for the text, (3) adjust the position decoration for letters.
So you know how to draw shapes in Word, with the other shapes you need to draw, you also perform drawing and similar settings. You can use these shapes to draw diagrams, flowcharts right in Word.
If you want to draw the mind map with Word, please refer to the article http://TipsMake. vn/cach-ve-so-do-tu-duy-bang-word/, and if you want to use images The block of organization structure chart in Word, please refer to the article http://TipsMake. vn/huong-dan-cach-ve-so-do-cau-truc-to-chuc-trong-word/
Good luck!
FAQ
What should I know about Draw Shapes in Word 2013 and 2016?
Focus on the key features, requirements, limitations, and practical use cases explained in this guide.
How do I get the best results with Draw Shapes in Word 2013 and 2016?
Follow the recommended steps, use current software or information, confirm compatibility, and review settings before major changes.
Are there any risks or limitations?
Potential limitations depend on compatibility, data quality, cost, privacy, support, and how the product or method is used.
Related Articles
 Instructions for Drawing Straight Lines in Word5 minutes read
 How to Draw Diagrams in Word6 minutes read
 How to Get the Drawing Toolbar in Word to Draw a Picture2 minutes read
 Instructions on How to Draw Diagrams in Word14 minutes read
 How to Group Shapes in Word: Draw Shapes in Words4 minutes read
 How to Draw Broken Lines in Word5 minutes read
Reader Comments 0
Sign in with email or Google to join the discussion.