Table of Contents
This updated guide explains how to Draw Pictures and Diagrams in Word: Step-by-Step through clear steps, practical examples, and important checks that help prevent common errors.
this guide shows how to draw pictures and diagrams in Word that you follow!
Draw Shapes and Diagrams in Word Using the Shapes Tool.
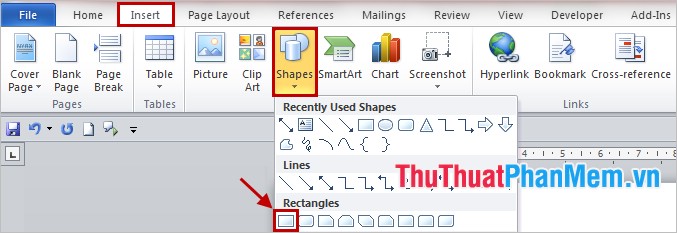
Step 1: Select Insert -> Shapes .
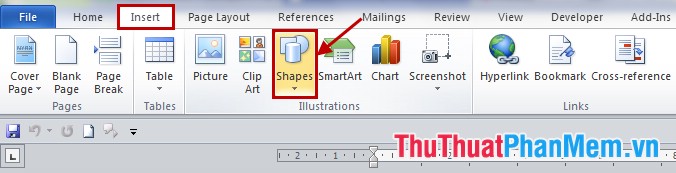
Step 2: There are many types of shapes, blocks, lines, arrows. divided into different categories for you to choose: Lines, Basic Shapes, Block Arrows, Flowchart. you select the image you may need to draw. any.
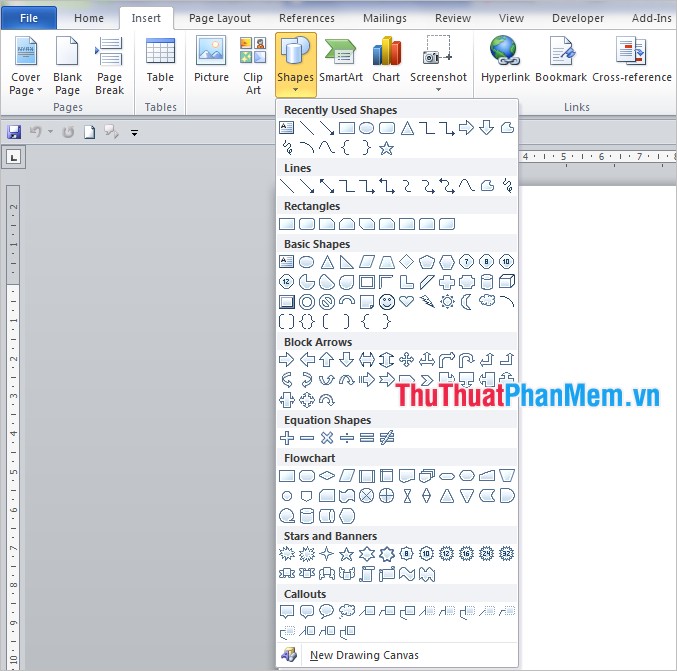
Example
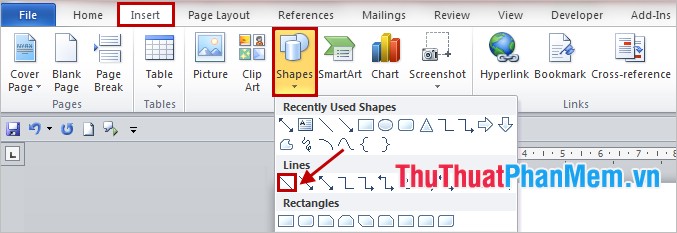
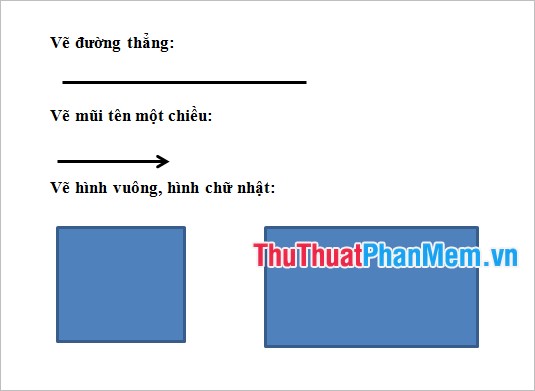
Draw a line: Insert -> Shapes -> Lines -> Line .
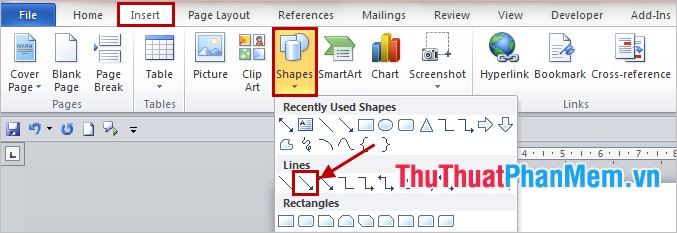
Draw a one-way arrow: Insert -> Shapes -> Lines -> Arrow .
Draw squares and rectangles: Insert -> Shapes -> Rectangles -> Rectangle .
Result:
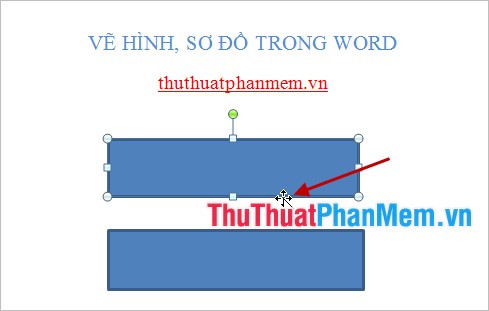
- Moving Shapes: you just need to select the mouse when the 4-dimensional arrow icon (as shown below) appears, hold down the mouse cursor and move to a new position.
- Copy object: you need to draw many similar images so that you do not spend time redrawing, you can copy the object by selecting the object, then hold down Ctrl key, hold down the mouse cursor and move cursor to the position you may need to copy. Or you can select the object and press Ctrl + C and press Ctrl + V then move the copy to the desired location.
- Add text to the Shapes object:
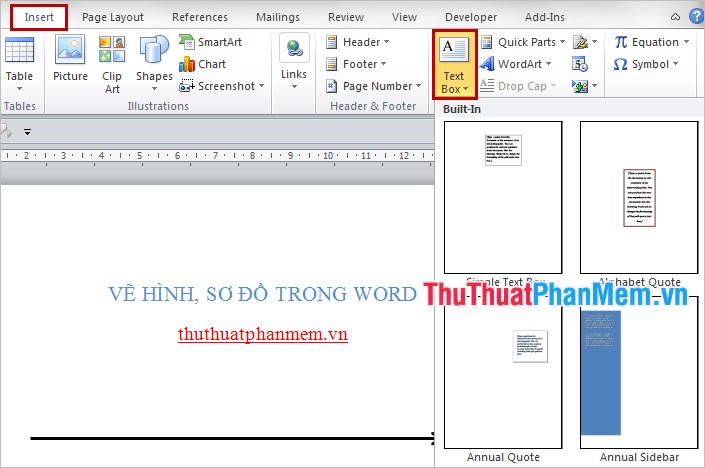
+ Add text to the shapes such as lines, arrows. you choose Insert -> Text Box -> choose any type of pattern. Then move to the appropriate position, to delete the frame surrounding the text, right-click and select Format Text Box .
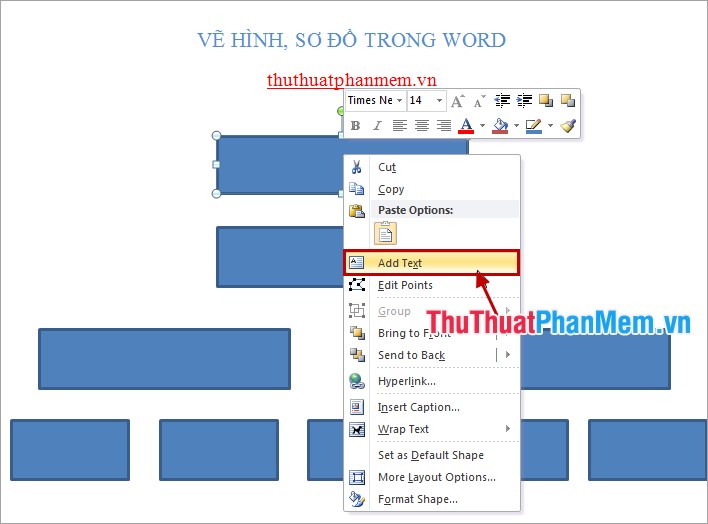
+ Add text to the blocks you choose right-click the object you may need to add text and select Add text , then enter the text you want.
- Edit, format, color. Shapes objects.
You just need to select the object to adjust, on the Riboon bar will appear Drawing Tools tab and under is the Format Menu .
Here you can choose the colors, styles for objects ( Shape Styles ), art fonts ( WordArt Styles ), change the shape of objects Shapes. you can customize it as you like.
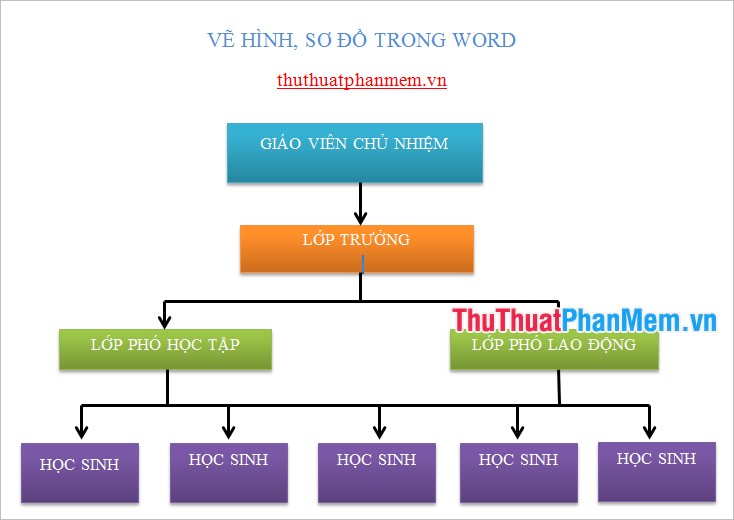
Below is a diagram drawn with the Shapes tool.
Also You Can Draw Diagrams Using SmartArt.
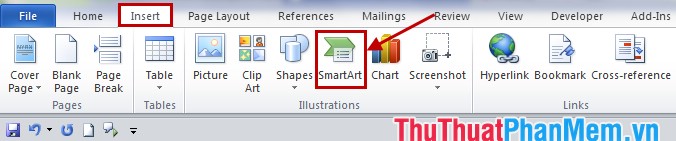
Step 1: Select Insert -> SmartArt .
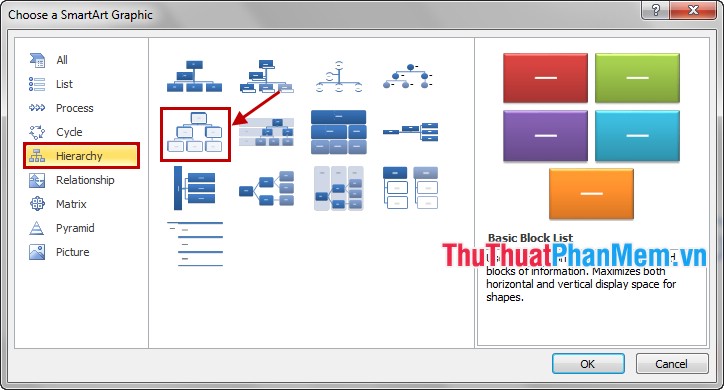
Step 2: The Choose a SmartArt Graphic dialog box appears, select the type of diagram appropriate for the purpose of use.
For example, draw an organization chart, select Hierarchy -> select diagram -> click OK .
Now on the Word page will appear the diagram you choose.
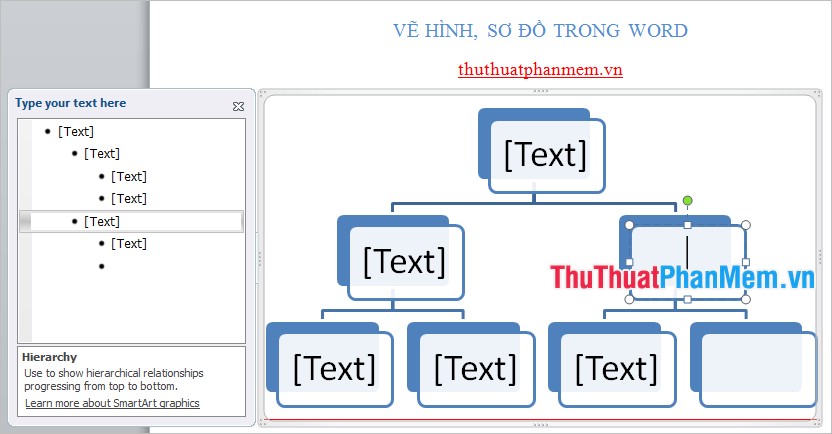
Step 3: Enter content in the text boxes in the blocks of the diagram accordingly. Then you select the diagram, now on the toolbar you have SmartArt Tools tab which includes Design and Format .
You use Design to design diagrams:
- Add Shape: add small branches, horizontal branches, sub-branches.
- Layouts: change the shape of branches and content boxes.
- Change Colors: change the color.
- SmartArt Styles: diagram style.
You format the font, the color of each shape in the Format.
For example, an illustrative diagram drawn with SmartArt:
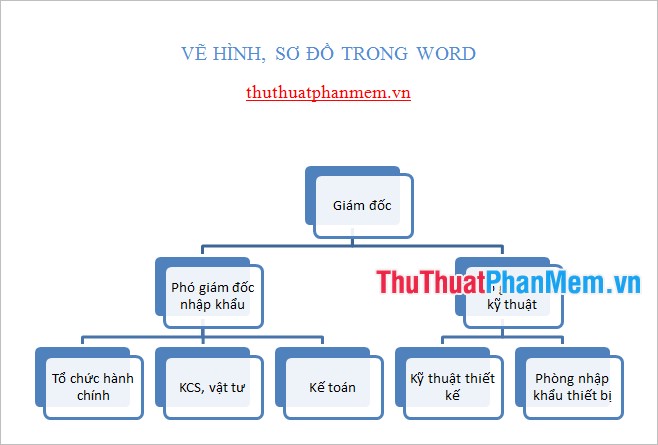
So you can draw any pictures you want, the type of diagram you require with very simple operations. Word documents are more vivid and easier to understand when illustrated with pictures or diagrams. Good luck!
FAQ
What is the easiest way to Draw Pictures and Diagrams in Word: Step-by-Step?
Start with the requirements in this guide, then follow each step in order. Check the result after every major change so problems are easier to identify.
Can beginners follow these instructions?
Yes. The process is organized into practical steps, and you can repeat any step before moving forward.
What should I check if the method does not work?
Confirm your software or device version, permissions, settings, file format, and internet connection when the task depends on online services.
Related Articles
 How to Draw Diagrams in Word6 minutes read
 Instructions on How to Draw Diagrams in Word14 minutes read
 How to Draw Arrows in Word3 minutes read
 Instructions for Drawing Straight Lines in Word5 minutes read
 How to Draw Shapes in Word 2013 and 20165 minutes read
 How to Import Lucidchart Diagrams to Microsoft Word and Excel6 minutes read
Reader Comments 0
Sign in with email or Google to join the discussion.