Spacing rows and columns in Excel beautifully

When editing text in Excel, you will come across cases where rows or columns of unequal width make your text look bad. After editing, we need to readjust the text to be more even and beautiful. If we had to adjust each column individually, it would be very time-consuming and it was difficult for the calibration to not deviate an inch.
Today, Thuthuatphanmem.vn would like to guide a few tips to help you align rows and columns in Excel.

1. Align the row and column to fit the data in the cell
Method 1:
You highlight all the columns you need to align by hovering over the first column name position and clicking and dragging to the last column.
Then move the mouse cursor to the line position between the two rows or columns and double click. Excel automatically adjusts your rows and columns to fit the data in the cell.

Method 2:
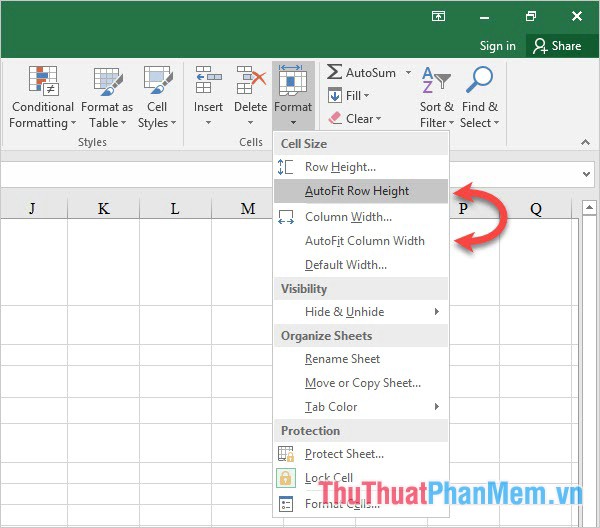
You highlight the area to be aligned. Go to the Home tab , look in the Cells section for the Format icon .
- Select AutoFit Row Height if you want to automatically align the line to the data.
- Select AutoFit Column Width if you want to automatically align the column to the data.

The result you get when doing the above two ways is an array of data with columns and rows that fit the data as shown below:

2. Stretch lines and columns to get the same length
Highlight the column or line that needs alignment as shown above.

Method 1:
Move the mouse to the line between two columns or rows, then click and drag and stretch or shrink as you like.
Note: You should choose the line between the first column (row) and the second column (row) to be able to clearly estimate the width after alignment.

Method 2:
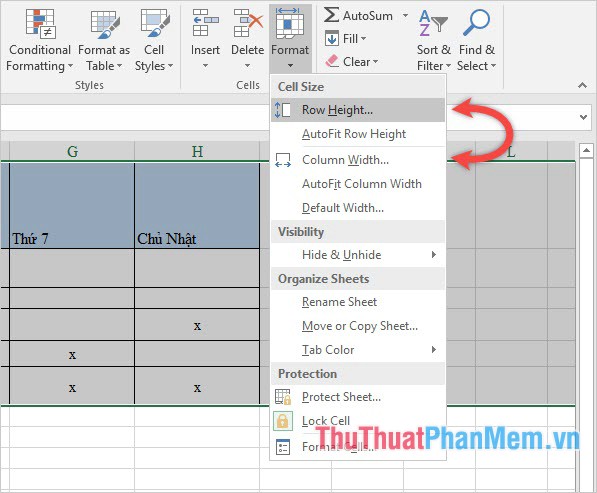
Go to the Home tab , look in the Cells section for the Format icon .
- Select Row Height if you want to align the line.
- Select Column Width if you want to align the column.

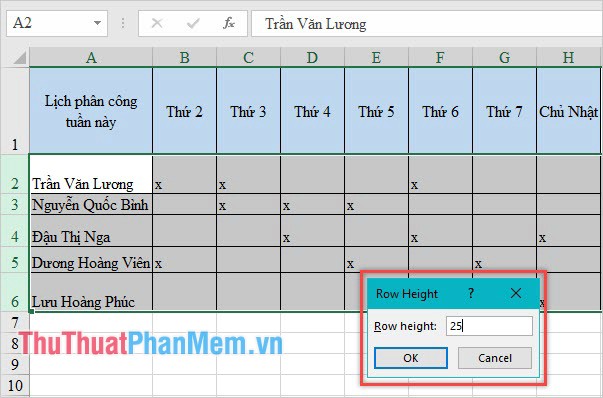
A small window will appear, enter the number of spaces you want to stretch evenly in the Row height box .

After doing either of the above, you will get results of columns or rows of equal size as shown below:

Thank you for following the article on how to create lines and columns of Thuthuatphanmem.vn , wish you successful implementation.
You should read it
- ★ MS Excel 2007 - Lesson 10: Modify columns, rows and cells
- ★ How to handle cells, columns, rows in a spreadsheet in Excel
- ★ Complete tutorial of Excel 2016 (Part 6): Change the size of columns, rows and cells
- ★ How to quickly Add and Delete rows and columns in Excel
- ★ How to temporarily hide rows and columns in Excel 2013