Table of Contents
This guide explains how to delete Tab in Word, with clear steps, practical tips, and important checks before you begin.

Learn about TAB in Word
No matter which version of Word you use, the TAB setup process is the same. By default when you open a new blank document, there is no TAB stop on the ruler (Ruler). However, the TAB was defaulted to be half an inch apart (about 1.27cm).
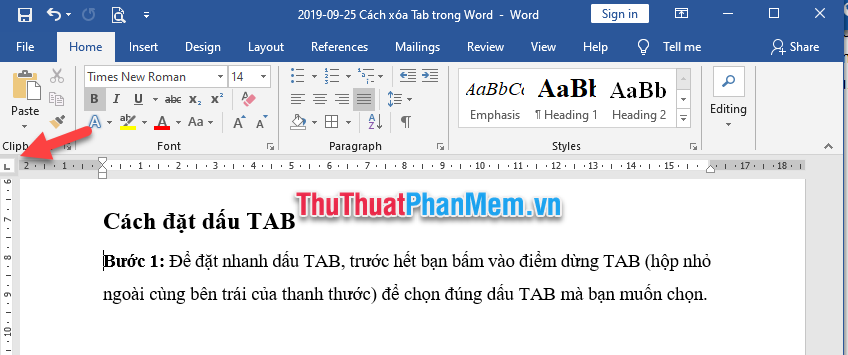
Select TAB as the small box on the far left of the ruler.

If your Word does not show a rule, you and the View tab (1) => click to check the box before the word Ruler (2) .

There are many types of TAB buttons, you can depending on the need to choose the appropriate stop type.

Left tab
The text is aligned to the right of the tab stops.

Center tab
The text is centered as you type.

Right tab
The text is aligned immediately and extends to the left.

Decimal tab
Numbers are aligned to the left of the cross. You cannot use the Decimal Tab to align numbers around a different character, such as a hyphen or an ampersand symbol.

Tab bar
Text is not positioned with a Tab bar. Instead, straight is inserted at the tab position.

Indent the first line
Located at the top of the ruler, the First Indent lets you indent the text in the first line of a paragraph.

Indented hanging line
Located at the bottom of the ruler, the Indented Hanging Indent lets you indent text in the second line of a paragraph and all subsequent lines.
How to place a TAB mark
Step 1: To quickly place the TAB mark, first click on the TAB stop (the small box on the left-most side of the ruler) to select the correct TAB mark you want to select.
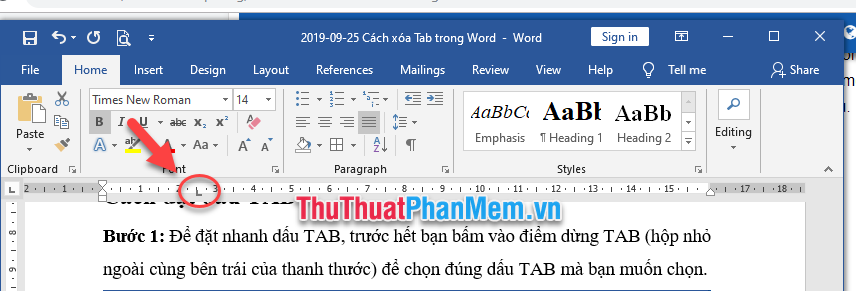
Step 2: Left-click on the position where you want to set the distance of TAB on the ruler (Ruler).
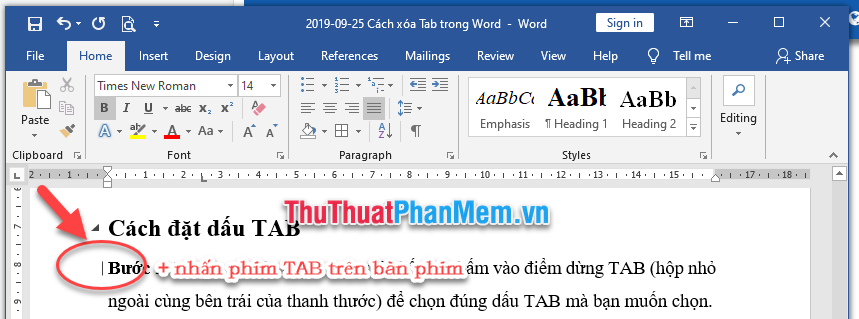
Step 3: Put the mouse cursor before the position you want to locate and press the TAB key on the keyboard.
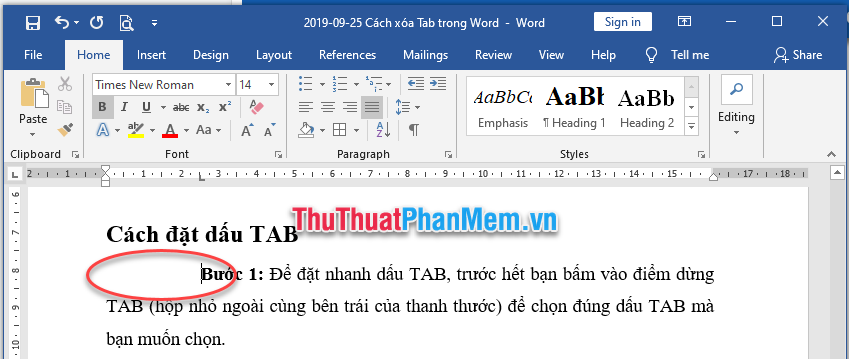
The results of the indented paragraph follow the TAB mark positioning.
How to delete TAB in Word
Step 1: Highlight or select the paragraph to delete TAB. Note that you must select the correct paragraph using TAB to display the TAB mark.
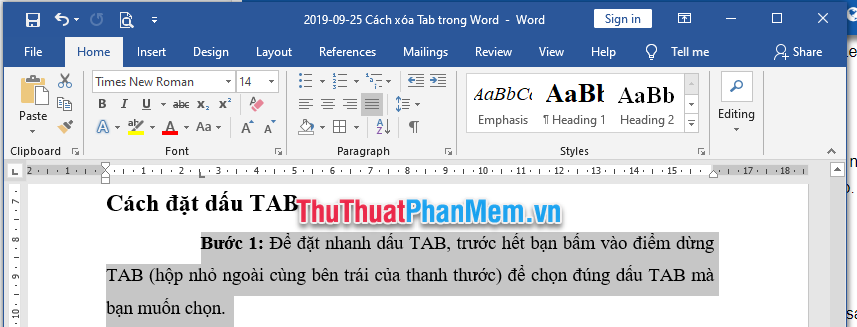
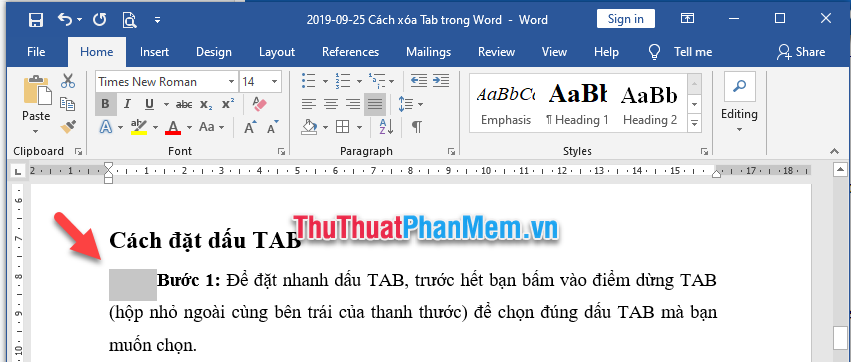
Step 2: Click on the TAB icon and move the mouse away from the position of the ruler and release the mouse, the TAB mark will disappear.

Step 3: After removing the TAB, if the text is not in the right position, you can remove the space before to bring the text to the beginning of the line.
Above Software Tips showed you how to set TAB, delete TAB in Word. Good luck!
FAQ
What should I know about Delete Tab in Word?
Focus on the key features, requirements, limitations, and practical use cases explained in this guide.
How do I get the best results with Delete Tab in Word?
Follow the recommended steps, use current software or information, confirm compatibility, and review settings before major changes.
Are there any risks or limitations?
Potential limitations depend on compatibility, data quality, cost, privacy, support, and how the product or method is used.
Related Articles
 Instructions for Deleting Table Paths in Word4 minutes read
 How to Delete White Pages in Word Is Easy: Delete Word White Pages3 minutes read
 Trick to Quickly Delete a Table in Word: Delete Tables in Word3 minutes read
 How to Remove the Underline, Delete the Red Brick, Blue Brick Under4 minutes read
 Delete Pages in Word - Instructions on How to Delete Pages in Word4 minutes read
 How to Delete Spaces and LINE Breaks in Word5 minutes read
Reader Comments 0
Sign in with email or Google to join the discussion.