How to delete any details in the image with GIMP
With GIMP, often referred to as the free version of Photoshop, users can easily delete objects in the background of the image with just a few tools. This technique requires a bit of patience to get the best results.
You've just taken a great picture, but accidentally got an unpleasant object that appears somewhere on the photo, affecting the composition, even ruining the whole image. What to do in this situation? Conditions do not allow you to use Photoshop, but do not worry, there are ways to fix this problem!
With GIMP, often referred to as the free version of Photoshop, users can easily delete objects in the background of the image with just a few tools. This technique requires a bit of patience to get the best results, because you are essentially patching the object with other parts of the image, and then drawing on the object to help it blend in with the original background. .

To get started, open the image in GIMP by going to File> Open and selecting the image from the computer. The example will remove the man from the photo below.

After opening, enlarge the part of the image you want to delete with the Zoom tool (select the Zoom tool from the toolbar or press Z on the keyboard). Users can click and drag the mouse around the object to enlarge it (shown in the image above).

OPTION : If you worry about accidentally deleting an object nearby, you can use the Paths tool on the toolbar or press B on the keyboard and draw around the object. Draw by clicking to create an anchor point, then click and drag the mouse to bend the straight line at the anchor point.

Click and drag the last anchor point so that it coincides with the first anchor point. You can click on any anchor point created and adjust the curves if necessary. Just click on the display boxes around the anchor point and drag them to the desired location.
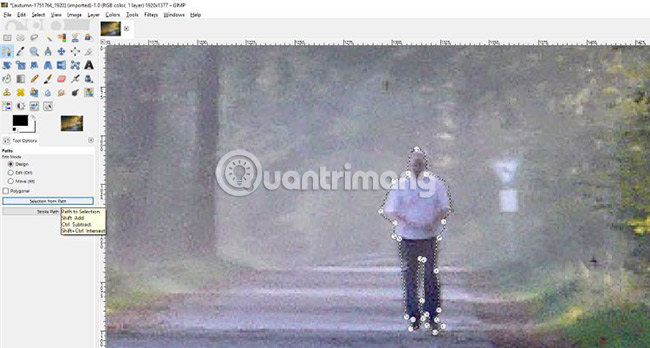
When everything is in place (in the example is a very rough outline), go to Tool Options and click ' Selection from path ' as shown above. This will outline the object as a selection and ensure that the user does not draw anything outside the object.
For example, don't use a selection for this image, so we'll go to Select> None or press Shift + Ctrl + A on the keyboard to deselect the area.
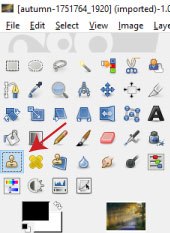
Next, select the Clone tool from the toolbar or press C on the keyboard (indicated by the red arrow in the image above) to select the pixel area in an area on the image, then draw or "duplicate" the pixels. selected on the object you want to delete. Use the square brackets [ and ] on the keyboard to adjust the brush size of the Clone tool.
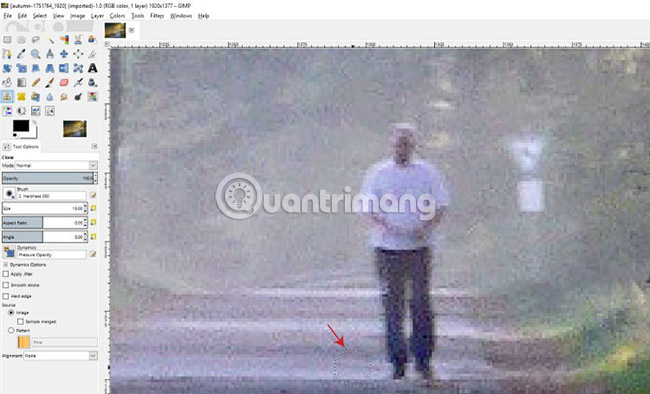
When you have the desired size, hold down Ctrl and select the area you want to get some pixels on the image (indicated by the red arrow in the image above).

The circle representing the brush will freeze on the selected area. This is a cloning area. Make sure to leave some space between the selected area and the object trying to delete, because the brush clone will move with the live brush (indicated by a green arrow) when you draw. You can increase or decrease the size of the brush after selecting an area to duplicate - the duplicated brush will increase and decrease according to the size of the brush.
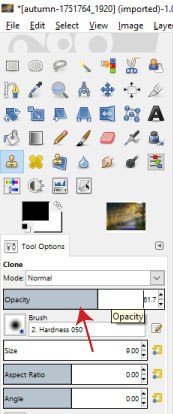
NOTE : If you want your audience / person to look like a ghost or partially visible, the user can adjust the opacity (Opacity) of the Clone tool in the Tool Options menu area . Just click on the Opacity bar and drag left or right, or double-click the number (shown as 51.7% above) and enter the desired opacity percentage.
When drawing, the object will begin to disappear (assuming you have chosen an area large enough to copy). When approaching the changed composition areas, you may need to repeat the steps to select the duplicate area (hold Ctrl and click on the new area) before continuing to draw. If you make a mistake, just press Ctrl + Z to undo the steps you have taken.
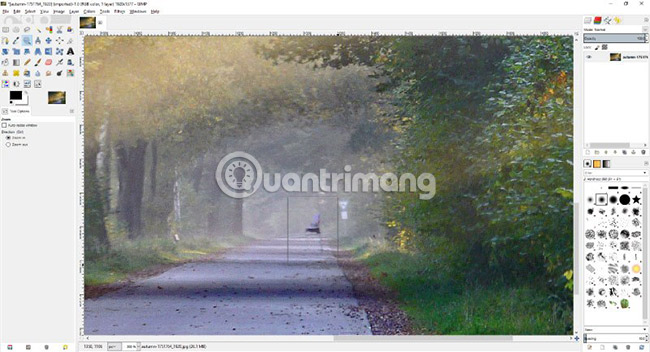
You should read Z on the keyboard and then hold down the Ctrl key while clicking to zoom out and see what the overall layout looks like while making changes. This helps control whether any part of the object is still visible, or anything seems to be wrong. In this case, some parts of the leg are still left over, and therefore, need to enlarge and process those areas.
Tip : You can hold down the Shift key to create straight lines using the Clone tool . The example used this technique until the end because some of the light lines on the sidewalk looked rather funny and blurry.
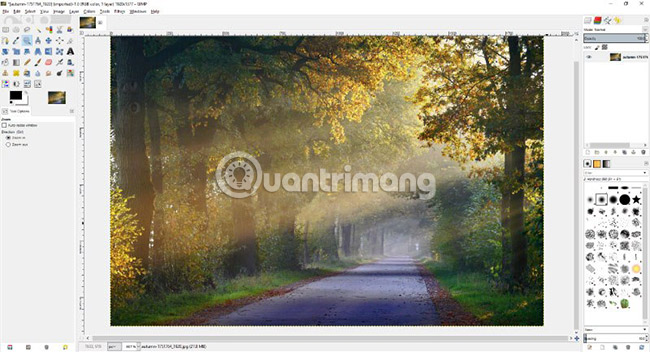
After processing the remaining points, the man in the background of the original image has disappeared! Do the same to remove other objects in the surrounding area and make the photo look more natural.
If necessary, readers can refer to the video below:
Hope you are succesful.
Was this article helpful?
Your feedback helps us improve.
Related Articles
 Don't miss out on these 11 beautiful free brushes for GIMP7 minutes read
 New features of GIMP version 2.1010 minutes read
 How to turn an image into transparent with GIMP6 minutes read
 How to Make a Transparent Image Using Gimp7 minutes read
 4 plugins that help GIMP become a professional tool.5 minutes read
Reader Comments 0
Sign in with email or Google to join the discussion.