How to Make Business Cards with GIMP
GIMP is a free image editing program that can do a lot of different things, including making business cards. While there aren't any easy templates to use in GIMP, you can create professional cards with just a few of GIMP's basic tools. You....
Part 1 of 3:
Preparing the Canvas
-
 Create a new image in GIMP. Click the File menu and select "New". This will open the "Create a New image" window.
 -
 Set the size of the canvas. The standard business card size is 3.5" wide by 2" high (90mm x 50mm). If you're going to have the cards professionally printed, include an extra 1/10th inch of space around the card as a "bleed" area. Use the drop-down menu next to the "Image Size" fields to select the unit of measurement.[1]
- If you want to make a vertical business card, just flip the dimensions (2" x 3.5" or 50mm x 90mm).
-
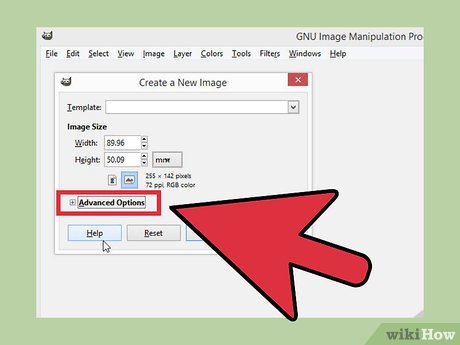 Expand the "Advanced options" in a "Create a New Image" window. This will allow you to change the pixels per inch for the file. The default is 72, which is far too low for printed materials and will result in a blurry image.
 -
 Set the "X resolution" and "Y resolution" to "300". When you change one to 300, the other should change to 300 automatically. This means that the image has 300 pixels per inch, which will result in a high resolution final product. When you create the canvas with these dimensions, it will seem very large on the screen. This allows you to make detailed edits to the image.
- If you want to see what it will look like when printed, click "View" and uncheck "Dot for Dot". It's recommended that you keep "Dot for Dot" enabled when editing.[2]
Part 2 of 3:
Creating the Card
-
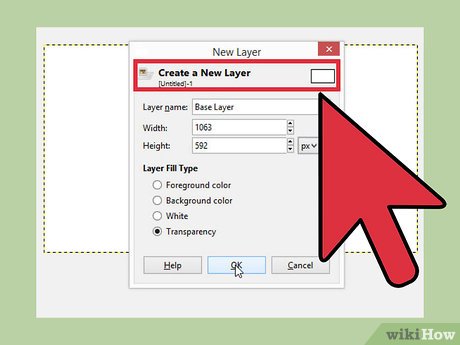 Create a new layer. Each element that you add to your business card should be on a separate layer. You're able to edit layers individually, which will make it easier to make changes to specific elements without having to redo the whole thing.
- You can create a new layer in GIMP by clicking "Layer" → "New Layer", or by pressing ⌘ Cmd/Ctrl+⇧ Shift+N.
- The default settings will create a new transparent layer the same size as the original image. Your new layer will appear in the Layer window on the right side of the screen.
-
 Add a background image (if necessary). If you want to add a background image to your business card, this should be the first layer you add. Click the "File" menu and select "Open as Layers". This will allow you to select an image file, which will automatically be added as a new layer.
- Be careful when using a background, as it can make your text difficult to read.
-
 Create a separate layer for your text elements. This layer will include your name, title, contact information, and anything else you want to include on your card.
 -
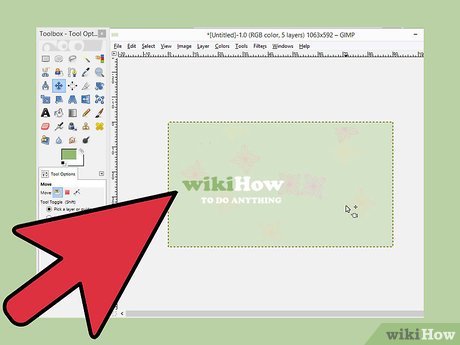 Use the Text Box tool to create text on your card. The Text Box tool ("T" in the toolbox on the left side of the screen) will allow you to create separate boxes with different formatting for each. Click and drag to create separate text boxes for your company name, your name and title, and your contact information
- Make sure that your text will be large enough to read. While text may be easy to read when you're zoomed-in on the card, when "Dot for Dot" is disabled you may find that it's impossible to see. Switch back and forth between views as you're adding text to see how it will read at its actual size.
- Try to keep the same font for most of the text on the card. Changing the font too many times will be jarring for the reader.
- Make sure that your name and your company name is prominent and easy to read.
- Choose an appropriate font for your business. Lighthearted businesses like party planners can use a more whimsical font, while a more serious business such as accountant should stick to more subdued fonts.
-
 Create a logo layer with your logo file (if applicable). If you have a logo that you want to use on the card, you'll want to add it to its own layer. This will ensure that it doesn't conflict with any of your text boxes.
- Click "File" → "Open as Layers" and then select your logo file. After loading it, you can resize it by dragging the boxes on the corner of the logo image. You can move the logo around by clicking and dragging the center of the image.
- If you don't have a logo, GIMP is the perfect place to create one. See How to Design a Logo for more information on creating the perfect logo.
-
 Review your card. Click the "View" menu and disable "Dot for Dot". This will allow you to see the card at the actual printed size. Use this view to review how the card will look. Make sure that you can read the text, and that the design is not too busy. Check for any typos as well.
 -
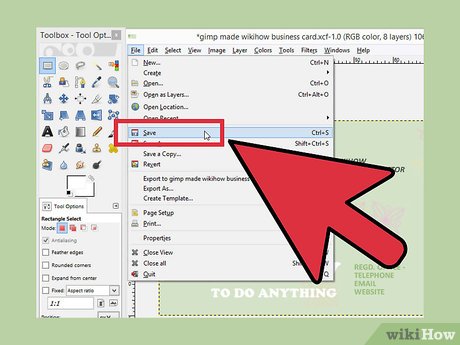 Save a backup of the card before starting the printing process. You'll want to save the file as a GIMP project so that you can easily go back and edit the individual layers. When you prepare the file for printing, you'll be "flattening" the image so that all of the layers are merged.
- Click the "File" menu and select "Save as". Give the file a name and select where you'd like to save it.
Part 3 of 3:
Printing
-
 Contact the printing company to determine the proper format. If you're having your card professionally printed, the printer may prefer specific file formats. Common formats include PDF and PSD (Photoshop). GIMP can export to both of these.
 -
 Export the image. Once you know the proper format for your file, you can export it in GIMP. Exporting the image will also make the printing process easier for yourself if you're printing at home.
- Click the "File" menu and select "Export As". Choose the format that you want to export as from the drop-down menu at the bottom of the window.
- If you're going to be printing the cards at home, select PNG or PDF as the format.
-
 Choose a program to create a page of cards. If you want to print the image yourself, you'll need to set up a new page where you can lay out all of the cards. You can do this in GIMP, or you can use a program like Word or Publisher.
 -
 Create a new document in the program you choose. In GIMP, make sure you create a new canvas that is 8.5" x 11" with 300 DPI resolution.
 -
 Insert your exported card image file. Browse for the image file that you exported from GIMP. Insert it into the document.
 -
 Continue to insert copies of the card until you've filled the page. Select the first file, and then copy and paste it to create another. Repeat this until you've filled up the page.
 -
 Align the cards. Use the rulers along the edge of the document to line up the cards for easy cutting. Make sure that they are aligned both horizontally and vertically.
 -
 Insert cardstock paper into your printer. Business cards need to be printed on thicker paper than standard printer paper. Find a thick paper that your printer supports, and that won't bleed to much when printed on. Ask the representative at the paper store, or refer to your printer's documentation for tips on finding the right paper.
 -
 Print the cards. Once you have the right paper inserted, you can start printing your cards. Print a single sheet first and inspect it to make sure everything is printing properly. Check that the ink isn't bleeding, and that the text is legible. Try cutting it as well so that you can see if everything is lined up properly.
- Once you're certain that the cards look good, you can start mass printing them. Use a precision cutting tool when you're finished to cut the cards out.