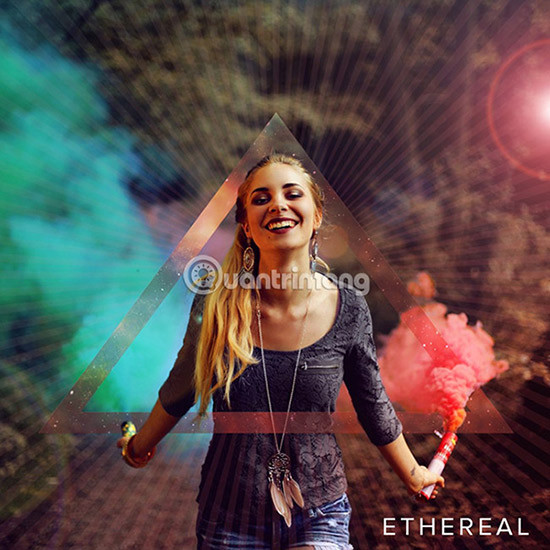
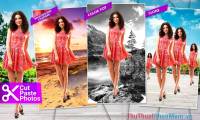
How to cut advanced photo collage in GIMP
In this tutorial, TipsMake.com will show you how to combine some excellent editing and image processing techniques in GIMP with graphic design techniques, to create an impressive layout for the works. mine.
Table of Contents
In this tutorial, TipsMake.com will show you how to combine some excellent editing and image processing techniques in GIMP with graphic design techniques, to create an impressive layout for the works. mine. It will be a combination of shapes, images and filters to produce a professional end product.
The version of GIMP used in this article is 2.9.8. This is a version of GIMP that contains many new features similar to those in GIMP 2.10. Note to press Ctrl + S to regularly save changes during the process and save the file in the original .XCF format until all work is finished.
If you want to practice following this tutorial, readers can download 2 images as examples at:
- https://pixabay.com/en/universe-sky-star-space-cosmos-2742113/
- https://pixabay.com/en/colorful-colourful-happy-outdoors-1844727/
Or use any image you like.

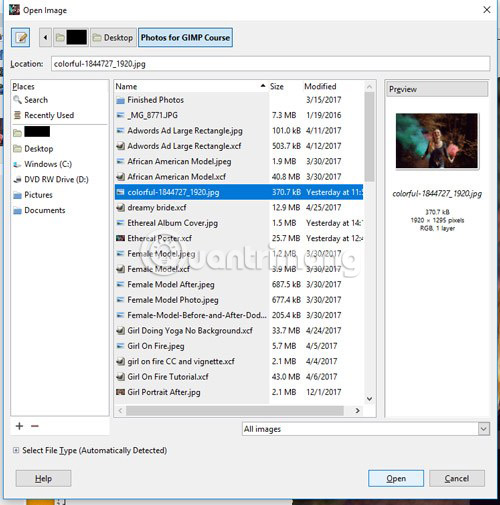
Once you've downloaded the image you want to join to your computer, open GIMP, go to File > Open to find the main image file you want to open, click the Open button in the lower right to open the image.
Create main layers

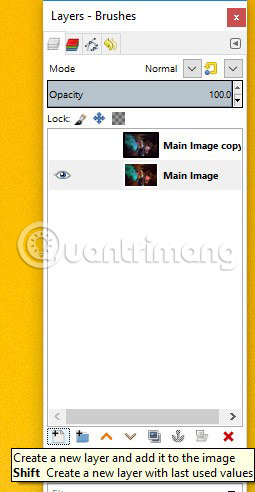
Now that the image has been opened in GIMP, go to the Layers panel on the right side of the screen (if you don't see this panel, visit Windows> Recently Closed Docs> Layers, Channels, Paths, Undo . to open it. it) and click on the layer containing the main image. First, double-click the name of the layer to change the name of the layer from colorful-1844 . to 'Main Image'. Next, click on the Duplicate Layer icon to copy this main image layer. This will create a new layer called 'Main Image copy' .
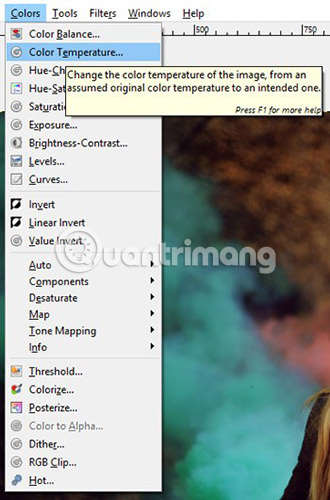
With the copy layer selected, now adjust the color temperature of the layer so that it is slightly softer than the present, by going to Colors> Color Temperature .
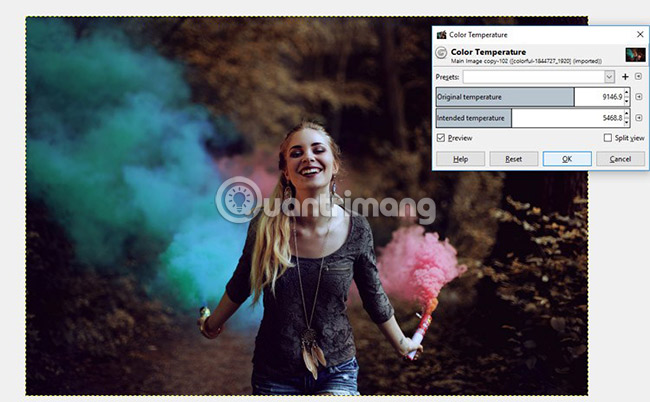
This feature is created to be able to adjust the color temperature of the image, when the lighting conditions where the image is taken do not match the camera's temperature setting at the time of shooting. However, it can also be used to adjust the general temperature of a photo. For example, the initial temperature is over 9000K (Kelvin) and the intended temperature adjustment is over 5400K.
If you want to fix the photo color temperature, there are several built-in GIMP presets that allow the user to choose the initial temperature and the temperature setting that is intended based on common lighting conditions (eg sunset, light in the studio, overcast light, etc .). Just click the left arrow to open the drop-down list containing these settings.
Once you have the settings you want, click OK.
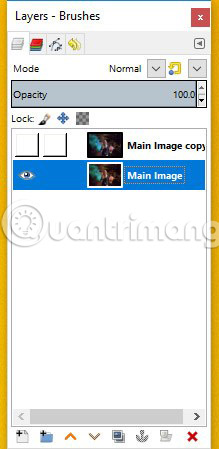
Next, click on the icon to show / hide (shaped like an eye) to hide the copied layer and select the original 'Main Image' layer.

Lighten this layer up a bit, focus on the girl's skin and the color of the flares, as these will be the only things visible in the final composition. Let's start by going to Colors> Hue-Saturation .
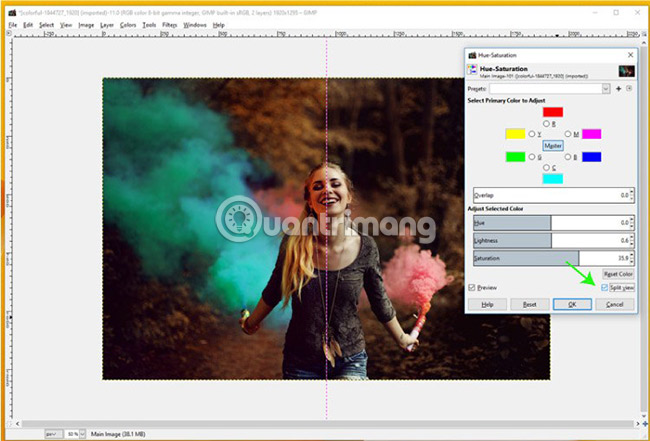
For example, increase the brightness to .6 by clicking and dragging the adjustment bar or by clicking on the numbers and entering .6. Next, increase the saturation to about 36 to increase the color intensity on the Main Image layer.
A new feature in GIMP 2.9.8 (released along with 2.10) is the ability to display a Split View (by selecting the Split View box above), allowing users to preview changes before being officially made. Show them. This parallel feature is very convenient because users will not have to continue to select it and uncheck the Preview boxes to review the changes. As you can see in the image above, there is a pink line running in the middle of the image, dividing the pictures into two parts before and after.
Click OK to apply the changes.
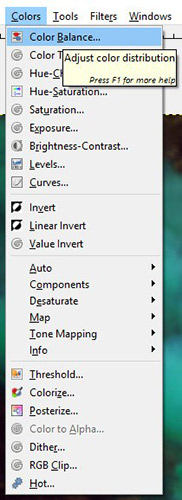
Next, we will adjust the Color Balance section on the image. So switch to Colors> Color Balance .
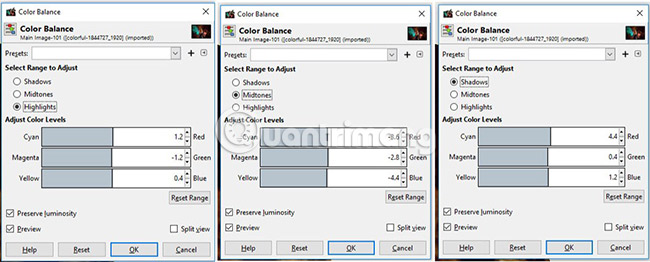
Shadows, Midtones and Highlights parts of the image will be adjusted as shown in the image above. It is possible to re-enable the Split view view to make a parallel comparison of new changes to the original image. When you're happy with the changes, click OK.
Draw triangle frames
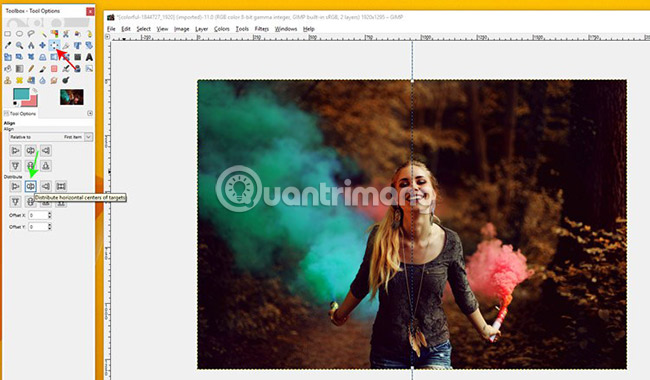
Now, we will draw a triangle for the image of the girl holding a flare, to add depth to the composition and continue to draw the viewers' attention to this part. To get started, click and drag on the ruler tool around the layout of the layout. The first baseline will be placed in the center of the image. Users can drag and drop these lines anywhere to start, then take the alignment tools from the toolbar, click on those baselines and click on the 'Distribute Horizontal Center of Targets' option. in Tool Options on the toolbar.

Next, draw the second baseline 400 pixels away from the left edge of the image. Again, use the Align tool, click on this second line, then in Tool Options, change 'X offset' to 400. Then, click on the Distribute Left Edges of Targets option .
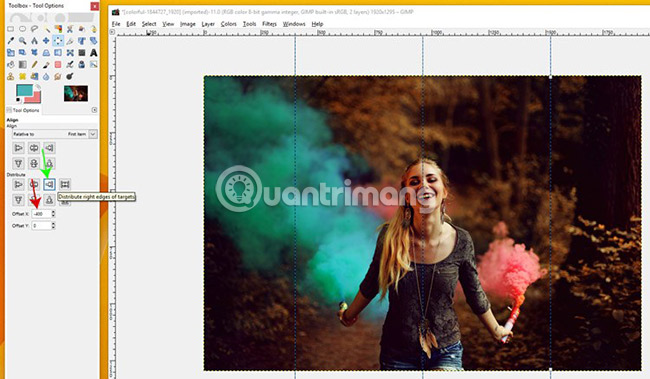
Repeat this step by adding another standard, but using the Align tool , click on this third baseline, change the option 'X offset' to -400 and click on the option 'Distribute Right Edges' of Targets' . This will align the third baseline 400 pixels from the right edge of the image.
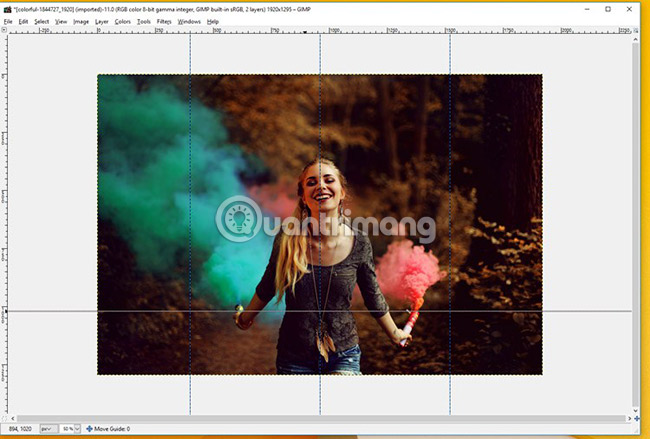
Finally, draw a horizontal baseline and place it at about 1020 pixels (just above the hand holding the blue flame). Users can see the coordinates where the baselines are located by looking at the numbers in the lower left corner of the canvas (894 and 1020 in this example).
Create Triangle layer
Next, create a new layer in the Layers panel .
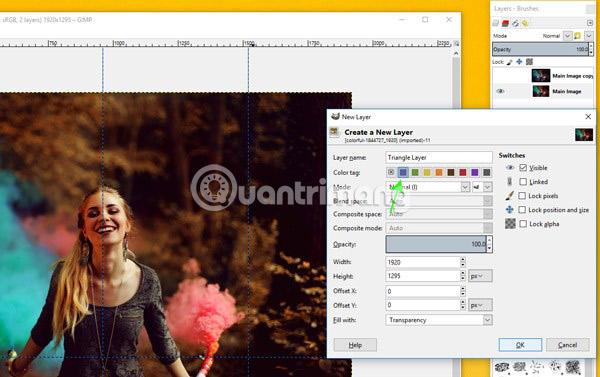
If you are using the previous version of GIMP, the reader will find that there are currently more options to create a new layer than before. Change the name of the new layer to Triangle Layer and even assign a color code to this layer to make it easier to distinguish this layer from other layers. Click OK to create a new layer.
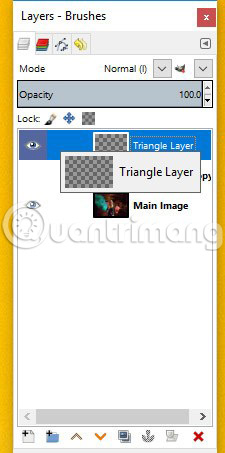
Click and drag this new layer to arrange it at the top of the Layers panel . Readers can see the layer indicated in purple on the icon that shows / hides (the eye image).
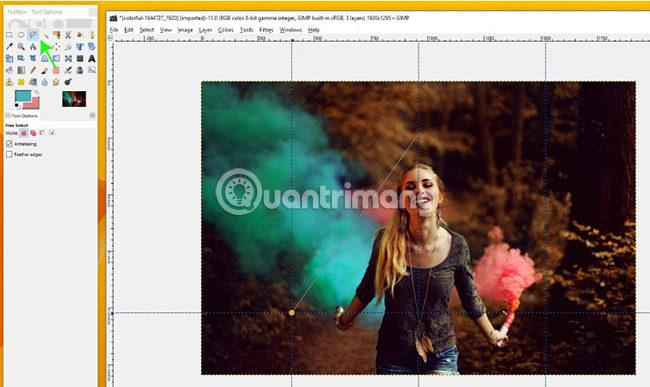
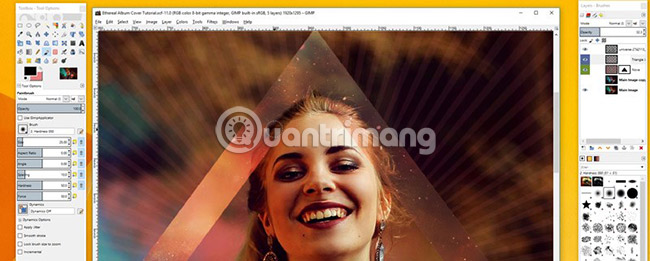
Select the Free Select tool and click above the top of the object to create an anchor point, then start drawing the triangle. Next, create a second and third anchor points where intersection with the baselines to create the bottom points of the triangle.
Finally, click again on the top anchor point created to connect the triangle. Users can click and drag the top anchor point if they want a slightly higher triangle than the main object.
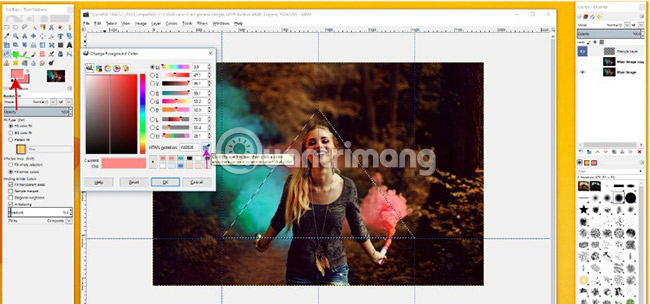
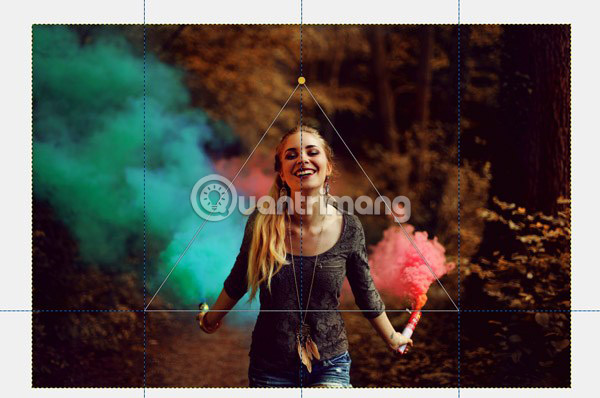
Now, click on the Bucket Fill tool . This will cause the triangle area to just paint the selected area (indicated by the motion stroke border) and double-click the foreground color to display the Change Foreground Color dialog box . Click on the Eyedropper tool and select the pink color from the smoke emitted by the flame by clicking on it. Click OK to apply this color. Then, with the Triangle layer still selected, click inside the drawn triangle selection to fill this area with pink.
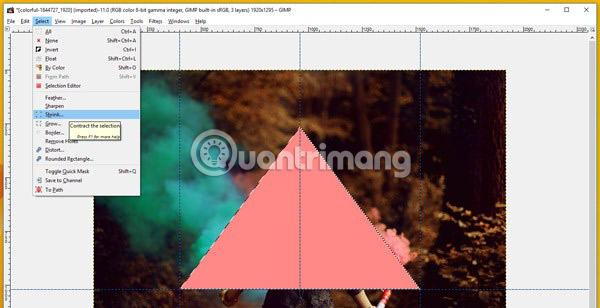
Now go to Select> Shrink because we will delete the middle part of the triangle so that the triangle only shows the edges. Reduce the selection to 50 pixels (enter 50 in the box and select the unit as pixels), then click OK.
With the Triangle layer still selected, press the Delete key on the keyboard. This will delete the pink inside the selection area, leaving a pink triangle border. It doesn't matter if the triangle overlaps the object a bit because it creates the feeling that the object appears as if she is bouncing off the image.
Create Universe layer
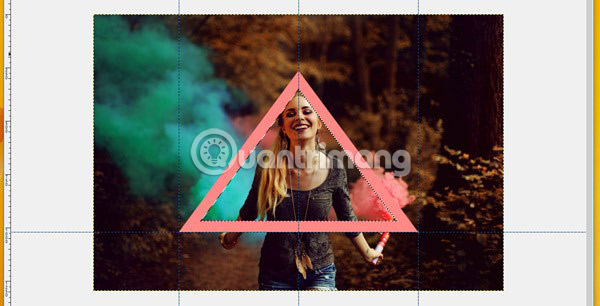
Go to Select> None to uncheck the area.

Next, we will open the galaxy image with many stars to add the triangle. Go to File> Open to import images into GIMP.
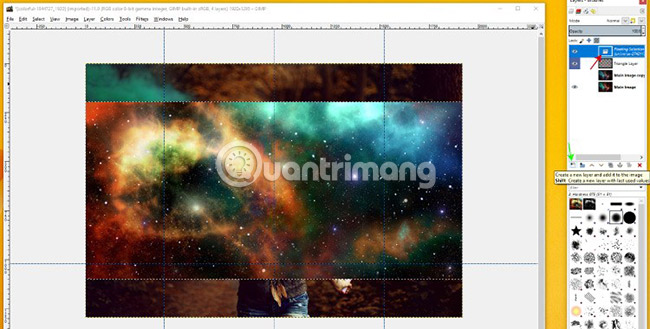
Then press Ctrl + C or go to File> Copy , then go to the first layer and press Ctrl + V or select File> Paste . This will add a galactic image in the form of a floating layer that appears on the main object. With this layer still selected, click on the 'Create a new layer' icon to add it to a separate layer.
Drag the galaxy image with the Move tool ( M shortcut) so that it is centered between the triangle - or in the position you want.

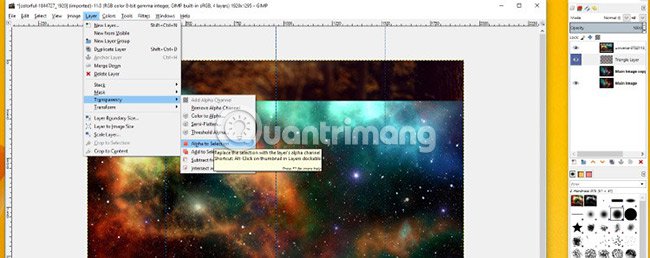
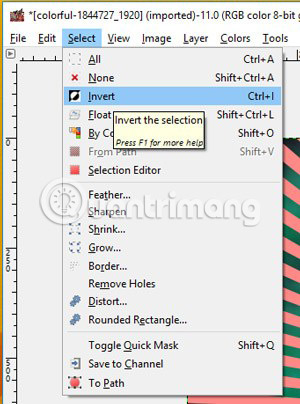
Next, click on the Triangle layer and go to Layer> Transparency> Alpha to Selection . This will once again create a selection around the triangle.
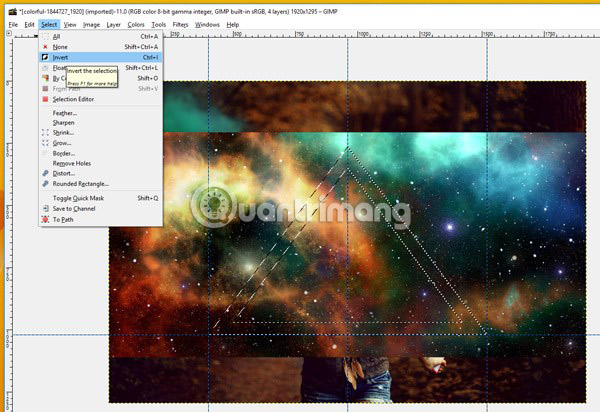
Go to Select> Invert to reverse the selection. Then, click the Universe layer . Press the Delete key to delete everything outside the triangle. Select Select> None to deselect the triangle.
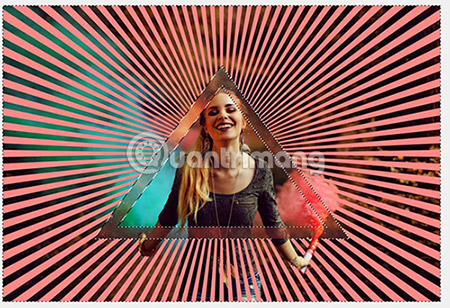
With Universe still selected, change the layer mode to 'Overlay'.
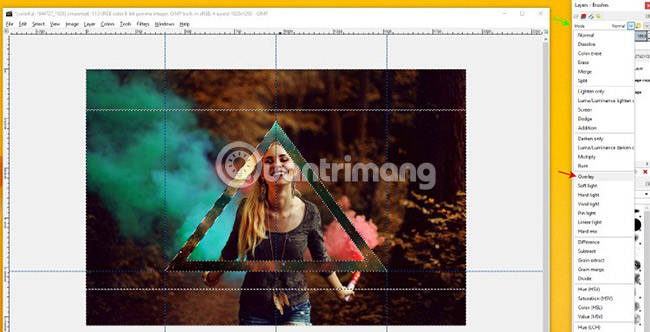
Now adjust the opacity of the 'Overlay' layer and the Triangle layer by clicking on each layer and adjusting the Opacity slider to get the desired interface. The Triangle layer in the example is set at about 32% opacity and the Universe layer is about 65%.

Select View> Show Guides to hide the baseline.
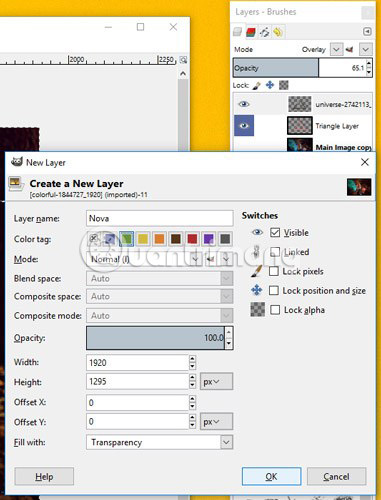
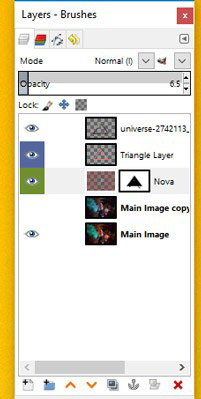
Create Nova Line
Next, create the 'Line Nova' line. Start by creating a new layer and name it Nova. Users can also specify a color for this layer. After that, move the Nova layer below the Triangle and Universe layers by clicking and dragging the layer in the Layers panel .
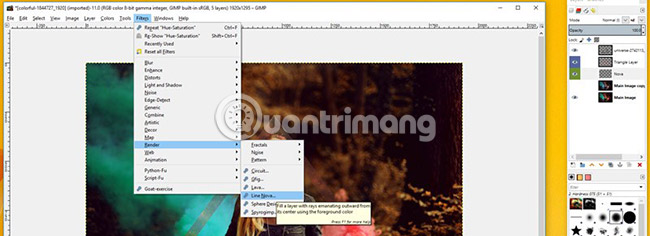
The color of the created lines will be the same as the currently selected foreground color, so be sure to change that color before creating the Line Nova. For example, select the same pink color with the Eyedropper tool , used earlier for the triangle. Next, go to Filters> Render> Line Nova .
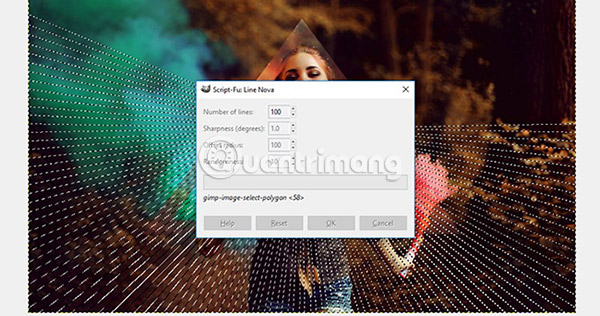
Reduce Number of lines created by the filter to 100 and Randomness to 10. Click OK to display Line Nova.
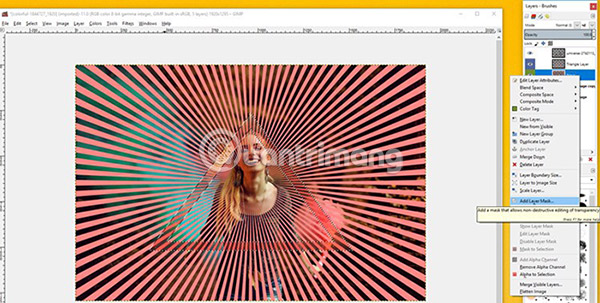
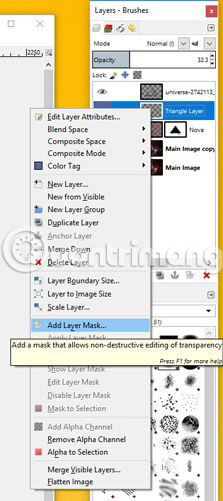
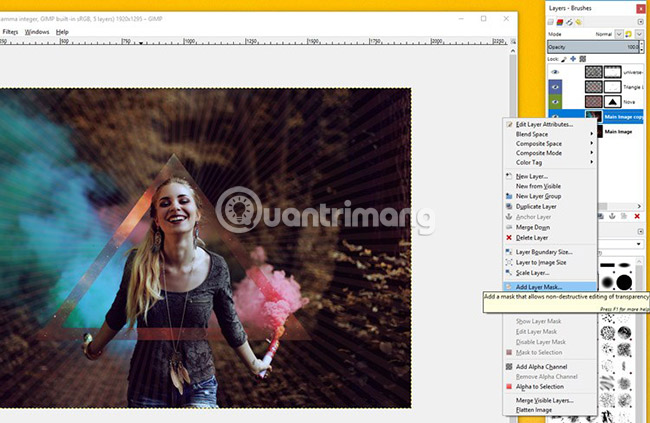
Now, if you want to delete any line in the triangle, select the Triangle layer and go to Layer> Transparency> Alpha to Transparency . The triangle will be. Then go to the Nova layer , right click on it and select 'Add Layer Mask' .

For example, select White (Full Opacity) for the option to 'Initialize Layer Mask to:' .
Make sure to select the layer mask Nova and not the Nova layer. The reason is because we want to paint on the layer mask to create transparency. Next, use the Paint Brush tool and select black as the foreground color. Then, use black to paint over the entire area inside the triangle. The lines inside this area gradually disappear when starting to color.
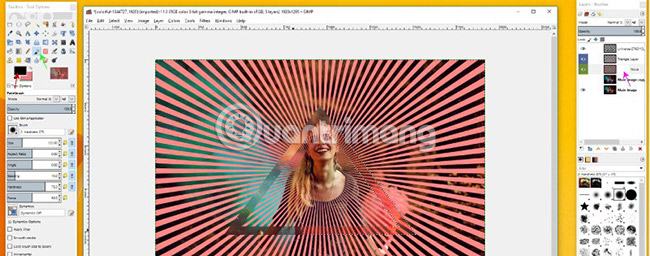
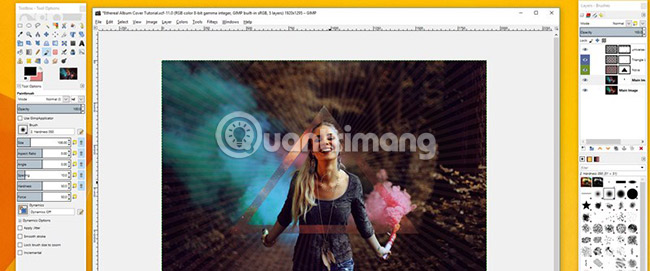
Then delete all the lines inside the triangle (where the face and upper body of the object appear).Select Select> Invert to select everything around the triangle.
Draw on the area inside the triangle to delete Line Nova. Now it will appear as if Line Nova only stops at the outer edges of the triangle. Next remove Line Nova from the object by drawing on any area Line Nova overlaps the object or the flare section. If too much Line Nova is removed, the user can redraw it by changing the color of the brush to white and then painting the points to return to the original. Just make sure you're still on the layer mask when doing this. Then select Select> None .
Reduce the Nova layer's opacity to about 6%.
Next, delete the part of the triangle that overlaps the object so that the object appears as if she is bouncing off the triangle. Right click on the Triangle layer and select 'Add Layer Mask' . Once again set Initialize Layer Mask to White (Full Opacity) .
After that, select the Paint Brush and black color to paint over the arms and flares wherever you want. You can use the Zoom tool to zoom in areas that need precision.

Draw on the smoke parts to create depth for the image - as if smoke passes through the triangle. Repeat these steps with the Universe layer - add layer mask to the layer and fill it with black on the layer mask on the parts of the galaxy triangle.
Next, switch to the copy layer ( 'Main Image Copy' ) and right click on it. Go to 'Add layer mask' and select White again for the 'Initialize Layer Mask to:' option . Select the brush tool and choose black as the foreground color.
Can bring some brighter colors back into the parts of the subject, including hair and skin. This will help the subject stand out in the picture. Draw on these areas with a layer mask, this will make the image layer below adjusted earlier look brighter. Draw on the smoke coming from the flares to help them light up a bit. It is possible to adjust the size of the brush while drawing using the left and right brackets on the keyboard ('[' and ']').
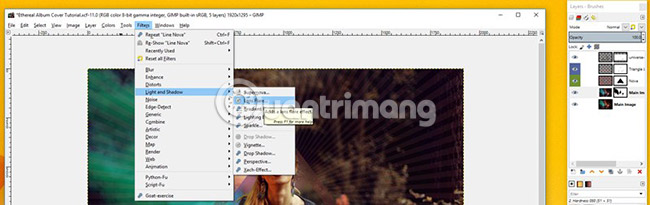
Create Lens Flare
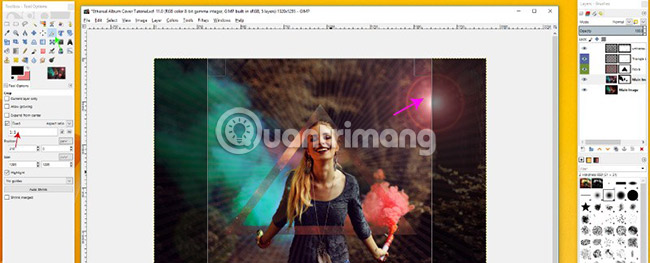
Now, create a Lens Flare. With the copy layer selected (not the layer mask), go to Filters> Light and Shadow> Lens Flare . Positions X and Y in the example are .846 and .199. Users may need to unlock chain links to keep X and Y values automatically adjusted together. Click OK to display Lens Flare .
Choose the appropriate size
Next, cut the composition to match the typical size of the album cover or any size you want. Select the Crop tool and under Tool Options, set the Fixed Aspect Ratio to 1: 1 (another popular ratio is 1920 × 1080). Click and drag the Crop tool . Users can click and drag the corners and outer edges of the outline crop to adjust its size and area. When the crop area is set, double-click the area to apply the crop operation. Go to Image> Scale Image to make sure the width and height are 4,724 inches - these are the standard sizes of album covers. Click OK. If the image is scaled down, the quality will drop a little but not significantly.
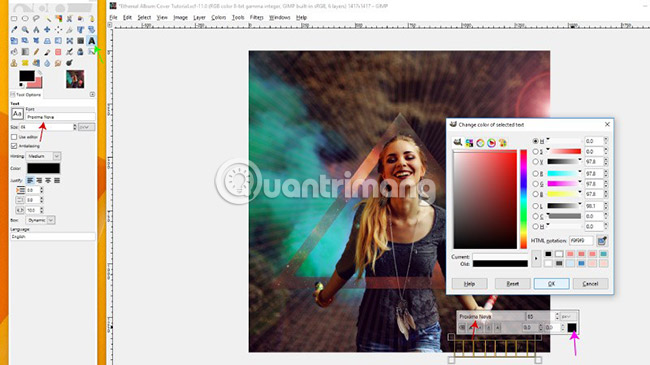
Select the Text tool and add text if needed.

Create a Gradient layer
Finally, create a new layer and name it Gradient. Move this layer below the text layer by clicking and dragging it in the Layers panel .
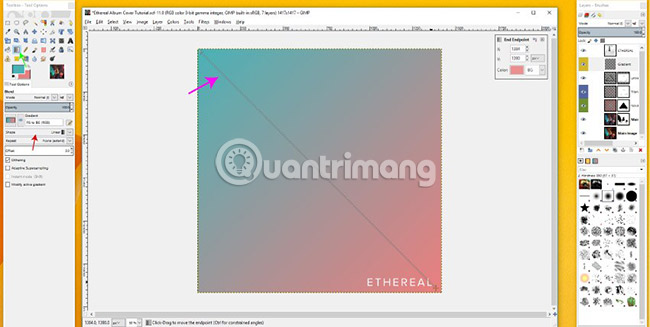
Select the Gradient tool and select the blue and pink colors from the flares to make foreground and background colors (if not already blue, double-click the foreground color box, select the Eyedropper tool and select a blue area from the smoke created by the fire in the picture). With the Gradient shape set to Linear, click and drag the gradient from the top left corner to the bottom right corner. In GIMP 2.9.8, users can adjust the gradient directly on the canvas. When satisfied with the final position of the gradient, click another tool in the Tool panel to reinforce the changes to the gradient (ie click the Move tool). Remember that the gradient is still active until the user does this.

Change the mode of the Gradient layer to 'Soft Light' .
Save and export files
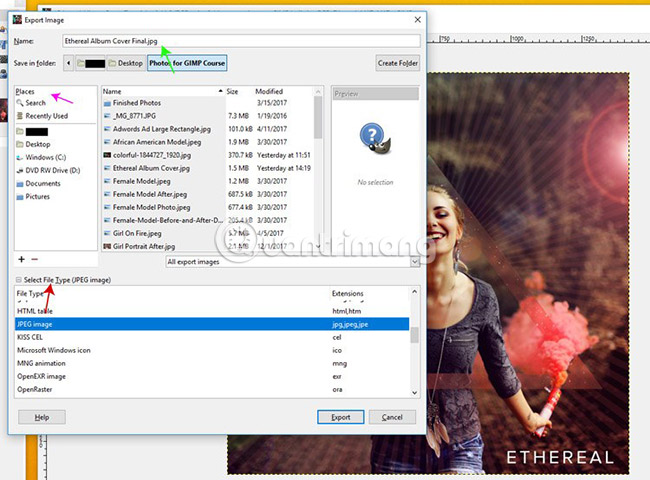
Now export the image by going to File> Export if you saved it earlier or File> Export As . Select the JPEG file type in the Select File Type drop-down list. Users can change their file name and location to save the file, then click Export. Adjust the quality of the image and click Save.

Hope you are succesful.
See more:
- 6 photo editing tips with GIMP
- How to draw borders for text in GIMP
Was this article helpful?
Your feedback helps us improve.
Related Articles
 Top hottest computer photo collage software 20216 minutes read
 How to combine mockup photos on Smartmockups3 minutes read
 Top best photo collage apps for iPhone4 minutes read
 Enhance GIMP's photo editing capabilities with Gimp Paint Studio1 minutes read
 The best photo compositing software on computers, iPhone, Android8 minutes read
 Top 5 best photo collage apps on smartphones6 minutes read
Reader Comments 0
Sign in with email or Google to join the discussion.