Table of Contents
This updated guide examines Layer: How to Recolor Anything on Gimp and organizes the essential facts, background, and practical takeaways in clear American English.
Part 1of 5:
Opening an Image
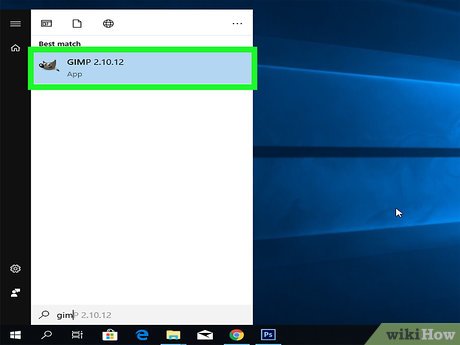 Open GIMP on your computer. The GIMP icon looks like a cartoon animal with a paintbrush in its mouth. You can find it on your Start menu on Windows or in the Applications folder on Mac.
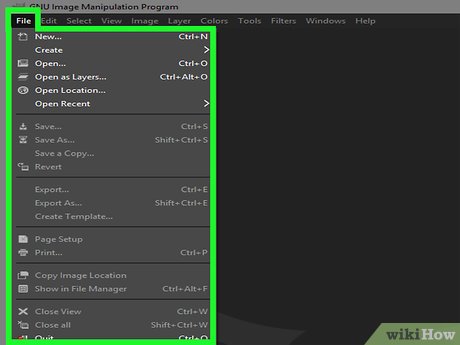 Select theFiletab on the top-left. This button is either on the tab bar at the top of the app window (PC) or on the menu bar at the top of your screen (Mac). It will open your file options.
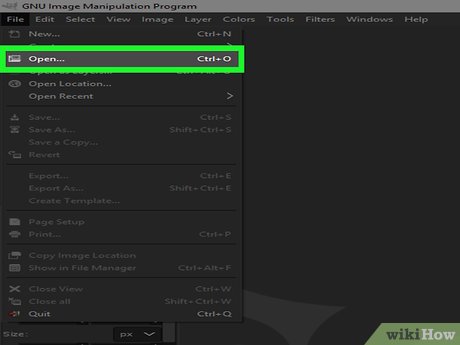 ClickOpenon the File menu. This will open a new pop-up window, and allow you to select the image you want to open.
 Select the image you want to recolor. Find and click on the file name in the pop-up window.
- You will see a preview of the image on the right-hand side of the pop-up when it's selected.
 Click theOpenbutton. This will open the selected image in GIMP.
- If you're prompted to convert the image profile to a compatible color scale for GIMP, click Convert for the best results.
Part 2of 5:
Creating a New Layer
 Click theLayertab at the top. You can find this button on the tab bar at the top of the app window (PC) or on the menu bar at the top of your screen (Mac).
 ClickNew Layeron the Layer menu. This will allow you to create a new layer on your image. You can use this layer to make color manipulations on your image.
- This option will open a new pop-up titled "Create a New Layer."
 SelectTransparencynext to "Fill with." In the "Create a New Layer" pop-up, make sure the "Transparency" option is selected as the layer fill at the bottom.
- In some versions of GIMP, you may see "Layer Fill Type" instead of "Fill with."
- If you have a "Layer Type" option, you can set it to "Normal."
 ClickOKin the "Create a New Layer" pop-up. This will create a new, transparent layer on your image.
Part 3of 5:
Recoloring An Area
 Click the Free Select (Lasso) tool in the toolkit. This button looks like a lasso icon in the toolkit section on the top-left. It will allow you to select an area in the picture.
 Check the
 Feather edgesoption on the bottom-left. When you select the Free Select tool, you can enable this feature on the bottom-left of the app window.
- This will give softer edges to your selection.
- You can increase the Radius value under the "Feather edges" option for even softer edges.
 Select the outline of the area you want to recolor. Use the Free Select (Lasso) tool with your mouse, and draw an outline around the area to recolor.
- Make sure the new, transparent layer is selected on the right-hand side, and not the original picture.
- When you finish the outline, you'll see dashed lines around your selection.
 Click the "Bucket Fill" tool in the toolkit. This button looks like a paint bucket in the toolkit section in the upper-left corner.
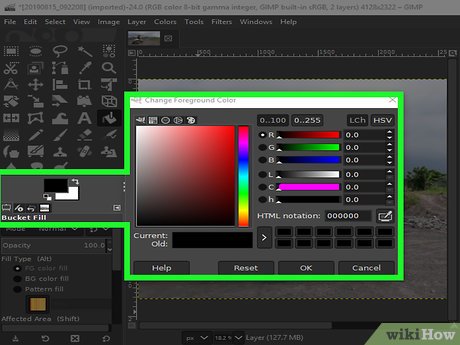 Click the front color below the toolkit. This will open the color selector in a new pop-up.
 Select the color you want to use. You can select any color in the color selector pop-up.
 Click the outlined area on the picture. This will fill the selected area with a solid color.
- Again, make sure the new, transparent layer is selected on the right-hand side; not the original image.
 Click theModedrop-down at the top of the Layers list. You can find a list of all your image layers on the right-hand side of the app window.
- By default, the layer mode should be set to "Normal."
 SelectColorin the Mode drop-down. This will change your transparent layer's mode to a "Color" layer, and change the color of the selected area in your original picture.
 Select the Eraser tool in the toolkit. This button looks like a rectangle eraser icon in the toolkit section on the top-left.
 Erase the extra color around the recolored area. You can use the Eraser tool to manually trim the edges, and remove the extra recolor around your selection.
Part 4of 5:
Recoloring with the Paintbrush
 Create a new, transparent layer. Follow the steps in the Part 2 above to create a new, transparent layer on top of your image with no fill.
- Make sure that this is a separate layer than the "Color Mode" layer you may use with the Bucket Fill tool above.
 Select the "Paintbrush" tool in the toolkit. This button looks like a paintbrush icon in the toolkit on the top-left of the app window.
- This tool will allow you to manually paint new colors on the pictures.
- Optionally, you can adjust your paintbrush stroke's size, angle, hardness and other attributes on the bottom-left section.
 Click the front color layer below the toolkit. On the left-hand side, click the front layer of the two color layers, and open the color selector.
 Select the color you want to use on your paintbrush. You can select any color in the color selector pop-up or enter RGB/HTML values to pick an exact color.
 Click theModedrop-down at the top of the Layers. This drop-down menu is located at the top of all your image layers on the right-hand side, and should be set to "Normal" by default.
- Make sure the new, transparent layer you created for the paintbrush process is selected on the Layers list. Do not select the original picture here.
 SelectHuein the Mode drop-down. This will allow you to change the color hue of the areas you paint with your paintbrush.
 Paint on the picture to recolor anything. You can use your mouse to paint on the picture, and change the color hue of any part of the image.
- You should be painting on the transparent "Hue" layer, and not the original picture.
Part 5of 5:
Exporting Your Image
 Right-click the original picture on the Layers list. The Layers section is located on the right-hand side of the app window.
- This will open your right-click options.
 SelectFlatten Imageon the right-click menu. You can find this option at the bottom or top of the right-click menu.
- This will merge all your layers, and create one, single image layer with all your recoloring work saved.
 Click theFilemenu on the top-left. You can find this option at the top of the app window (PC) or on the menu bar near the upper-left corner of your screen (Mac).
 SelectExport Ason the File menu. This will open a new dialogue box, and allow you to save your new image to your computer as a separate file.
 Select a saving location for your new picture. Find and click the folder you want to save your new picture in the dialogue box.
 ClickSelect File Typeat the bottom. You can find this option at the bottom of the dialogue box. It will extend a list of all the image file types you can export your new picture as.
 Select an image format for your new image. You can select a common image format like JPEG, TIFF, or PNG here.
 Click theExportbutton. This button is on the bottom-right corner of the dialogue box. It will export and save your new image to the selected folder.
- Some image formats like JPEG may prompt you to select an image quality in an extra pop-up. If you're prompted, you can optionally adjust the properties here, and click Export to finalize.
FAQ
What is Layer: How to Recolor Anything on Gimp about?
It provides a structured overview of layer, explains the main context, and highlights practical takeaways for readers.
Why does this topic matter?
Understanding the main concepts helps readers evaluate the issue, avoid common mistakes, and make better-informed decisions.
How should readers use this information?
Use the guidance as a practical starting point, confirm details that may have changed, and follow current product, safety, or security recommendations.
Related Articles
 New Features of GIMP Version 2.10: GIMP 2.1010 minutes read
 How to Change Object Color with Pixelcut AI Recolor3 minutes read
 How to Arrange Brushes in GIMP with Tags6 minutes read
 4 Plugins That Help GIMP Become a Professional Tool: Explained7 minutes read
 8 Best GIMP Plugins and How to Install Them11 minutes read
 How to Create X-Ray Effects in GIMP6 minutes read
Reader Comments 0
Sign in with email or Google to join the discussion.