Let your photos 'shine' with GIMP's background change feature
It's easy to change the backgound of a photo in Photoshop, but you don't want to pay the expensive cost for that, so GIMP will be a wise choice. Changing the background in GIMP is very simple and there are many different ways to do this. The following article will introduce two best solutions to help your photos 'shine'.
It's easy to change the backgound of a photo in Photoshop, but you don't want to pay the expensive cost for that, so GIMP will be a wise choice. Changing the background in GIMP is very simple and there are many different ways to do this. The following article will introduce two best solutions to help your photos 'shine'.
Before start
If you are a new user of GIMP, it may be a bit awkward with its unusual user interface.By default, GIMP is set up with each interface element - windows, toolbars, palettes, etc. - separate.
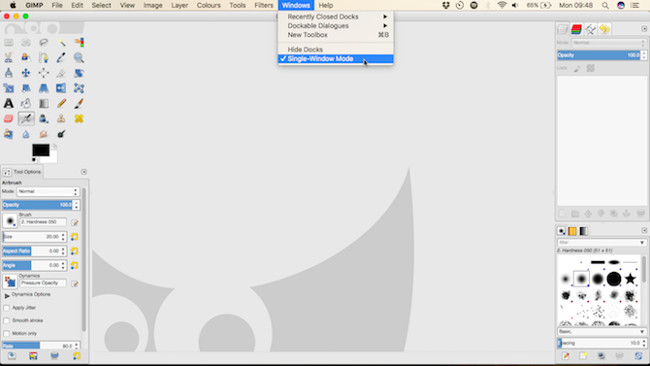
To view GIMP with the traditional interface, selectWindows> Single-Window Mode,separate parts of the GIMP interface will be joined together like the one you normally use.
Use the Foreground Select tool to separate the background
One of the quickest ways to change the background of an image is to use the Foreground Select tool.This is a semi-automated tool that does most of the work for you, but it only works well on some photos.
Determine the edge of the image you want to take and clearly separate it from the background.Highlight the entire previous contrast - tones or colors.
Open the image and select the Foreground Select tool from the control panel on the left side of the screen.
1. Draw a border
First, draw a rough outline around the object to split the background by clicking, dragging, or combining both.This outline does not need to be accurate.All you need to do in this section is to define the image area that contains the separating element and the background.
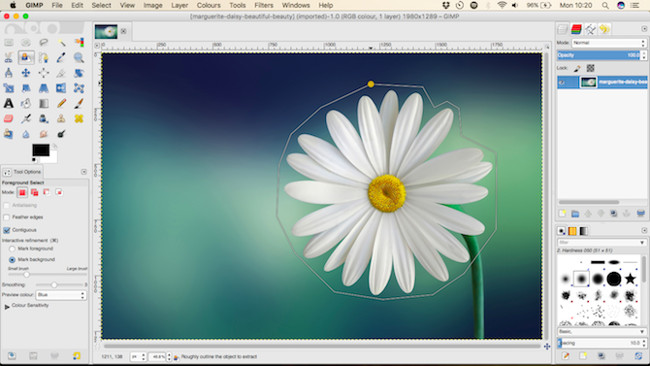
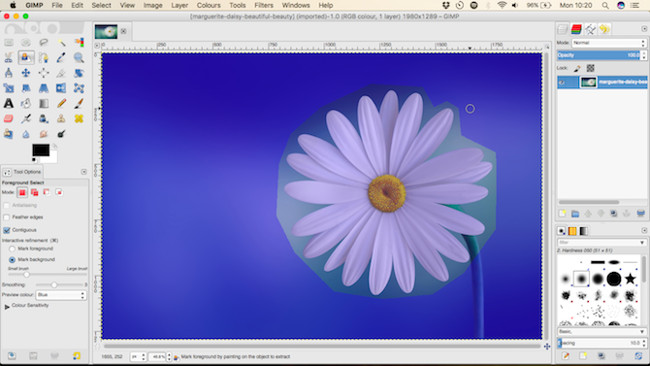
After the selection is complete, you will see a dark blue layer on the background and a lighter blue layer on the rest of the image.You can change this color to green or red inTool Options.
2. Draw on the image to be separated
Now, draw a line on all the parts of the image you want to grab, taking all of its different colors and tones.Make sure you do not encroach on the background - because this operation cannot be undone, you will have to start over if it is wrong.
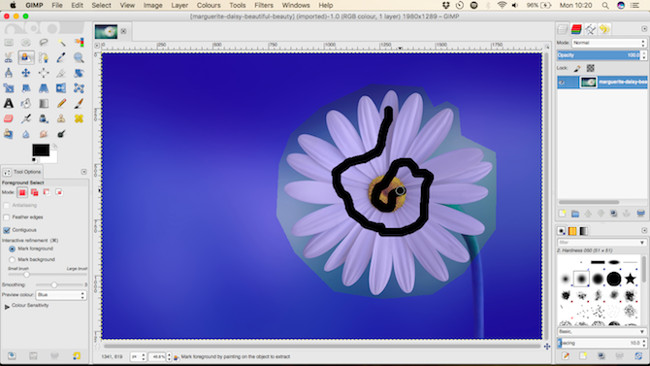
When you release the mouse button, GIMP will start analyzing the image, which will take several seconds.When completed, the image area contains the element to be retrieved and the background area is no longer segregated.If any part of the object to be retrieved is not selected, just redraw it to add.
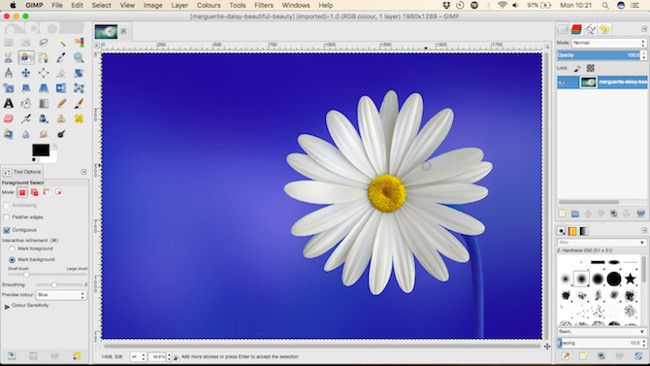
3. Create and copy the selection
When you are satisfied, pressEnterto select the image you want to retrieve.
Copy the selection by pressingCtrl + C on Windows or Cmd + C on the Mac. Then select Edit> Paste As> New Layer.
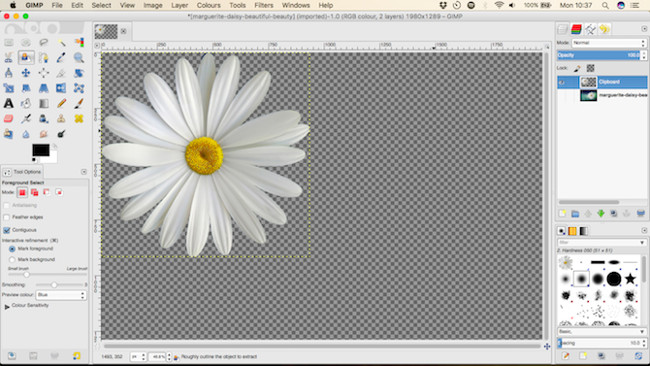
Now, the split image is pasted into a new layer with transparent backgound.SelectSelect > None to delete any remaining selections and hide the original image by clicking on the eye icon in the Layerpaletteon the right.
4. Add new wallpaper
Now you can add a new background.Create a new layer and move it just below the extracted image layer.You can paste an image into this layer or add color using theBucket Fill tool (Shift + B).
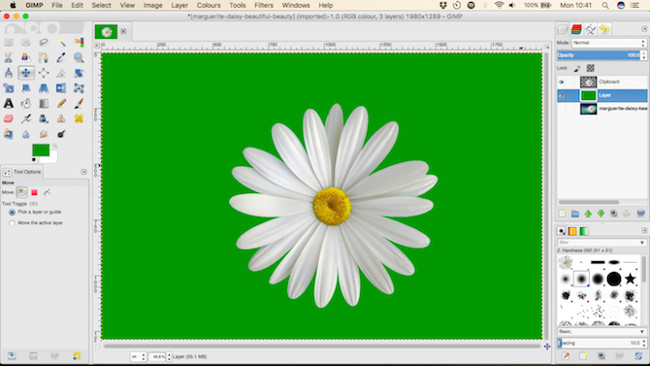
Drag the extracted image into place using theMove tool (use the M shortcut) to finish.
Use the Paths tool to separate the background
For any image that the object you choose has a blurred edge or many details, automated tools will not work.You need to usePaths tool .
GIMP's Paths tool is similar to the Pen tool in Photoshop.This tool will be a bit difficult to use, but it is an extremely powerful tool.
How to use Paths tool in GIMP
Paths tool allows you to create complex selections by placing a series of dots, called buttons, on top of an image.They are connected by a line that can be straight or curved or angled.By placing buttons around the object, you can select it correctly.
Here are the basics of Paths Tool to help you 'speed up':

Each click on the image will create a button -click multiple times to create a link.
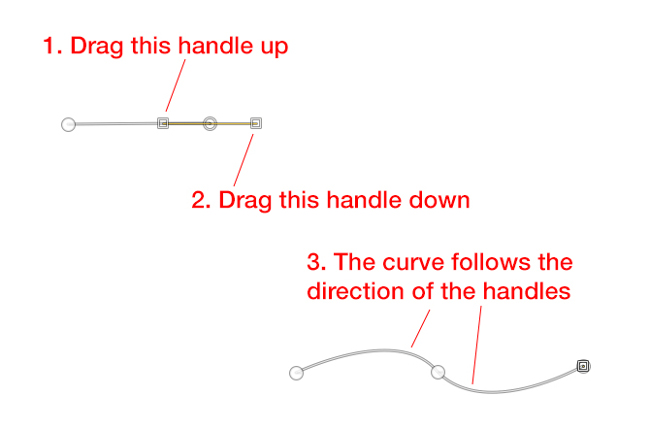
Click and drag the line between the two buttonsto create a curve.Move up or down to change the curve.

When placing a new button,click and drag in the direction you wantand quickly create the curve.
You can adjust the button at any time by clicking the button to select, move to a new location or delete the button with the Backspacekey.Make sure you select the last button in the path before you start adding other buttons.
The above instructions are very simple but may take some time before you feel "comfortable" with it.You should practice in a white image file to get used to how it works.
Change background with Paths tool
When you want to cut off an object with the Paths Tool , you position the buttons along a line around the edge of the object to be taken.
1. Zoom in
Zoom in on the image to make sure you put the buttons inside the object, not on or outside it.This will avoid any excess around the selection.
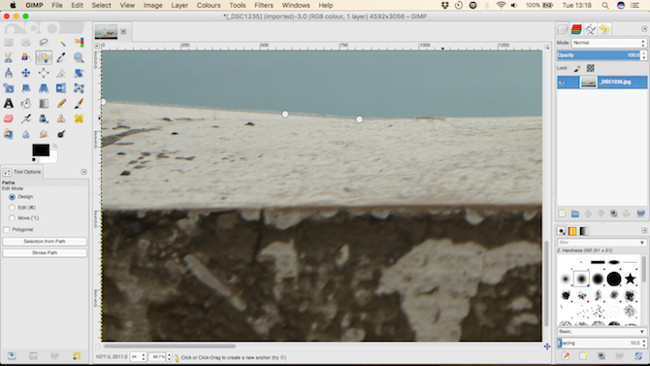
2. Start adding buttons
Select a starting point for the first button.Choose somewhere with no details, preferably a corner or a straight line.
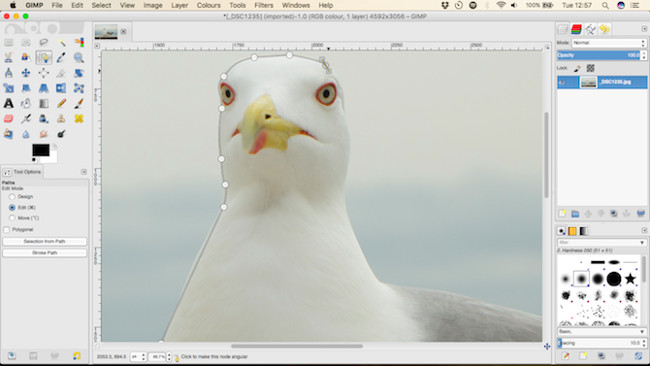
Now start adding buttons around the edge of the object.The spacing between nodes can be larger in visible and smaller areas in the detail area.Where there are more details, zoom in and use more buttons.
3. Complete the selection
To finish, place the last button next to the first button and then pressEnter to turn the path into a selection. Select Select> Featherand keep the default pixel setting of 5px to make the edges of the selection more smooth.
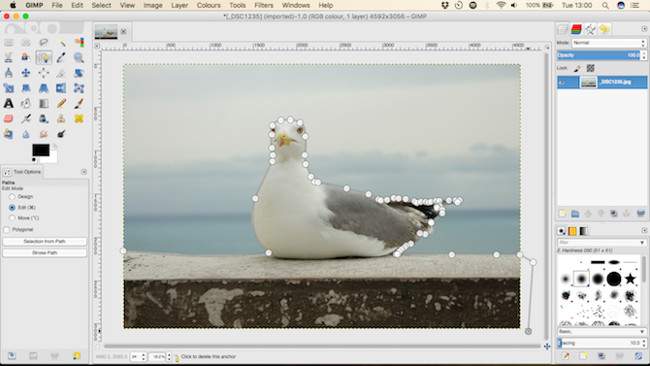
Now copy and paste the selection into a new layer and hide the original layer.
4. Add background
Finally, add your new background.Drag the image containing the background image into the GIMP window - this is the new layer, but make sure you put it under the layer containing the cut objects.Use theScale tool (Shift + T)to resize.
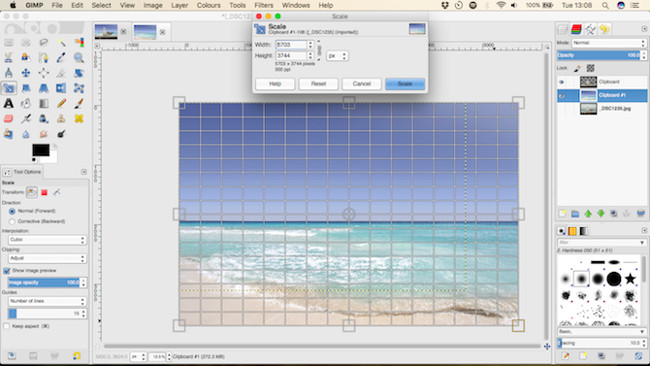
Select the layer containing the cut object and press theM key to open the Move tool.Now drag it into place and save the newly edited image.
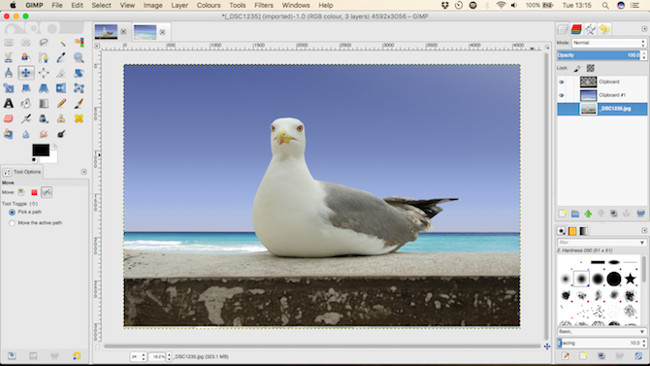
So you've completed the steps to change the wallpaper in a photo.GIMP also has many similar ways, but it is important to choose the right method for your image. The Foreground Select tool is the perfect choice for simple images, while learning Paths tools will help you with more complex, detailed images.
- Gmail allows you to change your wallpaper freely
- How to change the background (photo background) in Photoshop
- How to change the image background color with the Paint 3D application
- Changing virtual backgrounds in Zoom is more interesting with these 2 websites
- 6 photo editing tips with GIMP
- How to use Photoshop CS5 - Part 11: Change colors from black and white photos


 How to cut a circle image on Paint
  How to fix the error of saving JPEG images into JFIF on Chrome
  Instructions on how to crop a circle image online
  How to create a 3x4 photo in Paint
  How to batch format photos in Windows 10
  How to delete text in photos with Paint