How to combine photos in Word, combine 2 photos into 1 frame
Normally, when combining photos, people will think of using tools like Photoshop or Paint, etc. However, if you don't need to edit too much, you can also combine photos in Word and upload multiple photos. a framework that isn't too complicated.
Instructions for combining photos into a frame in Word
I. Instructions for combining photos in Word using Table
Step 1: Open your document with Word software .
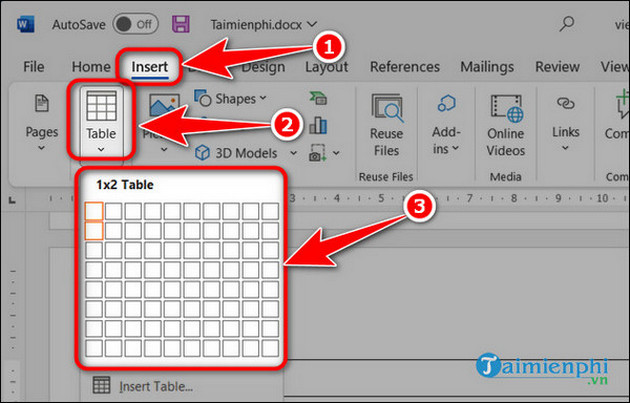
Step 2: Go to Insert => Table => Move the mouse to draw a table with the size you want.
- For example: Taimienphi wants to merge 2 images vertically, you create a table with size 1x2 (1 column x 2 rows).
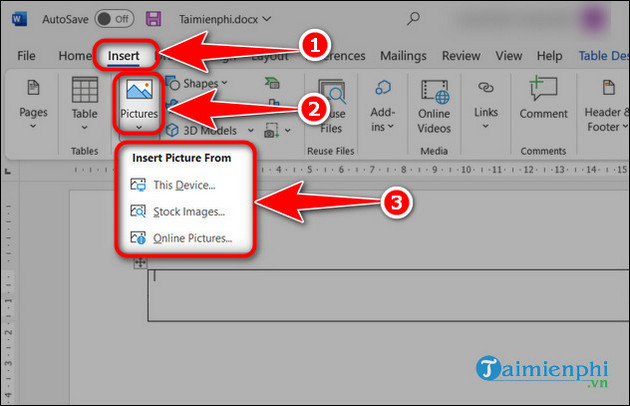
Step 3: Click on each cell in the table then insert the picture by going to Insert , in the Illustrations section, select Pictures .
- This Device: Select an image on your device,
- Stock Images: Select an image from Word's available stock.
- Online Picture: Select photos on online storage such as Onedrive,.
Step 4: Blacken the entire table, go to Table Design . In the Border section , you can customize the size , style and color of the border.
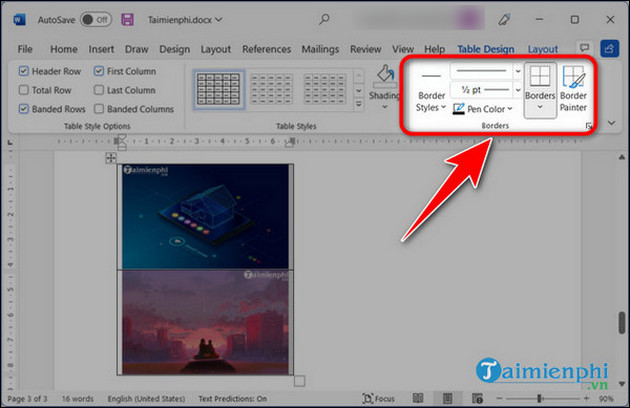
- Once completed, you will get the result as shown below.

II. Merge photos in Word using Text Box
Step 1: Open your document with Word software .
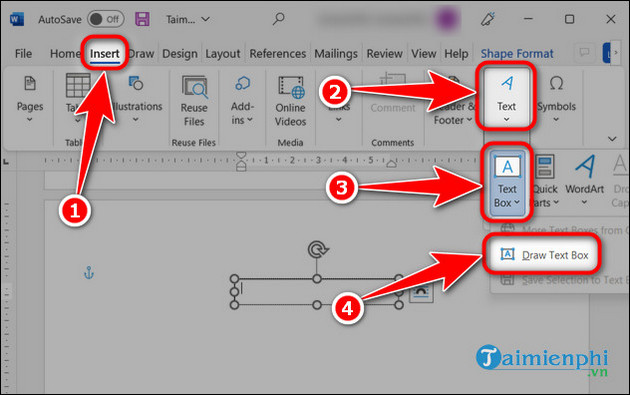
Step 2: Go to Insert => Text => Text Box => Draw Text Box . Click and hold the mouse to draw a Text Box on your document.
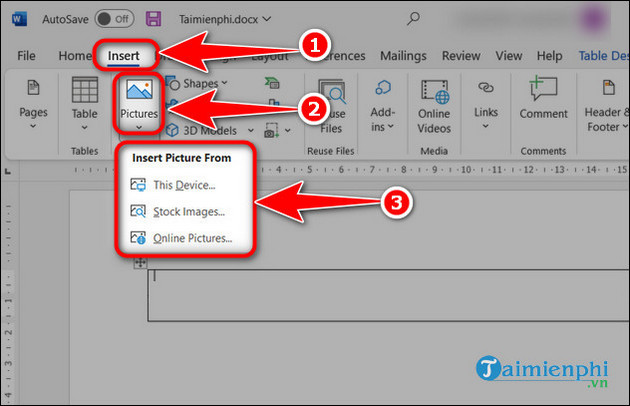
Step 3: Go to Insert , select Picture and insert the picture into the frame in the following ways:
- This Device : Choose a picture on your device,
- Stock Images : Choose a picture in Word's available stock.
- Online Picture : Select photos on online storage such as Onedrive,.
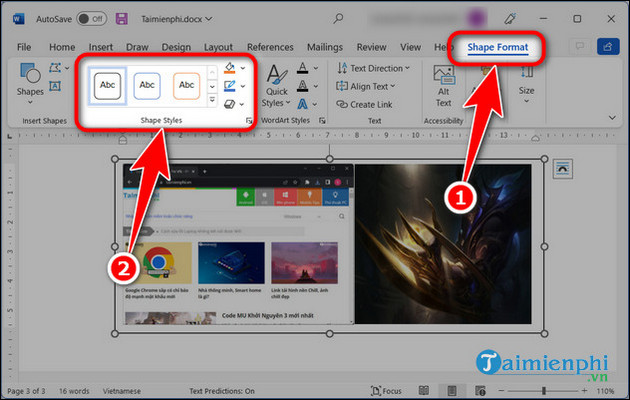
Step 4: Edit the border in Shape Format => Shape Styles section .
- Results after combining photos using Text Box.
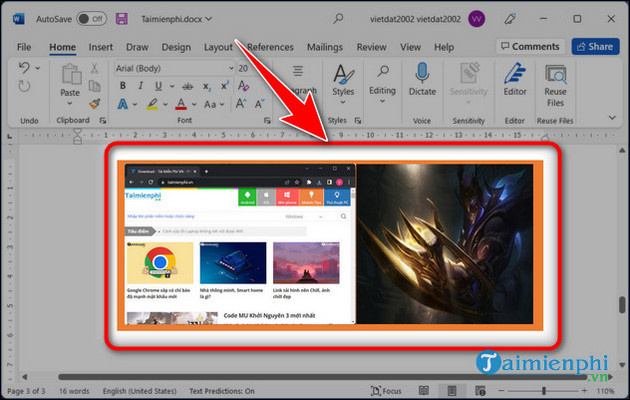
Thus, without using Photoshop, you can quickly combine photos without too complicated operations. If you need to further decorate the lines of text, you can refer to the article on creating beautiful fonts using WordArt to decorate the text to become attractive, attract viewers and create your own highlight.
 How to create a table of contents in Google Slides, Powerpoint Online
 The most detailed way to format borders for Excel tables
 How to type angle symbols in Word simply and quickly
 The most effective way to number pages in Word 365 as desired
 IFS function in Excel, usage and specific examples
 How to create tables in Word on computers