IFS function in Excel, usage and specific examples
What is the IFS function in Excel? How to use the iFS function in Excel 2016? Here's everything you need to know about the IFS function in Excel.
Table of Contents
Microsoft Excel is currently one of the most popular spreadsheet software today. Although there are now many free options like Excel, there is still no real competitor that can beat its top position.
Microsoft Excel design is easy to use with convenient dashboards and a variety of useful functions. This is also the most attractive point of Excel. This software not only provides calculation functions but also conditional functions, helping you handle more complex data.
Conditional functions like IFS have the potential to take your Excel formulas to the next level. With the IFS function, you can create conditions and nest different functions inside a single formula. Alternatively, you can also just use the IFS function.
But what is the IFS function and how is it different from a regular IF function? Read the following article to learn what IFS is in Excel and how you can use this function effectively.
What is the IFS function?
The IFS function in Excel is a logical function introduced in Excel 2016. The IFS function replaces the nested IF function and is much easier to use. The IFS function tests one or more conditions and returns a value that meets the first TRUE condition. If the value meets the first condition, the formula stops there and outputs the result. But, if the first condition is not met, the formula will continue checking the conditions in sequence until one condition is met.
Recipe
= IFS(logical_test1, Value1 [logical_test2, Value2] …, [logical_test127, Value127])In there:
- Logical_test1 tests the first logical condition. It is a required argument and the condition used by Excel to evaluate to TRUE or FALSE.
- Value1 is the result when logical_test1 is TRUE. If necessary, you can set it blank.
The remainder of the logical_test and Value arguments are optional. The function allows users to use 127 logical_test arguments.
How to use the IFS function in Excel
This is a built-in function that can be used as a function in an Excel worksheet. Let's take an example:
Suppose we want to classify grades A, B, C, D, E, and F according to the scores students achieve, we use the IFS function as follows:
=IFS(A2>80,"A",A2>70,"B",A2>60,"C",A2>50,"D",A2>40,"E",A2>30,"F")
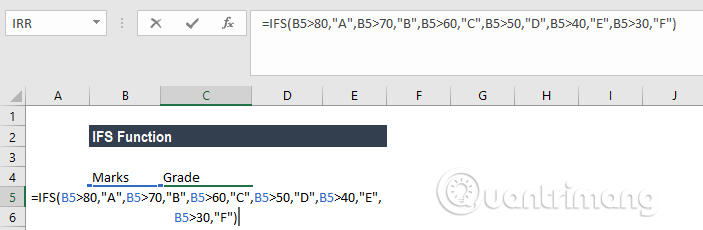
Specifically, in this function, set if A2 is greater than 80, the return result is point A, if A2 is greater than 70, the return result is point B, and similarly up to point F.
Using this formula we will have the following result:
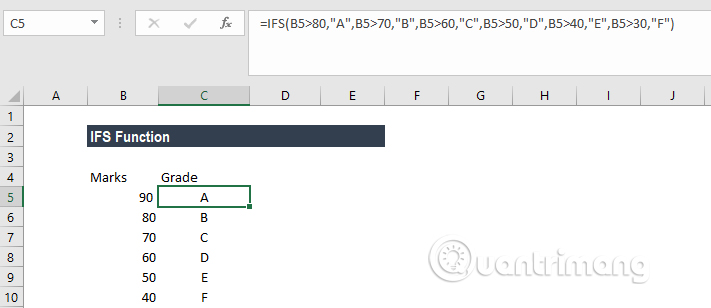
Example of IFS function in Excel
To understand how to use this function, let's look at a few examples:
Example 1 - Using IFS with ELSE
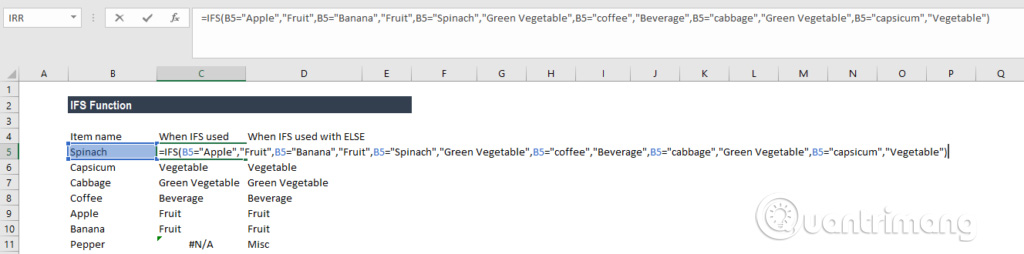
Suppose there is a list of items and need to classify them into groups: Vegetable, Fruit, Green Vegetable and Beverage. When using the IFS function, you will have the following formula:
=IFS(A2="Apple","Fruit",A2="Banana","Fruit",A2="Spinach","Green Vegetable",A2="coffee","Beverage",A2="cabbage","Green Vegetable",A2="capsicum","Vegetable")
Then we will get the following result:
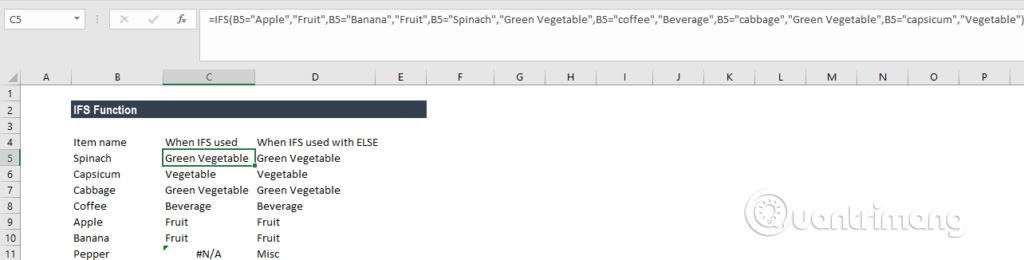
In this example, we have set up a logical condition in the IFS function. When a logical condition evaluates to TRUE, the corresponding value is returned. However, if no logical condition evaluates to TRUE, the IFS function will throw the #N/A error. As in this example it is Pepper in cell B8.
To avoid the #N/A error, we can use the ELSE function. We can therefore set the last logical condition in the formula to TRUE and then set a returned value.
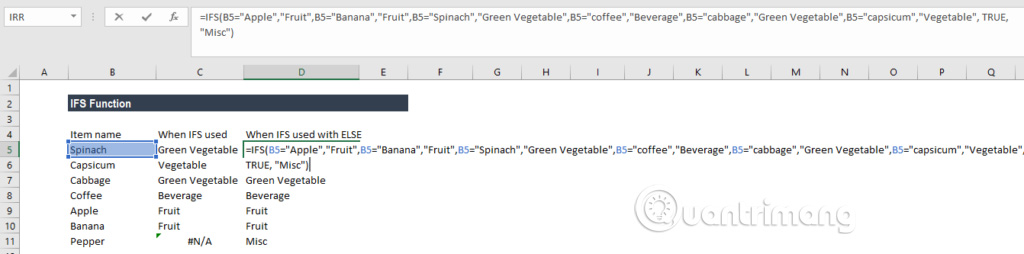
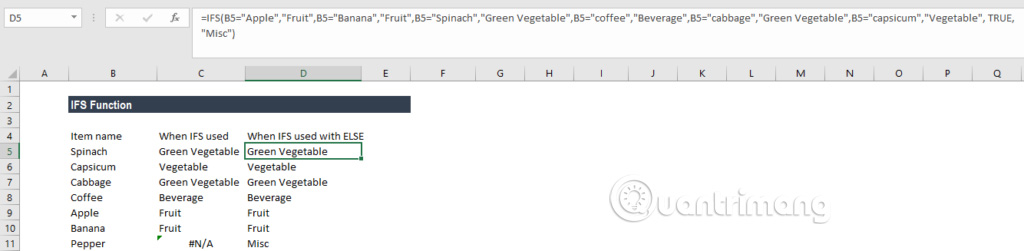
Here, we've added TRUE, "Misc", to ensure that Excel returns the value "Misc" in case no previous logical condition in the IFS function evaluates to TRUE.
Now the result will be as follows:
Example 2 - Nested IFS vs IF function
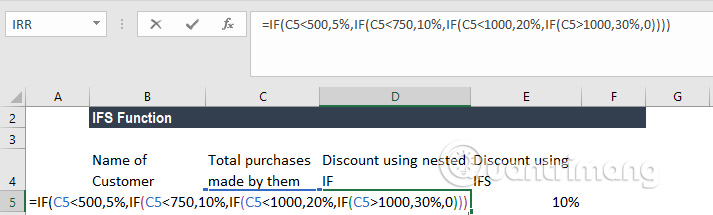
Before we had the IFS function, we often used nested IF functions. Let's see how the IFS function is more efficient than the nested IF function. Suppose a store offers customers a discount based on their total purchase bill. Therefore, customers will receive 5% discount for bills from 100 USD to 500 USD, 10% discount for bills from 500 USD to 750 USD, 20% discount for total amount from 750 USD to 1000 USD and 30% discount when Customers purchase over 1000 USD.
Below is the formula when using nested IF functions:
Now let's see what happens if we use the IFS function:
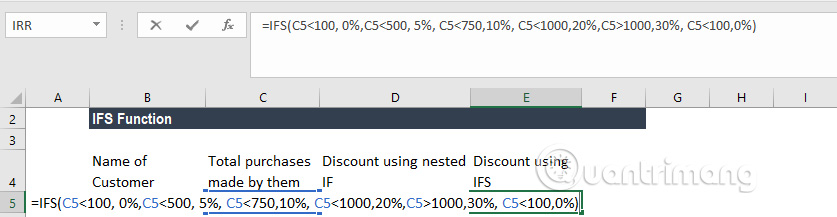
As you can see, the IFS function is easier to use because you only have to use a single function to enter a series of logical conditions, whereas the nested IF function has to use many logical conditions and can easily cause confusion while write functions.
Some errors occur when using the IFS function
1. #N/A error occurs when no TRUE condition is found in the IFS function.
2. Error #VALUE! Occurs when the logical_test argument processes to a value other than TRUE or FALSE.
3. The error message "You've entered too few arguments for this function" appears when you provide the logical_test argument without a corresponding value.
IFS is essentially similar to IF, as both of these Excel functions take values and test them against custom conditions. What IFS does better than IF is that it allows multiple conditions to be applied. With an IF function, you will need to nest multiple functions inside each other to declare multiple conditions, whereas with IFS, you can do it in a single function.
Compare how to use IFS and SWITCH functions
Like the SWITCH function, the IFS function allows you to test more than one condition in an independent formula. Both functions are easy to write and read a formula containing multiple conditions. One advantage of SWITCH over IFS is that the expression appears only once in the function and does not need to be repeated. Additionally, SWITCH can accept a default value. However, SWITCH limits exact matching. It cannot use operators such as greater than (>) or less than (<) with standard syntax. In contrast, the IFS function requires expressions for each condition, so you can use logical operators as needed.
Tips for using the IFS function in Excel
Copy the formula into other cells
You can copy the IFS function into another cell the same way you do other Excel formulas. Click on that cell, where the IFS function originally appeared, select the fill bar in the bottom right corner and drag it to another cell. You can also double-click the small green box in the lower right corner of the cell to send the formula to the adjacent cell.
Make sure at least one condition is true
If the function determines that none of the conditions are true, you receive the "#N/A" error message. You can prevent these errors by ensuring all-case conditions are considered.
Adding TRUE is the final logical check
You can also prevent errors when using ifs in Excel by adding TRUE as the final logical check. This action allows the function to return a value if it finds no previous condition to be true. For example, consider this function:
=IFS(A1>150, "High", A1<100, "Low", TRUE, "OK")
This function returns 'High' if A1 is greater than 150, and 'Low' if A1 is less than 100. If A1 is neither greater than 150 nor less than 100, this function returns 'OK'. These 'OK' values can occur if A1 is a number between 100 and 150 or equal to 100 or 150.
Note when using the IFS function in Excel
The IFS function evaluates multiple conditions and returns the result corresponding to the first TRUE value. You can use the IFS function when you want to use a formula to test multiple conditions at the same time without having to nest multiple IF statements. IFS-based formulas are shorter and easier to read and write.
Conditions are provided to the IFS function as test/value pairs, and IFS can handle up to 127 conditions. Each condition represents a logical value, returning TRUE or FALSE. The following value will be returned when the test results in TRUE. In the event that there is more than one TRUE condition, the value corresponding to the first TRUE result is returned. Therefore, the order of conditions is very important when using the IFS function in Microsoft Excel.
Conditions are a real game changer in Excel. You can combine other functions in IFS formulas to create complex formulas that let you achieve amazing things in Excel. Now that you know about the IFS function, it's time to move on and explore the limitless possibilities it offers!
Wishing you success!
Was this article helpful?
Your feedback helps us improve.
Related Articles
 IRR function in Excel - Usage and examples5 minutes read
 Offset function in Excel - Usage and examples6 minutes read
 VLOOKUP function to use and specific examples10 minutes read
 Excel date function - Usage and examples5 minutes read
 The IF function in Excel: Syntax and specific examples of the IF function.5 minutes read
 OR function in Excel, how to use the OR function, and examples2 minutes read
Reader Comments 0
Sign in with email or Google to join the discussion.