No need to use software, here are 3 ways to get images from Word files fastest
Microsoft Word allows users to easily insert images into document files without compromising the image resolution. However in some cases you want to get the image in the document file to share with other users, or you have to delete all the images in the document file. Instead of taking a screenshot of each image, or deleting each image, you can extract all images in the Word file.
Here are 3 ways to get images from Word files quickly without having to install and use any software at all.
1. Save a Word document as a Web Page
This is the easiest solution to retrieve all images on a Word document. To do this, follow the steps below.
First open the Word document that you want to retrieve all images. Next select File in the top left corner of the document and select Save As.
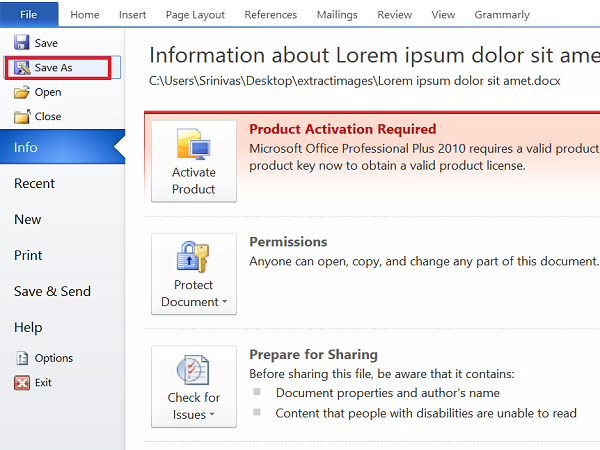
Find the location where you want to save the file, and name the file. In the Save As drop-down menu, click the Web page.

Note: Do not select the Web Page option , Filtered because this option will reduce the resolution of the image.
Next click Save to save the Word document file as Web Page.

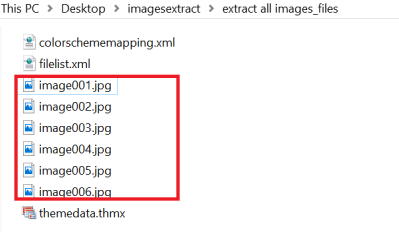
Find the location where you just saved the document file, now you will see the html file and a folder with the same name created.

Open that folder and you will see all the images displayed there. Copy all images to any folder you want.
2. Change the extension from ".docx" to ".zip"
In addition to the above solution, you can extract all images from Word files by renaming the file extensions from "docx" to "zip".
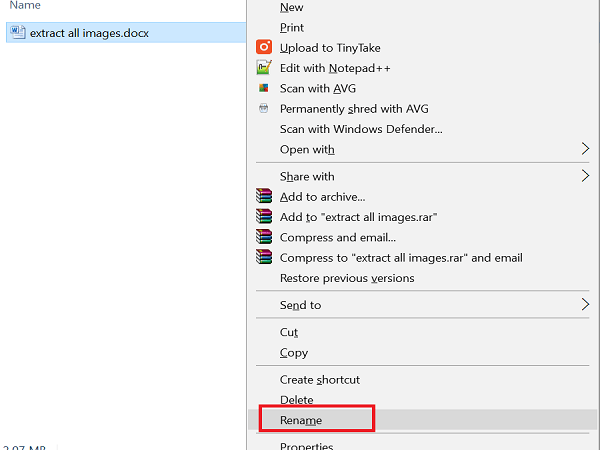
Select the document you want to retrieve the image, right-click it and select Rename .
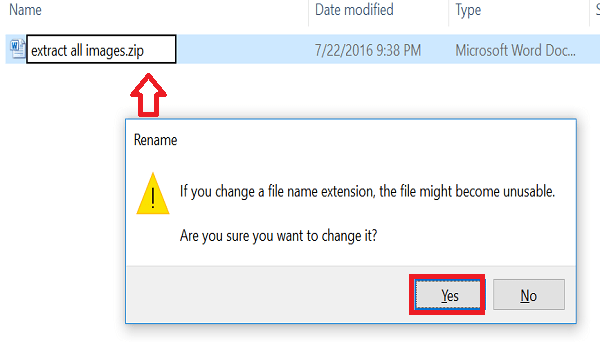
Next change the extension from ".docx" to ".zip" and press Enter . At this time, a message window appears, where you click Yes .
Use decompression software like 7-Zip, WinRAR, . to extract zip files. Select the location where you want to extract the zip folder.
Next open the folder you just unzipped and select Word => Media .
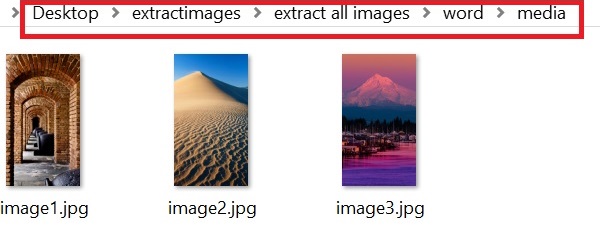
All images are stored in the Media folder, and you can copy these images to any folder if desired.
Note: Also you can right click on Word file and use 7-zip to extract images.
3. Traditional method: copy and paste images
This will help you if you want to get 1 or 2 images on a Word file.
Right-click the image and select the Copy option. The size and image resolution you copy will not be affected.
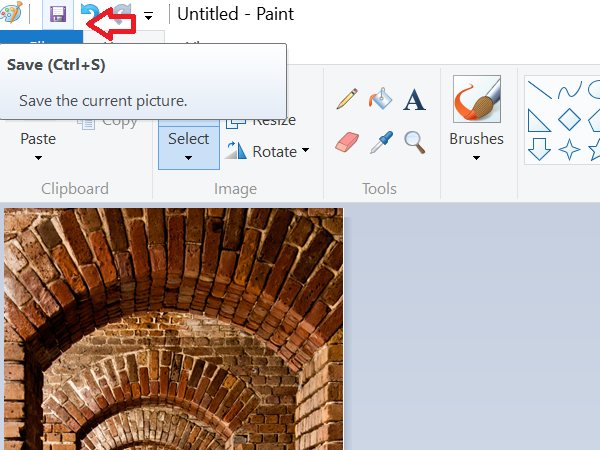
Open an image editing tool, such as Paint, Photoshop or GIMP, then paste the image you copied and then press Ctrl + S or click Save to save the image.
Refer to some of the following articles:
- Fix the x80070005 error code in the Active Office process
- How to change the default save file format in Word, Excel and Powerpoint 2016?
- How to delete a background color in a Word document?
Good luck!
You should read it
- ★ How to edit photos in Word is extremely useful that you should know
- ★ Insert images into Word 2016 and align images in Word 2016
- ★ How to cut photos from PDF to Word
- ★ Save images in Ms Word documents into separate files
- ★ Word 2013 Complete Guide (Part 17): Drawings and how to create effects for drawings