Table of Contents
This guide explains how to rotate Images in Word, with clear steps, practical tips, and important checks before you begin.

Word supports users to edit images quickly and accurately. To rotate the image on Word you have up to 3 different ways:
Method 1: Rotate photos directly
This way you will easily align as well as use and most convenient. Rotate images directly so you can align many different angles to best suit.
Step 1: When you finish adding the image to Word, click on the image, this time, the Rotation mark will appear on the image .

Step 2: You proceed to press and hold the mouse on the arrow rotation , and you move the mouse left or right as the image will rotate.

Method 2: Rotate, flip images in Word
This is the best way to rotate photos, users can reverse the direction of top / bottom, left / right of the image to create more attractive.
Step 1: Select Format tab and find the Rotate tool with two triangles .
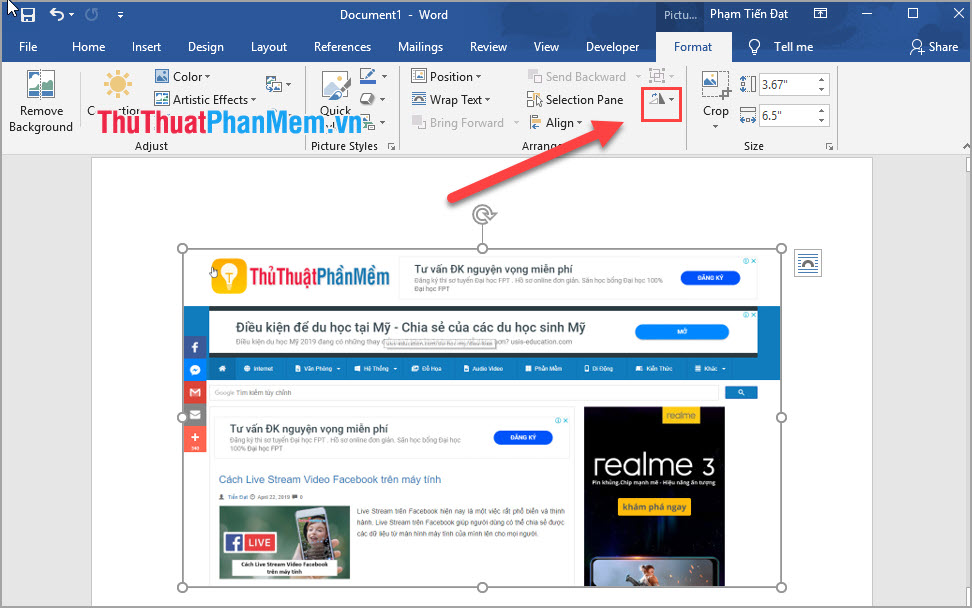
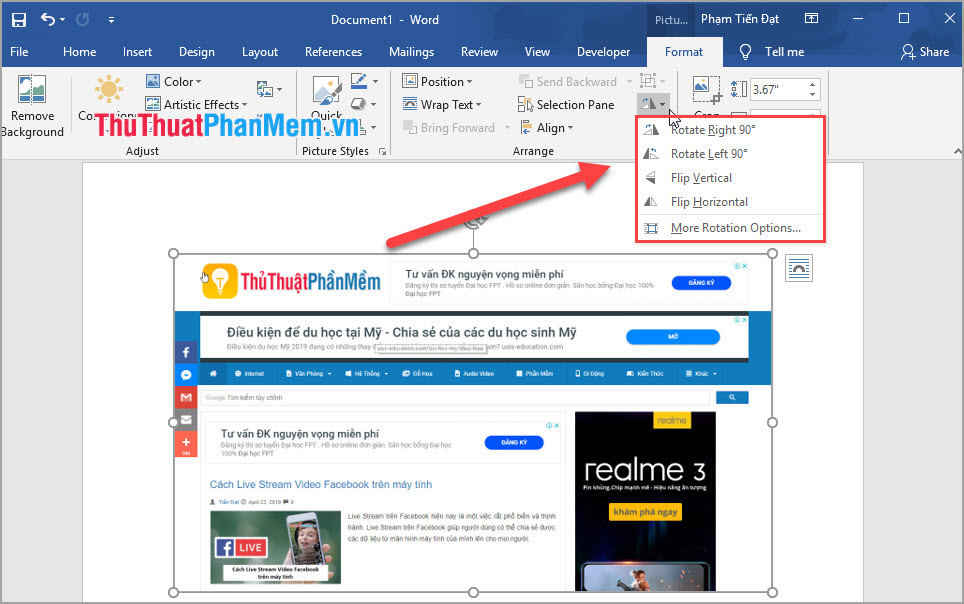
Step 2: After that, click on the icon and there will be 5 different options:
- Rotate Right 90: Rotate 90 degrees from left to right.
- Rotate Left 90: Rotate 90 degrees from right to left.
- Flip Vertical: Flip photos into vertical.
- Flip Horizontal: Flip the image horizontally (change direction left and right.
- More Rotation Options.: Add a photo rotation option.
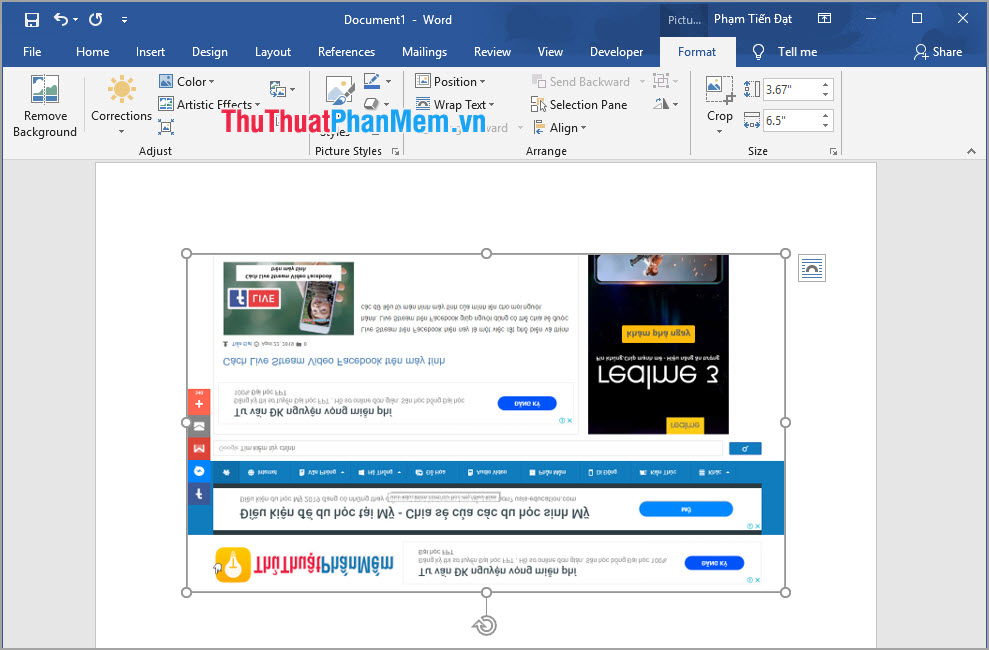
And this is the result when using the Flip Horizontal photo mode.
Method 3: Rotate photos according to preset degrees
This way easily helps you not to align every bit of inclination. You only need to enter the number of angles you want to rotate the software to handle for you.
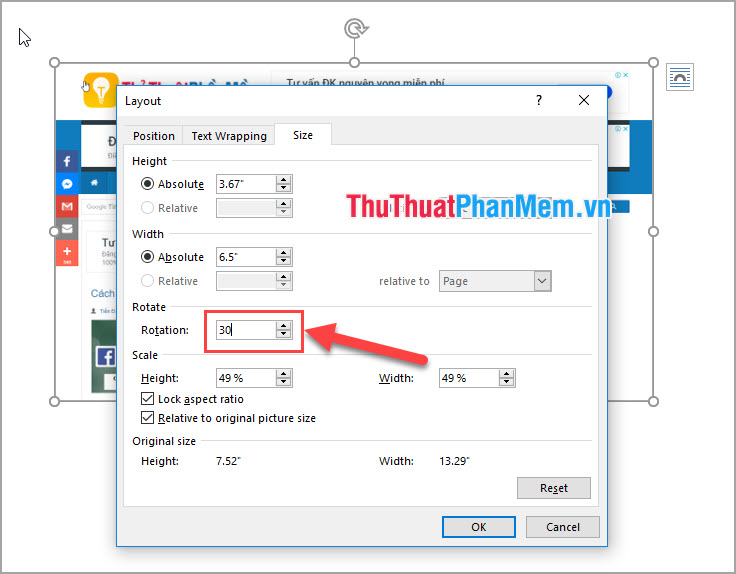
Step 1: Right-click the image to rotate and select Size and Position.
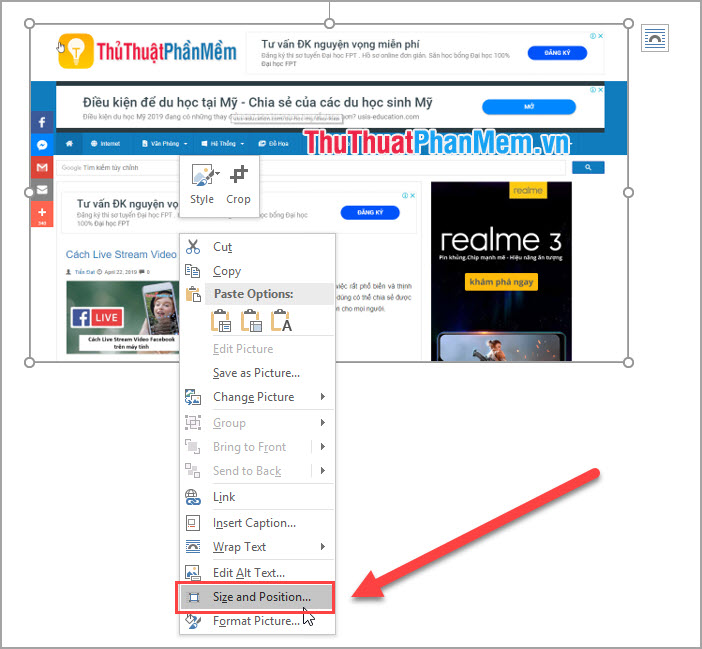
Step 2: Then, at the Rotation line you enter the number of angles you want to rotate.
Thus, Software Tips have guided you 3 ways to rotate photos quickly and beautifully in Word. With these ways you can use on Word 2007 and up. Good luck!
FAQ
What should I know about Rotate Images in Word?
Focus on the key features, requirements, limitations, and practical use cases explained in this guide.
How do I get the best results with Rotate Images in Word?
Follow the recommended steps, use current software or information, confirm compatibility, and review settings before major changes.
Are there any risks or limitations?
Potential limitations depend on compatibility, data quality, cost, privacy, support, and how the product or method is used.
Related Articles
 Rotate and Move Images in Word3 minutes read
 How to Rotate Images Backwards, Horizontally on Computers Without4 minutes read
 How to Rotate Images in Microsoft Word6 minutes read
 Rotate Pictures in Words: Ways to Rotate Images in Word4 minutes read
 How to Horizontally Rotate Any Page of Paper in Word4 minutes read
 How to Rotate Text in Excel: Rotate the Word on Excel4 minutes read
Reader Comments 0
Sign in with email or Google to join the discussion.