How to merge multiple photos into one frame in Photoshop
There are many ways to combine multiple photos into one frame in Photoshop, but after examining the ways and thoughts, TipsMake feels the method of using the Clipping Mask function is the fastest and most professional method.

Photoshop is a specialized software with many very magical functions. With this software, you can turn ordinary photos into masterpieces that make viewers admire loudly. Today with TipsMake.com, you will learn how to use Photoshop to combine multiple photos into one frame.
There are many ways to combine multiple photos into one frame in Photoshop, but after examining the ways and thoughts, TipsMake feels the method of using the Clipping Mask function is the fastest and most professional method.
TipsMake will guide you from the beginning with the most thorough step. As you can see in the image below, the interface opens when you create a new Photoshop file with only one Background layer in the Layers section .

As a first step, you need to create a new layer by clicking on the New Layer icon in the right corner of the Layers interface .

Next you need to create the array of shapes for this layer. This shape will limit the scope for one of the pictures you want to insert into the frame. For example, if you want to insert an image with a 200 px circle shape, you have to create a 200 px circle shape on this newly created layer.
So you can freely promote your creativity for the cube to arrange it to fit perfectly into the picture. Here, TipsMake only guides you with the simplest square.
To create a square / rectangle shape for the layer, click the Rectangle Tool icon on the Tools toolbar or press the U button on the keyboard.

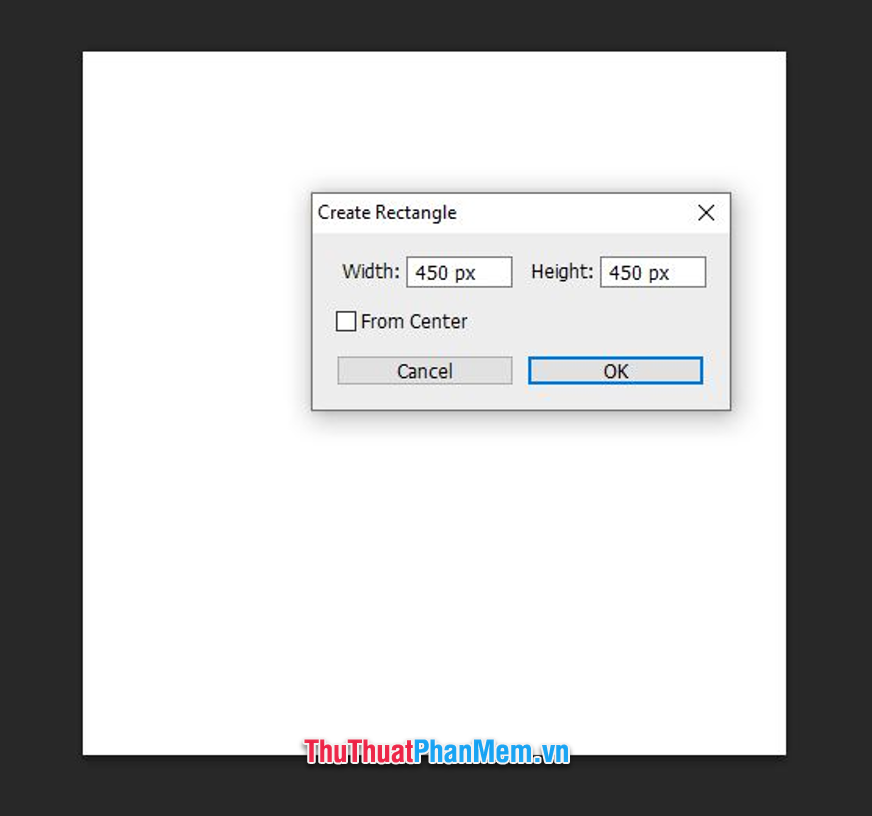
Make sure you can create a rectangle on the selected layer background. You can choose to create a free size for that rectangle by clicking and dragging on the working interface of Photoshop or choosing to click on the working interface to create a rectangle of the correct size.
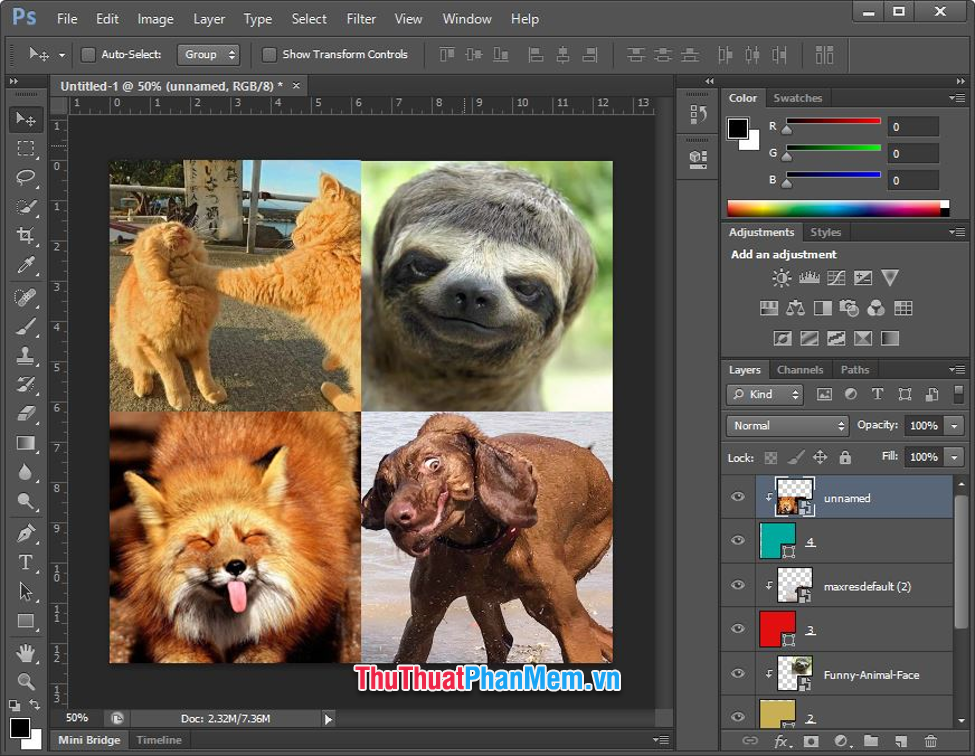
According to the example below, TipsMake is going to make a collage of 900 x 900px and combine from 4 equal images at 4 corners so we will use clicking on the working interface of Photoshop to display the Create Rectangle window pane Then enter the information Width and Height .
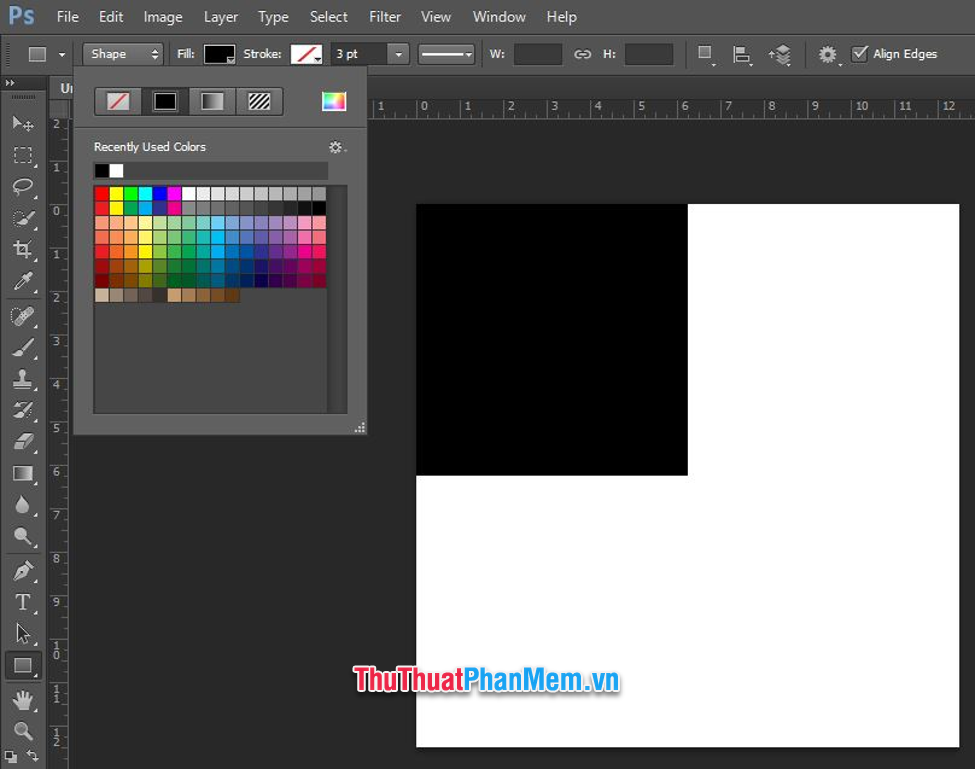
After creating the shape on the first layer, you click on the Move Tool icon on the Tool toolbar or press V on the keyboard to be able to move that shape to the specified position.

You should change the color of the cube to distinguish the different shapes from each other.
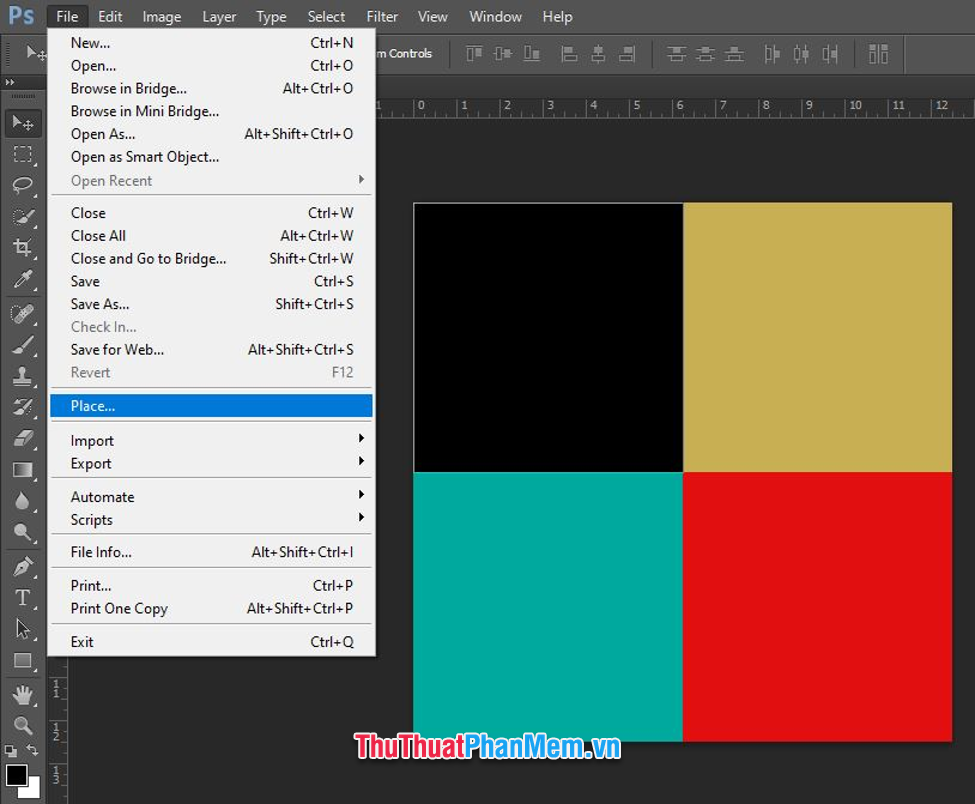
Do the same with the rest of the blanks to make the cubes fill the picture, which can be named to mark the location of the cubes.
Next is the job of inserting the image, you click on the cube layer corresponding to the position you want to insert the image.

Next, select File on the toolbar and click on Place in the selection list.
Select the photo you want to insert in your computer folder and then click Place to insert the image.

You hover to move the position of the image, click on the square marks around the image, hold and move it to adjust the corresponding size to fit the picture frame. You can press Shift to keep the width length ratio when adjusting the size.
After you've adjusted the position and size of the picture, press Enter to confirm the image insertion.

Next, right-click on the image layer you just inserted, click Create Clipping Mask to assign the area for that photo equal to the area of the layer below (that is, the shape that I created earlier).
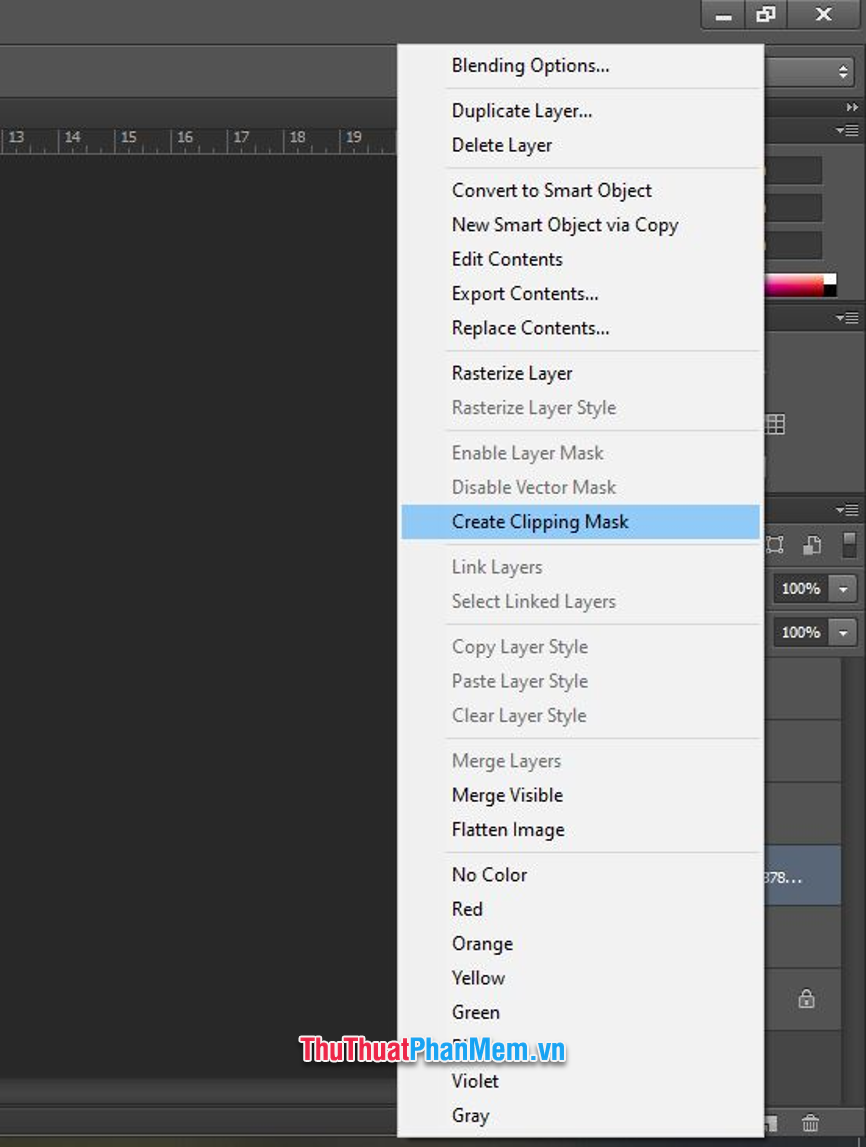
As a result, you will get inserted pictures that fit within the created cubes without inserting into the "territory" of other cubes. After creating Clipping Mask, you can freely adjust the size of the inserted image or move the image position so that the frame is satisfied by using the Move Tool (V). How to use the Move Tool described above is simple mouse movement, drag and drop.

Along with that method, you also do the same with the remaining cubes. You need to note that Clipping Mask only attaches the image to the adjacent layer below it, so if you want to insert the image into any position, you must place that photo layer directly above the created cube layer.
Finally, when you're satisfied with your work, all you need to do is Ctrl S and save your image in either a .jpg or .png format.

Thank you for following the tutorial How to combine multiple photos into one frame in Photoshop by TipsMake.com . Hopefully this article has enough information and content to guide you in collage, wish you successful implementation and see you in other tutorials.
Was this article helpful?
Your feedback helps us improve.
Related Articles
 How to merge multiple photos into a photo frame in Photoshop2 minutes read
 Merge multiple photos into one common frame using GIMP5 minutes read
 How to cut circular images in Photoshop4 minutes read
 How to merge photos into the frame on Paint4 minutes read
 How to make a photo frame in Photoshop3 minutes read
 How to merge photos on Macbook, merge multiple photos into 1 on Mac OS5 minutes read
Reader Comments 0
Sign in with email or Google to join the discussion.