Table of Contents
This practical guide explains how to create Tables in Word on Computers in a clear sequence, including preparation, key settings, common mistakes, and troubleshooting steps.
What This Guide Covers
- Detailed instructions for creating tables in Word
- Method 1. Create a table in Word quickly using the keyboard
- Method 2. Create a table in Word using the available Table feature
In the instructions on how to create tables in Word below, TipsMake will detail two solutions to create tables as quickly as possible. When you make a class list, statistics of results, and the number of those data units, drawing a table in Word is the most appropriate way to present the content visually for readers to understand more easily. Therefore, when creating similar content, you need to create a table in Word according to the instructions below.

Create tables in MS Word
Detailed instructions for creating tables in Word
Method 1. Create a table in Word quickly using the keyboard
Step 1: On your Word text editing frame, move the mouse pointer to the location where you need to create a table in Word. Then, you type the character | (straight line) Every two consecutive line characters will create a cell in the table, separated by a space between each line character . For example, if you type a straight line character twice, it will create one cell, three characters will create two cells,.

Step 2: After entering the number of straight line characters needed to create a table in Word, press Enter and the software automatically creates a one-row table for you with the corresponding number. To create more rows, place your cursor in the last cell of each row and press the Tab button .

Very quickly, with just a few simple steps on the keyboard, you can create tables in Word to do your work.

Method 2. Create a table in Word using the available Table feature
For Word 2016, 2013, 2010, 2007
The way to create a table in Word 2016, 2013, 2010, 2007 is similar. If you are using Word 2003, there are separate instructions below.
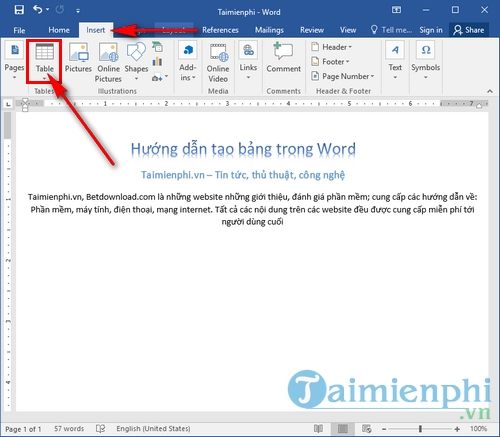
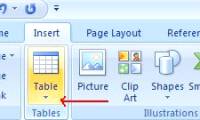
Step 1: On the editing window, place your cursor at the location where you want the table in Word to appear. Then switch to the Insert tab and select Table to display options for creating tables in Word.
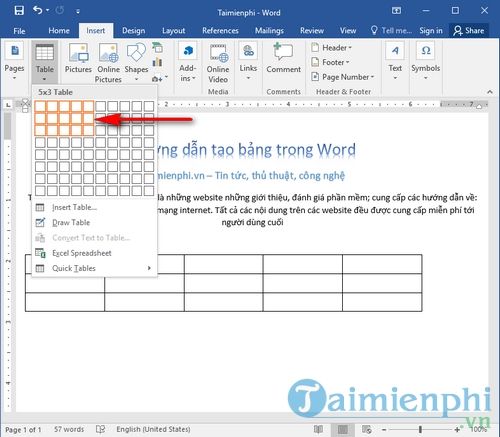
Step 2: Move your mouse over the corresponding cells to create a table in Word corresponding to rows x columns . The software will automatically display the table every time you drag the mouse so you can visualize the size of the table most accurately.
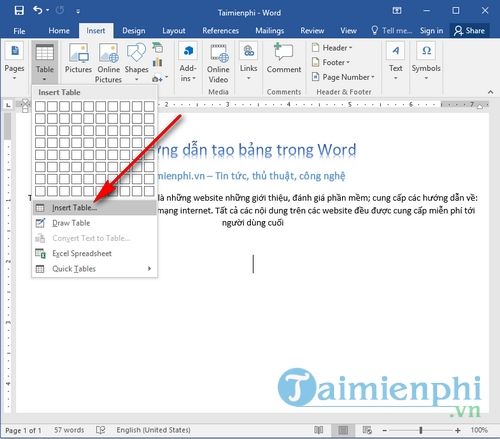
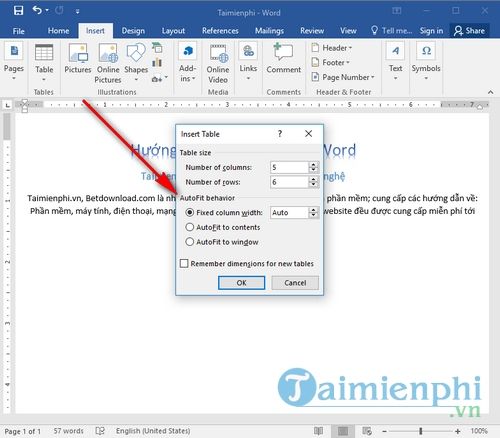
Or you can choose Insert table. to customize the number of rows, columns, and column size with the following values:
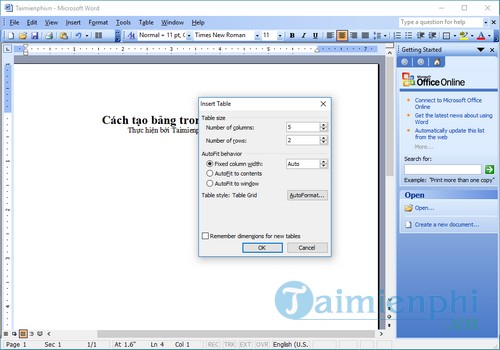
- Number of columns : number of columns
- Number of rows : number of rows
- Fixed column width : width of the column
- AutoFit to contents : automatically adjusts according to the content inside
- AutoFit to window : automatically adjusts to the window
After setting the corresponding values. Click OK and the result will be after successfully creating a table in Word.
What are the results when creating a table in Word 2016, 2013, 2010, 2007

For Word 2003
Word 2003 has quite limited features compared to Word 2007, 2013, 2016 versions, so you can create a table according to the instructions below:
Step 1: On the editing frame, place the mouse cursor at the position where you need to insert the table, then select Table -> Insert -> Table. to open the table creation window in Word 2003.
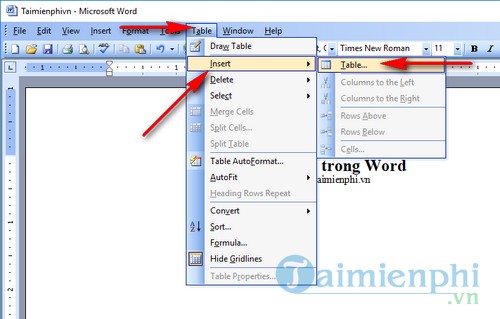
Step 2: On the Insert table window, you also have options for entering values like how to create a table in Word 2016, 2013, 2007 above. Here Start by enter the appropriate values and click OK to create the table.
Above TipsMake has guided readers how to create tables in Word in detail and completely. With this method, you will easily collect data and calculate quickly. Next, learn how to insert charts in Word to better understand how to use this tool. Good luck !
Final Thoughts
Use the instructions and checks above in order, verify the result after each major step, and keep a backup whenever the process changes important files or system settings.
FAQ
What should I check before starting?
Confirm that your device or software version matches the instructions, save important data, and note the original settings before making changes.
What should I do if the steps do not work?
Restart the app or device, install available updates, review any error message, and repeat the steps carefully in the same order.
Can I undo the changes?
Many changes can be reversed, but the exact method depends on the feature. A backup or restore point gives you the safest way to recover.
Related Articles
 How to Insert and Create Tables in Word 2016: Step-by-Step Guide7 minutes read
 How to Create Tables and Tables in Word - Instructions on How to Create7 minutes read
 How to Create Tables, Draw Tables in Word: Step-by-Step5 minutes read
 MS Word - Lesson 8: Creating a Table: Microsoft Word 20073 minutes read
 Instructions for Deleting Table Paths in Word4 minutes read
 Word Tables: How to Create a Table Border in Word5 minutes read
Reader Comments 0
Sign in with email or Google to join the discussion.