How to Change Your Desktop Background in Windows
This wikiHow teaches you how to alter the image displayed on your PC's desktop background (also known as wallpaper). Right-click an empty space on the desktop. Doing so will prompt a drop-down menu.
Table of Contents
Method 1 of 4:
Using Windows 10
-
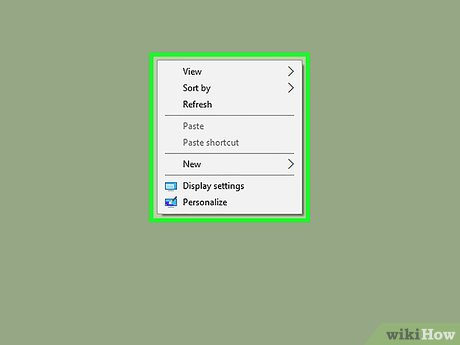 Right-click an empty space on the desktop. Doing so will prompt a drop-down menu.
 -
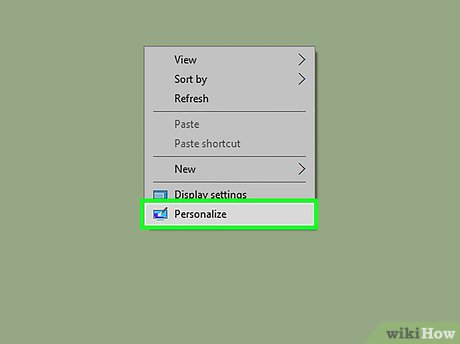 Click Personalize. This option is at the bottom of the drop-down menu.
 -
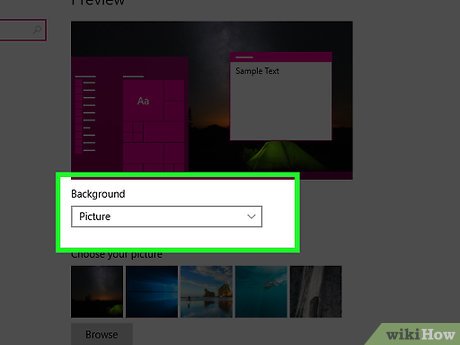 Click the box beneath the "Background" heading. You can click one of the following options:
- Picture - Allows you to select a picture to display on your desktop. A bunch of recent and sample pictures will be listed and can be used by clicking one. You can also click Browse and choose a picture if you don't like the stock photos. Furthermore, you can click the box beneath "Choose a fit" to change the way the picture is displayed (e.g., filling your entire screen).

- Solid color - Allows you to select a solid color (e.g., gray) to fill your Windows desktop.

- Slideshow - Displays a series of photos from your computer's default "Pictures" folder in a slideshow. You can change this folder by clicking Browse and selecting a new folder.

- It's best to make new folder dedicated for your desktop background slideshow that contains the pictures you want as a background. For example, you could create a folder called "Desktop Slideshow" under the "Pictures" section of File Explorer.

- It's best to make new folder dedicated for your desktop background slideshow that contains the pictures you want as a background. For example, you could create a folder called "Desktop Slideshow" under the "Pictures" section of File Explorer.
- Picture - Allows you to select a picture to display on your desktop. A bunch of recent and sample pictures will be listed and can be used by clicking one. You can also click Browse and choose a picture if you don't like the stock photos. Furthermore, you can click the box beneath "Choose a fit" to change the way the picture is displayed (e.g., filling your entire screen).
-
 Exit the "Personalization" window to see your new background. To do so, click the X in the top-right corner of the page. Your selected wallpaper option will have automatically been applied to the desktop when you changed the settings.
Method 2 of 4:
Using Windows 7 and 8
-
 Right-click an empty space on the desktop. Doing so will prompt a drop-down menu.
 -
 Click Personalize. This option is at the bottom of the drop-down menu.
 -
 Click "Desktop Background". This link should be in the bottom-left corner of the window.
 -
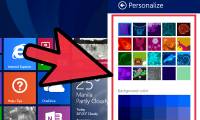
 Click a picture. Doing so will select it as your desktop background.
- You can also click the Windows Desktop Backgrounds dropdown menu near the top of the window to pick a different pictures folder (e.g., "Pictures").
- If you want to look for a specific picture, click Browse.
- Clicking the checkbox in the top-left corner of two or more pictures will place them on a slideshow rotation. You can change the default time between photos and transition style from the bottom of the window.
-
 Click the box beneath the "Picture position" heading. You'll see options for displaying your picture here. A few common options include:
- Fill - Your picture will take up the whole screen.
- Tile - Multiple thumbnails of your picture will display in a grid on your desktop.
- Center - Your picture will be centered in the middle of your screen with a black border.
-
 Click a picture position option.
 -
 Click Save changes. It's at the bottom of the "Desktop Background" window. Your changes will be applied.
Method 3 of 4:
Using Windows Vista
-
 Right-click an empty space on the desktop. Doing so will prompt a drop-down menu.
 -
 Click Personalize. This option is at the bottom of the drop-down menu.
 -
 Click "Desktop Background". It's the second link from the top of this window.
 -
 Click a picture. Doing so will select it as your desktop background.
- You can also click the Windows Wallpapers box near the top of the window to pick a different pictures folder (e.g., "Pictures").
- If you want to look for a specific picture, click Browse.
-
 Click a picture positioning option. This section is beneath the "How should the picture be positioned?" heading. Your options (from left to right) include a full-screen version of the picture, a grid comprised of your photo, and a centered version of the picture.
 -
 Click OK. It's at the bottom of the window. Doing so will apply your selected picture to the desktop background.
Method 4 of 4:
Using Windows XP
-
 Right-click an empty space on the desktop. Doing so will prompt a drop-down menu.
 -
 Click Properties. It's at the bottom of the drop-down menu.
 -
 Click the Desktop tab. You'll see this at the top of the "Properties" window.
 -
 Click a desktop image option. You'll see several options below the "Background" heading; clicking one will preview it in the window near the top of the page.
- You can also click Browse to pick a custom picture.
- For a solid color, click None as the background. Then click the box below "Color" in the bottom-right corner of the window, and pick a color.
-
 Click the box below the "Position" heading. It's at the bottom-right side of the "Properties" window. You'll see three options here:
- Stretch - Your picture will take up the whole screen.
- Tile - Multiple thumbnails of your picture will display in a grid on your desktop.
- Center - Your picture will be centered in the middle of your screen with a black border.
-
 Click a picture position. Doing so will apply the position to your picture.
 -
 Click OK. It's at the bottom of the window. Doing so will save your changes.
Was this article helpful?
Your feedback helps us improve.
Related Articles
 Error 'can't change desktop wallpaper' on Windows 10, this is how to fix it5 minutes read
 Instructions to change the wallpaper on Windows 117 minutes read
 How to Change the Background in Windows 83 minutes read
 How to Remove a Background from the Desktop Background List (Windows)3 minutes read
 Guide to change Background beautiful, detailed and easy to learn2 minutes read
 The quickest way to change your Windows or MacBook desktop wallpaper to a high-resolution image.11 minutes read
Reader Comments 0
Sign in with email or Google to join the discussion.