How to Install FFmpeg on Windows
This wikiHow teaches you how to install FFmpeg onto your Windows 10 computer. FFmpeg is a command line-only program that allows you to convert videos and audio into different formats, as well as record live audio and video. Open the FFmpeg....
Part 1 of 3:
Downloading FFmpeg
-
 Open the FFmpeg download site. Go to https://ffmpeg.zeranoe.com/builds/ in your computer's web browser.
- Although there is a dedicated FFmpeg website, the file that you can download from there won't work with Windows 10.
-
 Click Download Build. It's a blue button on the right side of the page. FFmpeg will begin downloading onto your computer.
- Depending on your browser's settings, you may first have to select a save location or confirm the download.
-
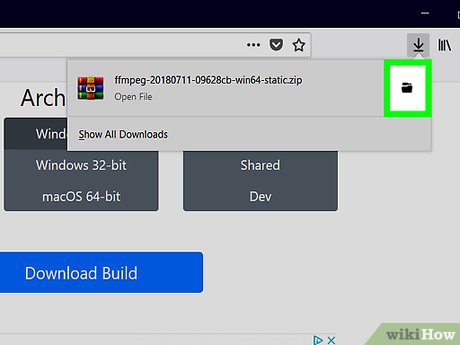 Open the FFmpeg download folder. Double-click the downloaded FFmpeg ZIP folder to do so.
 -
 Extract the FFmpeg folder. You can use your computer's built-in unzip feature to do this:
- Click the Extract tab at the top of the window.
- Click Extract all
- Click Extract at the bottom of the window.
- Wait for the window to open.
-
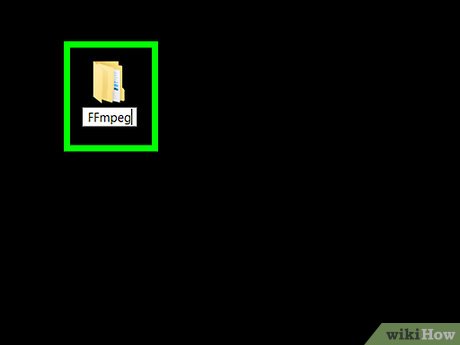 Rename the extracted folder. In the window that opens, you'll see a folder entitled "ffmpeg-20180424-d9706f7-win64-static". You'll need to rename this folder to "FFmpeg" by doing the following:
- Click the folder once to select it.
- Click the Home tab at the top of the window.
- Click Rename in the "Organize" section of the toolbar.
- Type in FFmpeg and then press ↵ Enter.
-
 Copy the "FFmpeg" folder. Select the "FFmpeg" folder if it isn't already selected, then press Ctrl+C to copy it.
- If you don't want to save a copy of the "FFmpeg" folder here, you can press Ctrl+X instead.
-
 Click This PC. It's a folder on the left side of the window, though you may need to scroll up to see it. Doing so opens the This PC window.
 -
 Open your hard drive's folder. Double-click the hard drive folder (usually the "OS (C:)" folder) below the "Devices and drives" heading in the middle of the window.
- If you don't see any folders listed below the "Devices and drives" heading, click Devices and drives once to force the folders to display.
-
 Paste in the "FFmpeg" folder. Click a blank space anywhere inside of the folder, then press Ctrl+V. This will paste the copied "FFmpeg" folder into your computer's hard drive folder. After doing this, you can proceed with enabling FFmpeg in Command Prompt.
Part 2 of 3:
Enabling FFmpeg in the Command Line
-
 Click This PC. It's a folder on the left side of the window, though you may need to scroll up to find it. This will take you back to the This PC folder.
- If you closed File Explorer, click Start , type in this pc, and click This PC at the top of the Start menu.

- If you closed File Explorer, click Start
-
 Click Computer. This tab is in the upper-left side of the This PC window.
 -
 Click Properties. It's a red checkmark on a white box that you'll find in the upper-left side of the window. Doing so opens the Properties window.
 -
 Click Advanced system settings. This link is in the upper-left side of the Properties window. A new window will open.
 -
 Click Environment Variables…. You'll find this button near the bottom of the window. Doing so opens yet another window.
- If you don't see this option, first click the Advanced tab at the top of the window.
-
 Double-click the Path value. You'll find this value in the "User variables for [name]" section at the top of the window. This will open the Path variable's window.
- If you don't see the Path entry, try scrolling up or down with your mouse cursor in the "User variables" section.
- If you want to enable FFmpeg for all users on this computer, you'll instead double-click Path in the "System variables" section near the bottom of the window.
-
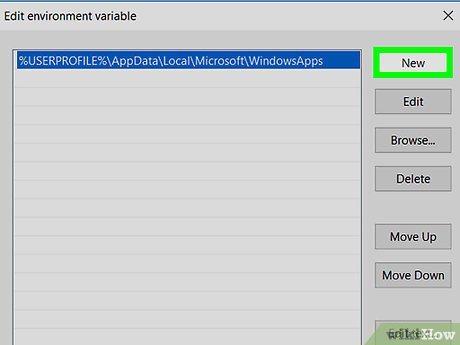 Click New. It's on the right side of the window. This will create a new text field in the window.
 -
 Enter the path to the "FFmpeg" library. Type C:FFmpegbin into the text field, then click OK.[1]
 -
 Click OK on both open windows. At this point, FFmpeg is enabled for Command Prompt, though you're free to test FFmpeg to ensure that it installed correctly.
Part 3 of 3:
Testing FFmpeg
-
 Open Start. Click the Windows logo in the bottom-left corner of the screen. This will open the Start menu.
-
 Search for Command Prompt. Type in command prompt into Start. This will bring up the Command Prompt app icon at the top of the Start menu.
 -
 Open Command Prompt in administrator mode. Right-clickCommand Prompt at the top of the menu, then click Run as administrator and click Yes when prompted.
-
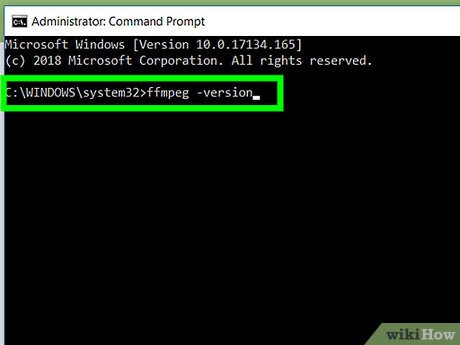 Check your FFmpeg version. Type in ffmpeg -version and press ↵ Enter. This should bring up a list of information about FFmpeg.
- If you instead see the phrase "'ffmpeg' is not recognized as an internal or external command, operable program or batch file" appear, you may have misspelled the path name.