How to Completely Customize Your Windows Desktop Using Rainmeter
One of the things people love most about Windows is the ability to customize your PC down to the smallest detail. With Rainmeter, you can customize your PC like never before. Here's everything you need to get started.
Search for Rainmeter skins
There are thousands of Rainmeter skins scattered across the web, with many sites offering them for free. DeviantArt is the most popular, but you can also check out RainmeterHub or VisualSkins if you need more options.
Finding the right Rainmeter skin is simply a matter of scrolling long enough. Whether you want something minimalist or want to turn your desktop into a sci-fi-inspired machine, there's something for you.
Since most, if not all, Rainmeter skins can also be customized by editing the underlying core files, it's best to start with a base skin and add more widgets or skins on top to suit your needs and aesthetics. Most Rainmeter skins are uploaded as .rmskin packages that you can install as a program and upload right away.
If you want something minimalistic, TipsMake has a list of the best Rainmeter skins for minimalist desktops. On the other hand, if you want something sci-fi that can completely transform your desktop into a futuristic gaming console, you can try this Rainmeter SHIELD theme. If you like a clean, icon-free desktop, this is a Rainmeter layout that can get you started.

Based on experience with the Rainmeter community, chances are you won't find something you like right away. Instead, you may like one element from one theme and a few elements from another.
The great thing about Rainmeter is that it lets you mix and match elements you like from different themes. You can even add your own wallpaper to create a truly unique desktop.
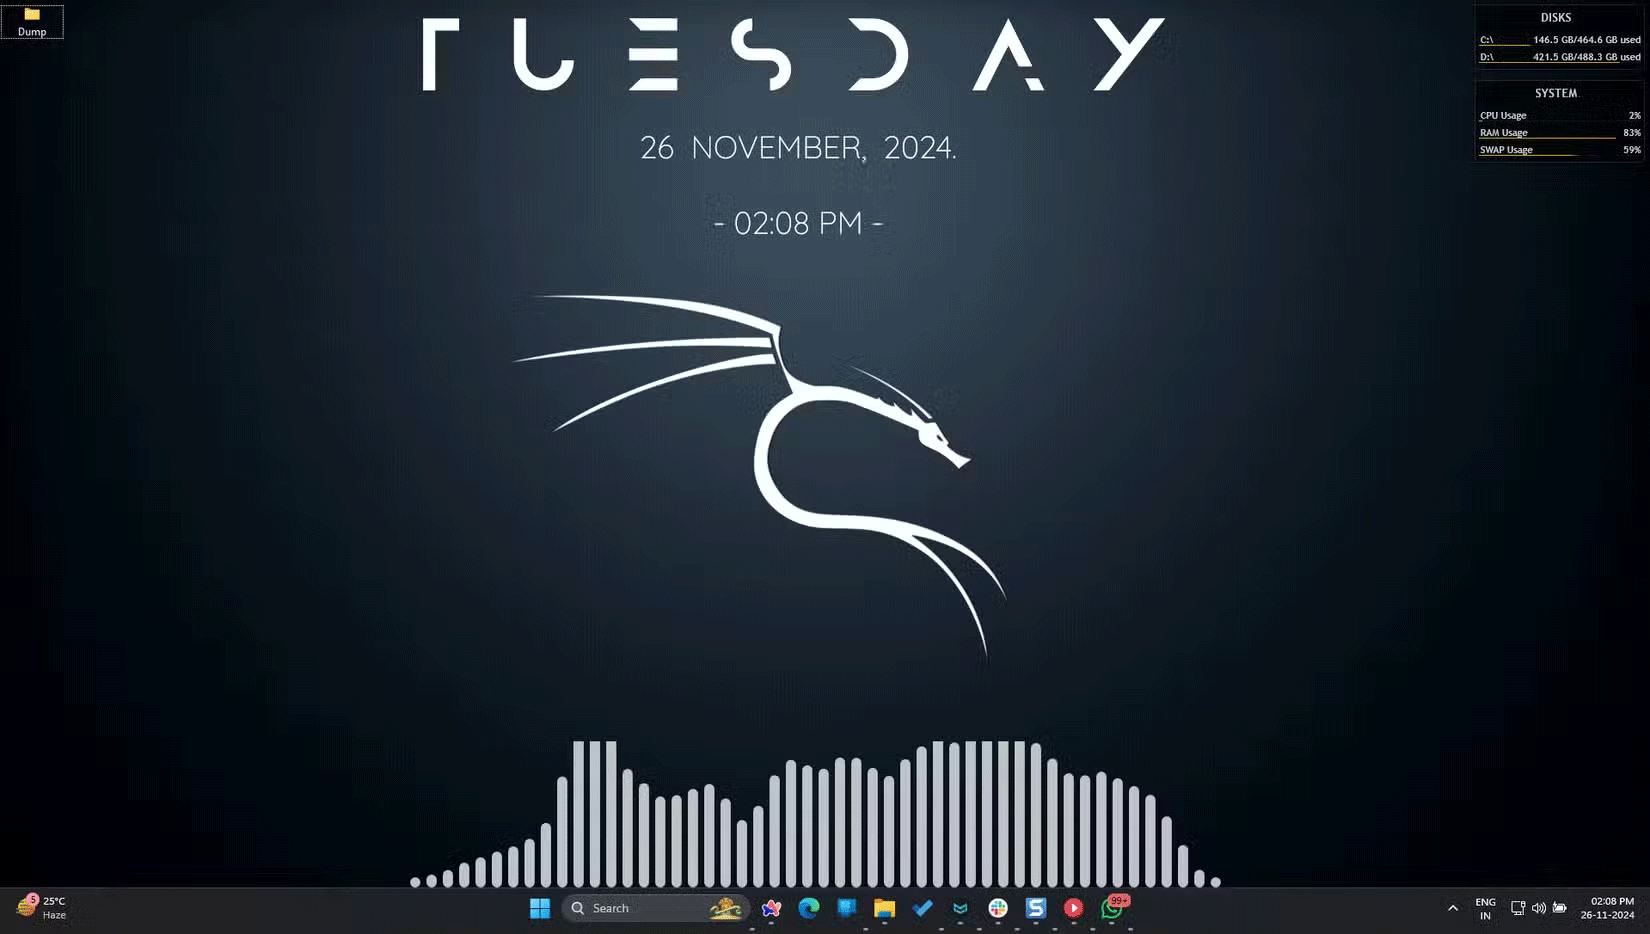
For this reason, you'll find more widgets, effects, and smaller tools than a full skin. You can then use these tools individually or with other components. In the Rainmeter theme screenshot above, the example uses the clock from one skin, while the audio visualizer comes from another.
Customize the interface to your liking/requirements
Most Rainmeter skins will give you some customization options right out of the box. Almost every skin comes with a .ini file for each component that contains the settings for that component. This file is usually called settings.ini or named after the specific skin you are using.
For example, if you're setting up a Rainmeter clock skin, this settings file will contain options for the type of clock, the font used, whether you want the clock in 12 or 24 hour format, colors, etc.
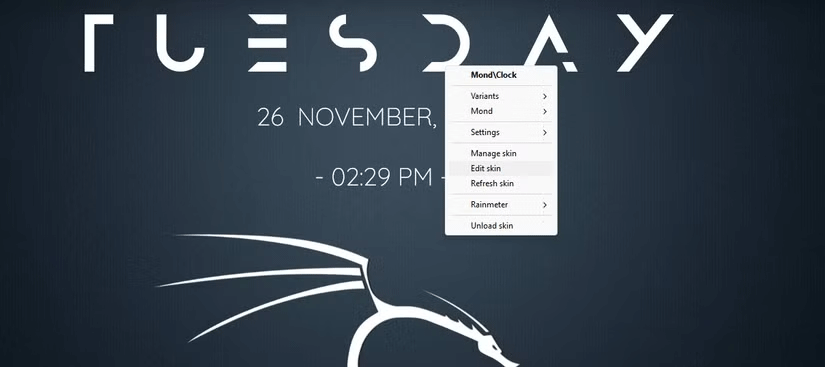
Some developers add a custom UI to the settings panel that makes it easy for beginners to make the changes they want and save them. You can quickly access this by right-clicking on the skin you want to change, hovering over the skin name, and finding the .ini file you want to edit.
However, sometimes you won't find any UI to help, in which case you'll have to edit the skin's source .ini file. You can access them by right-clicking on the skin and selecting the Edit skin option .
If you find yourself staring at a notepad file with no idea what the text inside means, don't worry. There are likely comments about important areas you might need to change, or the developer has provided some documentation online.

Many Rainmeter weather skins require you to enter your location code from a compatible service they support before the skin can display the weather for your area. If such a skin does not come with a settings interface, you will need to enter this location code into the skin's source .ini file.
In the end, you just need to read carefully and find out where the location code is, then replace it. It's much simpler than it looks at first and a little patience will help a lot here.
Eventually, you will be able to understand these source files better and make more changes to tweak the skin to your liking.
Create custom Rainmeter skins
While Rainmeter skins may seem complicated, all you need to create a skin is a text editor and Rainmeter itself. Rainmeter can create text and simple or complex vector shapes like rectangles and circles on its own. However, you'll need a separate image editor like Photoshop or GIMP for more control.
You can see the Creating Skins section in the Rainmeter documentation for a detailed explanation of how skins work underneath, as well as the commands and options you may need to specify.
Creating custom skins is simple at first but can get really complicated as you add shapes, sizes, colors, fonts, variations, and other vector graphics. However, from this point on, the sky is the limit.
Rainmeter is a great way to get started with editing and customization. It's easy to use, lightweight on your PC, has a large support community, and is generally one of the best free tools you can use to bring your desktop to life in unique ways.