How to Change Location Settings in Windows 8
Windows 8 includes a built-in location platform that informs apps, web pages, and networks of your regional location. While this service tailors ads and content to best suit your needs, location services can also be invasive. You can...
Table of Contents
Method 1 of 3:
Changing Regional Location Settings
-
 Click the "File Explorer" icon. File Explorer is the folder-shaped icon next to the Start menu.
 -
 Click the "Desktop" option. You can find "Desktop" in the left-hand sidebar of the File Explorer menu.[1]
 -
 Double-click the "Control Panel" option. This will open the Control Panel app, from which you can alter your system's settings.
- You can also open Control Panel by holding down ⊞ Win and tapping X, then clicking the "Control Panel" option in the resulting pop-up menu.[2]
-
 Double-click the "Clock, Language, and Region" option. This section of Control Panel lets you alter you time and date, preferred language, and regional location.[3]
 -
 Click "Change Location" under the "Region" section. "Region" is at the bottom of the "Clock, Language, and Region" menu.
 -
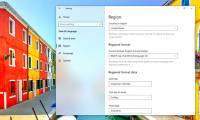
 Click the "Location" tab. You can select a regional location from this section.
 -
 Click the field under "Home location". This will prompt a drop-down menu with different country options. Changing this option is helpful if you recently moved or if you never set your country to begin with.
 -
 Select your country of residence. If you don't see your country immediately, try scrolling down.
 -
 Click "OK" to confirm your changes. You have successfully changed your regional location settings!
Method 2 of 3:
Changing Network Location Settings
-
 Make sure you are logged onto your preferred wifi network. You'll need to be actively using your wifi network in order to make changes to its location settings.
- To log onto a wifi network, click the wifi symbol in the toolbar in the lower right-hand corner of your screen, then click your preferred network's name. You may have to enter a password before you can log on.
-
 Click the wifi symbol in the lower right-hand corner of your screen. This will open the network menu, from which you can select your current network.
 -
 Right-click your chosen network. This will prompt a drop-down menu with network settings choices.
 -
 Click "Turn sharing on or off". Network sharing is optimal for private networks, since you don't have to worry about an unwanted member stealing your data via network share.
 -
 Review your options. When you first register a network, Windows asks if the network is "Home", "Work", or "Public"; your chosen category dictates the security settings for that network. Changing network sharing settings can alter your initial settings--for example, if you accidentally set your home network as a "Public" one, selecting "Turn on sharing..." will reformat the network to give it private attributes. [4]
- Click "No, don't turn on sharing or connect to devices" if you want your network to have public attributes. This will prevent your computer from being visible to other computers and devices (e.g., Bluetooth speakers or printers). If you do this while at home, you won't be able to use your other home-networked devices from your computer.[5]
- Click "Yes, turn on sharing and connect to devices" if you want your network to have private attributes. This will make your computer visible to other computers and devices, effectively bypassing the traditional "Private" network security. Be careful about doing this in a public location, since it can allow potentially harmful sources to access your computer.
-
 Return to your desktop. You have successfully altered your network location settings!
Method 3 of 3:
Disabling Location Services
-
 Click the "File Explorer" icon. File Explorer is the folder-shaped icon next to the Start menu.
 -
 Click the "Desktop" option. You can find "Desktop" in the left-hand sidebar of the File Explorer menu.
 -
 Double-click the "Control Panel" option. This will open the Control Panel app from which you can alter your system's settings.
- You can also open Control Panel by holding down ⊞ Win and tapping X, then clicking the "Control Panel" option in the resulting pop-up menu.
-
 Double-click the "Location Settings" option. If you don't want your computer updating third-party sources with your location, you can disable location services from here.
 -
 Click the box next to "Turn on the Windows Location platform". This should remove the check mark from the box, indicating that the Location platform is no longer active.[6]
- To enable location services, click the box again. Make sure the box has a check mark before closing the menu.
-
 Click "Apply" to confirm your changes. You have successfully disabled location services!
- Keep in mind that disabling location services will impact features such as desktop news, app data gathering, and website data gathering. If you rely on having these experiences tailored to your location, do not disable location services.
Was this article helpful?
Your feedback helps us improve.
Related Articles
 How to change regional settings on Windows 103 minutes read
 How to use Bottom Quick Settings to change the location to open Quick Settings5 minutes read
 Steps to change Taskbar position on Windows 113 minutes read
 The most detailed guide on how to change your location on your phone.9 minutes read
 How to change the location of Taskbar on Windows 103 minutes read
 How to change where Windows screenshots are saved2 minutes read
Reader Comments 0
Sign in with email or Google to join the discussion.