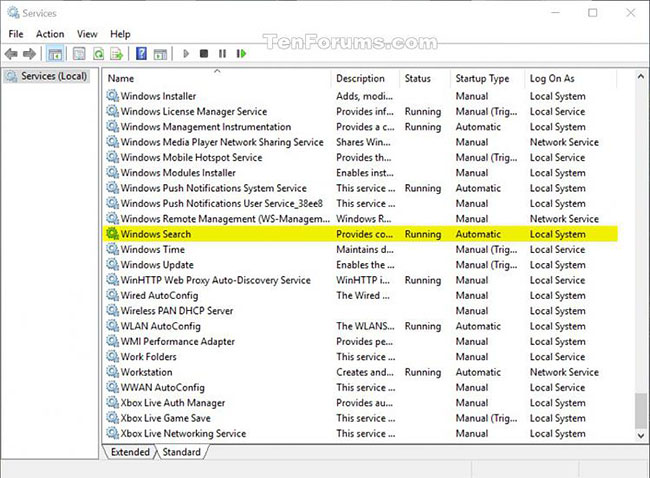
How to change the storage location of Search Index in Windows 10
By default, Windows will use the index when searching to give you faster search results. The search index (Search Index) includes only the locations you have selected. These locations can be filtered by the type of file (extension), file attributes, and the file content you want to index.
Search Index data files are stored in the % ProgramData% MicrosoftSearchData folder location by default. You can choose to store the index in any other internal location you want. You will not be able to choose to use removable media, networks or external locations as an index storage location.
This tutorial will show you how to change the storage location of Search Index data file in Windows 10.
Note : You must be logged in as an administrator to make changes.
Change the storage location of Search Index under Indexing Options
1. Open Control Panel (icon view), click the Indexing Options icon and close Control Panel.
2. Click the Advanced button .

3. Click the Select new button in Index Location.
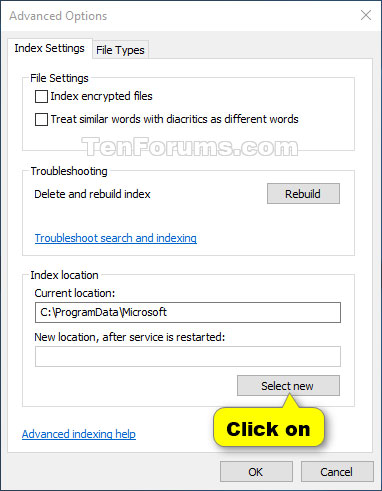
4. Browse to and select the new location (eg "D" ) you want to save the index data files and click OK.
Note : The new location is where the Search / Data folders will be saved.
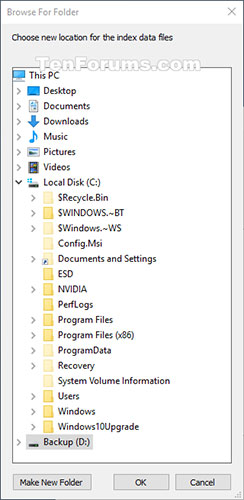
5. Click OK to apply.
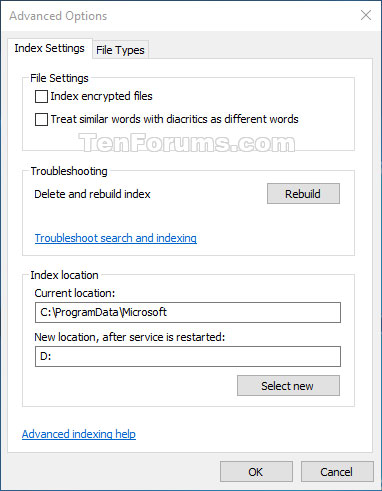
6. Click Close.
Change the storage location of Search Index in Registry Editor
1. Press the Win + R keys to open the Run dialog box, enter regedit and click OK to open the Registry Editor.
2. If prompted by UAC, click Yes.
3. Navigate to the location of the key below in the Registry Editor.
HKEY_LOCAL_MACHINESOFTWAREMicrosoftWindows Search 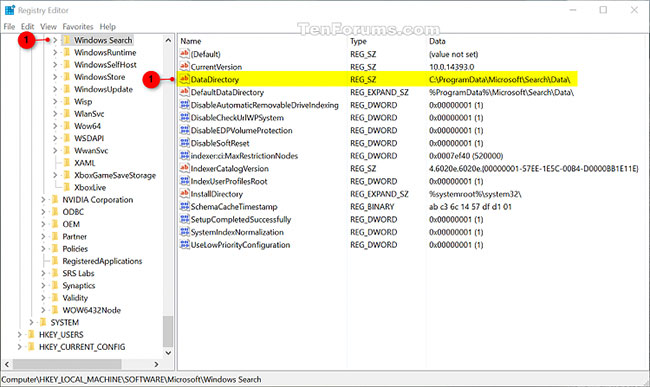
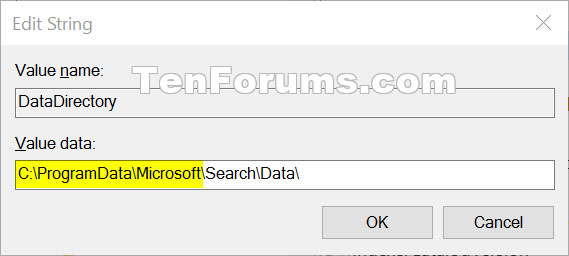
4. To the right of the Windows Search key, double-click the DataDirectory string value to modify it.
5. Enter the full path of the location you want to store the index, add SearchData to the end of this path and click OK.
6. Close Registry Editor.
7. Stop and restart the Windows Search service to apply changes.
