Table of Contents
This updated guide examines Drive: How to Format Windows 8 and organizes the essential facts, background, and practical takeaways in clear American English.
Method 1of 2:
Formatting a Hard Drive to Install Windows 8
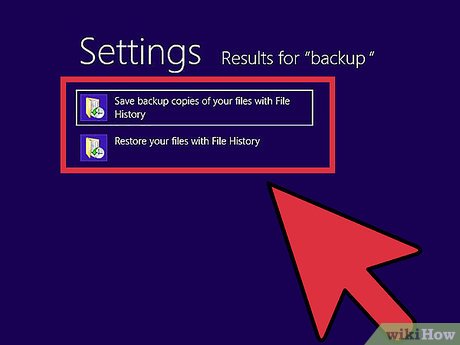 Backup any important data. Formatting your hard drive will delete everything on it, so make sure that all of your important files are backed up somewhere safe. Click here for instructions.
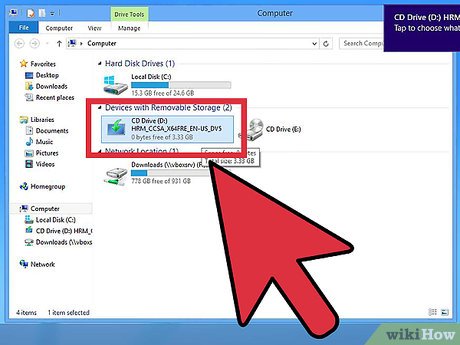 Insert your Windows 8 DVD. The easiest way to format your hard drive is to reinstall your operating system, which will format the drive in the process. You will need your Windows 8 installation DVD to do this.[1]
- Note: This guide will walk through the steps for formatting and installing Windows 8, but you can use this method with any version of Windows or Linux. Most versions of both Windows and Linux have very similar installers that will guide you through the process.
- If you only have an ISO file for your operating system, click here for instructions on burning it to a DVD so that you can boot from it.
 Restart your computer.
 Open your computer's BIOS menu before Windows boots. The key to open the BIOS menu is typicallyF2,F10,F11, orDel. Your computer will display the proper key before Windows loads.
- If your computer is booting too fast to enter the BIOS, click here for instructions on forcing the Advanced Startup menu to appear.
 Open the BOOT menu in your BIOS. This will allow you to change the order of devices that your computer tries to boot from.
 Set your DVD drive as the primary drive. This will make your computer try to boot from the DVD first, allowing you to start the Windows 8 installation.
 Save your changes and exit the BIOS. Your computer will reboot.
 Press any key when prompted to start the Windows 8 installation. The setup program may take a few minutes to load.
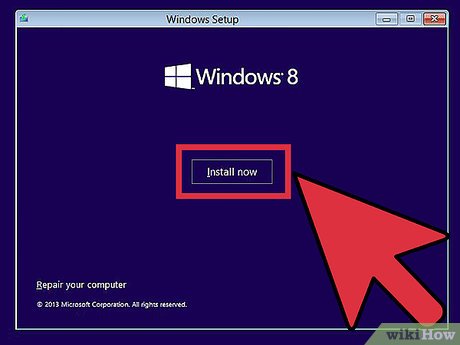 Click the "Install now" button. This will begin the installation process.
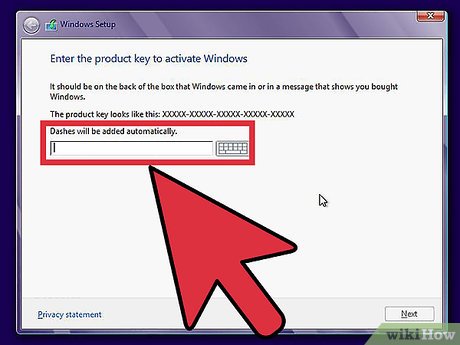 Enter your Windows 8 product key. This is a 25-character key that is unique to your copy of Windows. You will need this key to proceed with the installation.
- You can usually find the key on your installation disc's case, affixed to your computer, or in the confirmation email for your online purchase.
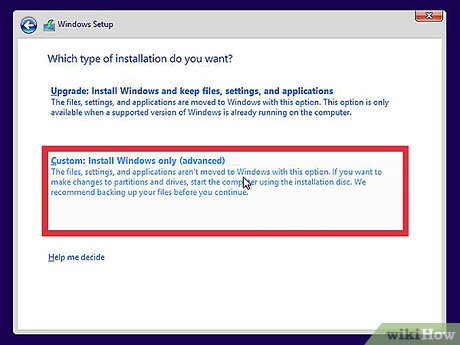 Click "Custom" asked what kind of installation you want to do. This will allow you to format your drive before reinstalling Windows 8.
- In general, it is recommended that you never select an "Upgrade" installation. While this will save your data and installed programs, it will often lead to errors and software conflicts.
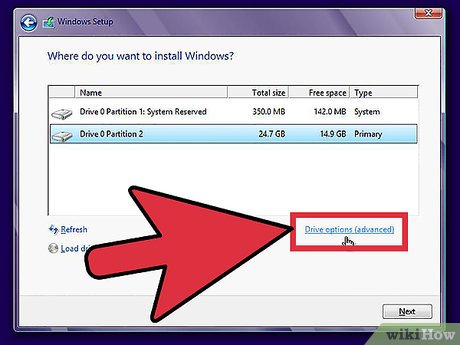 Click "Drive options (advanced)". This will not be present if you are installing Windows 8.1.
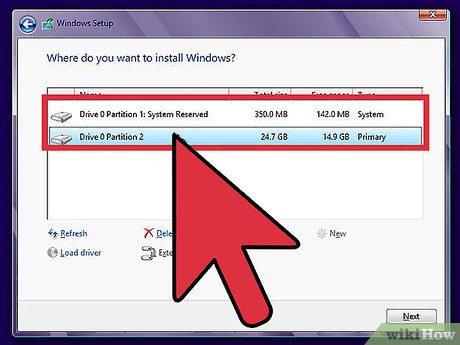 Select the partition that you want to format for Windows 8. If you are reinstalling Windows 8, select the drive that currently contains Windows 8.
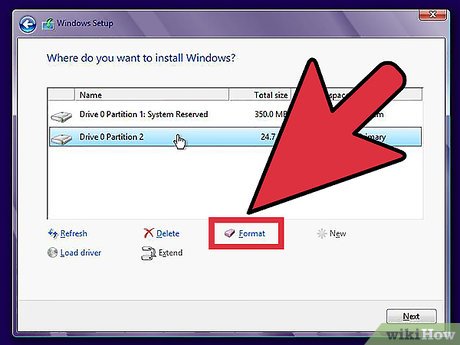 Click "Format". This will format the drive using the NTFS file system, which is the file system used by the Windows operating system.[2]
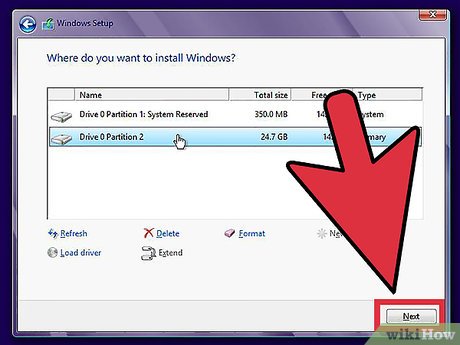 Click. Next to proceed with the Windows 8 installation. For more details on installing Windows 8, click here.
Method 2of 2:
Wiping and Formatting the Drive
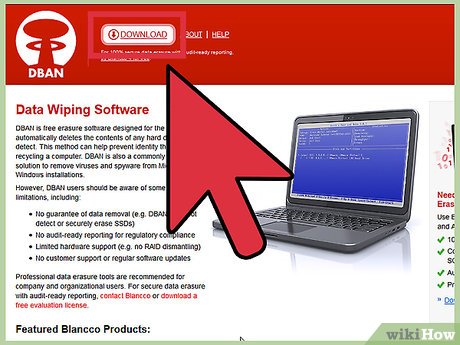 Download DBAN. DBAN (Darik's Boot and Nuke) is a free hard driver eraser that will completely wipe the entire hard drive containing Windows 8. The hard drive will be empty and need to be either initialized by another operating system for storage or have an operating system installed on it.
- This will delete everything on the drive, so make sure anything you need to save has been properly backed up. You will not be able to use data recovery software on the drive afterwards to retrieve anything you forgot.
- If Windows 8 is your only operating system, you won't be able to use the computer until you install a new operating system or reinstall Windows 8.
- Do not use this method if you have a solid state drive (SSD). If you are formatting an SSD, the best way is to simply reinstall your operating system on it. Do not use traditional data-wiping methods when trying to completely format an SSD. These can drastically reduce the lifespan and may not actually remove any data.
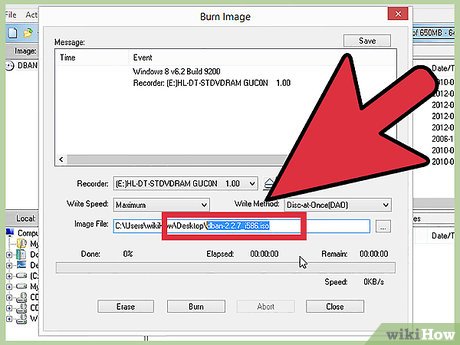 Burn the DBAN image to a blank DVD. DBAN is downloaded in ISO format, which is a disc image file. This allows you to burn it to a disc so that you can boot your computer from it. You can use a free burning tool like ImgBurn to burn the ISO to a disc. Click here for detailed instructions.
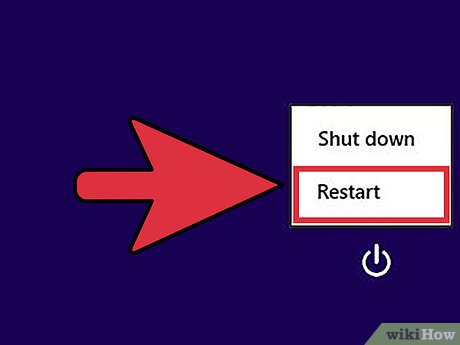 Reboot your computer. You will need to open your BIO settings to change the boot order.
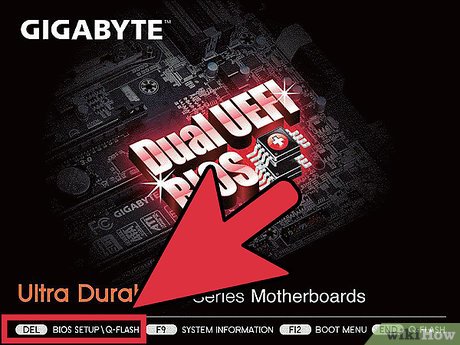 Press your BIOS setup key before Windows loads. This is typicallyF2,F10,F11, orDel. Your computer will display the proper key before Windows loads.
- If your computer is booting too fast to enter the BIOS, click here for instructions on forcing the Advanced Startup menu to appear.
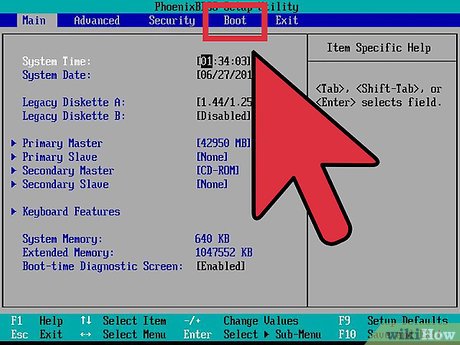 Open the BOOT menu in your BIOS. This will allow you to change the order of devices that your computer tries to boot from.
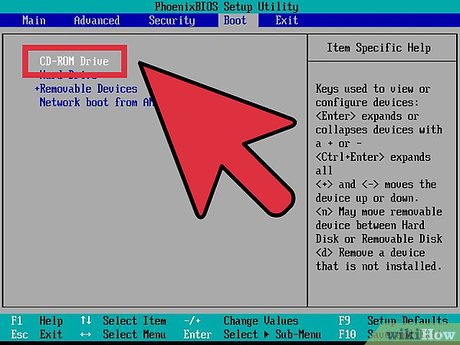 Set your DVD drive as the primary drive. This will make your computer try to boot from the DVD first, loading DBAN.
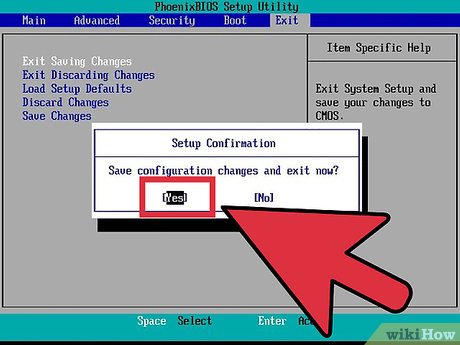 Save your changes and exit the BIOS. Your computer will reboot and DBAN will start.
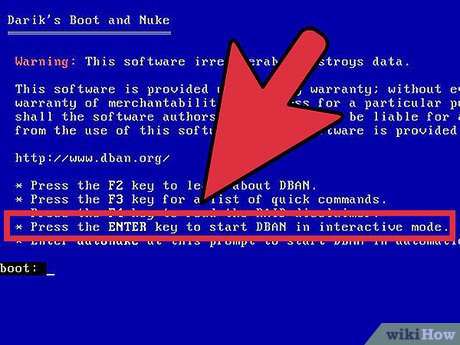 Press. ↵Enter to start DBAN. DBAN will take a few moments to load.
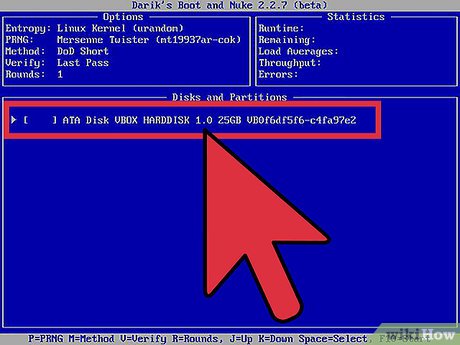 Use the arrow keys and then press. Space to select the drive you want to erase. If you have multiple drives, be absolutely sure that you have the right drive selected. You can use the drive sizes to help determine which drive is which.
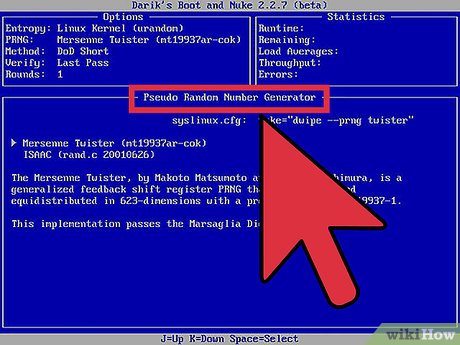 Set your wipe settings. There are several settings you can change, but most users can simply leave everything at default.
- PressPto open the "PRNG" menu. This stands for Pseudo Random Number Generator, which is the algorithm used to wipe the drive. There are two different algorithms to choose from.
- PressMto open the "METHODS" menu. These are the number of passes that DBAN will make over the drive. More passes means a more secure erase, but also significantly increases the time it will take. If you're just wiping the drive to reinstall, you can choose one of the lighter-security methods. If you're wiping to erase sensitive data before recycling the drive, select one of the more secure methods.
- PressRto set the number of "ROUNDS". This is the number of times the wipe process will be run. More rounds means a more secure wipe.
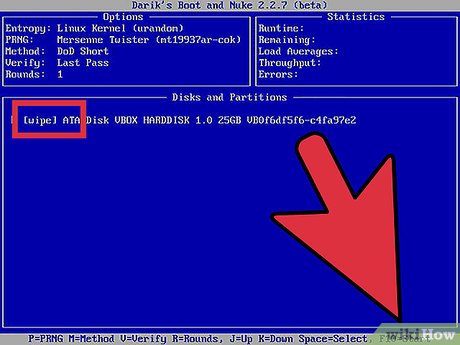 Press. F10 to start wiping the drive. DBAN will use the methods you picked to begin overwriting all of the sectors on your drive. You will be able to see the time remaining in the upper-right corner.
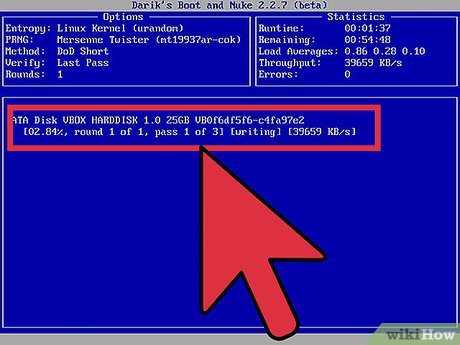 Use or dispose of your newly-wiped hard drive. Now that your hard drive is wiped, you can move on to doing whatever it is you want to do with it.
- If you want to reinstall Windows 8 or install another operating system on it, click here. This will format the drive and install the operating system. If you wiped your only hard drive with an operating system installed, you'll need to install an operating system before you can use it again.
- If you want to use the drive as storage for another operating system, click here for instructions on formatting it for use as storage.
- If you want to recycle your computer, click here.
- If you want to sell your computer, click here.
FAQ
What is Drive: How to Format Windows 8 about?
It provides a structured overview of drive, explains the main context, and highlights practical takeaways for readers.
Why does this topic matter?
Understanding the main concepts helps readers evaluate the issue, avoid common mistakes, and make better-informed decisions.
How should readers use this information?
Use the guidance as a practical starting point, confirm details that may have changed, and follow current product, safety, or security recommendations.
Related Articles
 Instructions to Format USB Pendrives with Command Prompt4 minutes read
 How to Change the Date and Time Format on Windows, Change the Slash to a Dot10 minutes read
 How to Change Number Format in Windows 113 minutes read
 4 Ways to Fix USB Errors Without Formatting: 'Windows Was Unable5 minutes read
 How to Change the Date and Time Format on Windows?7 minutes read
 How to Format a Drive with ReFS in Windows 103 minutes read
Reader Comments 0
Sign in with email or Google to join the discussion.