How to Configure Profile Manager in OS X Mavericks Server App 3.X
Now that you have set up your Server and configured Open Directory, you are ready to start managing your devices on the network with Profile Manager. Profile Manager allows you to configure settings on your devices from a central location...
Part 1 of 3:
Configure and Start Service
-
 Open Server App from Launch Pad.
 -
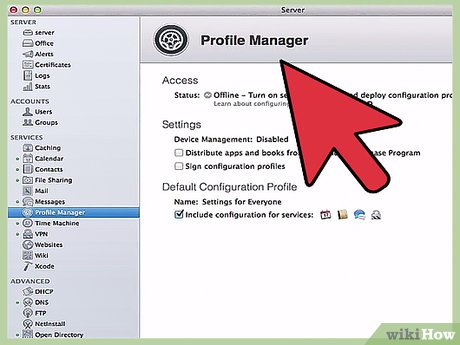 Click on Profile Manger located in the left pane of the window.
 -
 Configure Device Management by clicking on the Configure button.
- Read the overview and click the Next button when finished.
- Enter your organizations information and click the Next button when finished.
- Choose the certificate that you would like to use and click the Next button when finished. NOTE: If you produced a certificate yourself, you will receive a warning that it is not signed by a trusted certificate authority.
- Enter your Apple ID and password to obtain a push certificate from Apple and click the Next button when finished.
- Wait for service to finish setting up and click the Finish button when done.
-
 Enable the ability to 'Enroll devices using the Device Enrollment Program'. You will have to register your domain on Apple's Deployment Program website before you can continue. If you are running the server out of your home, this feature is not needed.
 -
 Enable the ability 'Distribute apps and books from the Volume Purchase Program'. This feature is not needed if you are running the server out of your home.
 -
 Choose your default configuration profiles by clicking on the Edit button.
- Name the profile, check the box if you would like to include services that have been configured, and click the Ok button when finished.
-
 Enable Sign Configuration Profiles by clicking the Edit button.
- Choose the certificate that you would like to use from the drop down menu and click Ok when finished.
-
 Turn on the Profile Manager service by click on the switch in the upper left hand corner of the window.
Part 2 of 3:
Configure Profiles for Your Devices
-
 With the Server App open and Profile Manager selected, you can get to the configuration area by two different means.
- Open Safari and type in the following: www.yourdomain.com/ProfileManager
- Clicking the arrow next to Open Profile Manager near the bottom of the window.
-
 Enter an authorized users credentials that has administrative privileges.
 -
 To start configuring the settings by Group, Users, Devices, or Device Groups. Click on the desired choice. Suggestion is to do this by Group.
 -
 Click on the Settings tab and click the Edit button.
 -
 Go through the list and start entering your desired configurations then click Ok button when finished.
 -
 Click Save so that the settings will be pushed to the User, Group, Device, or Device Group.
 -
 Repeat for each User, Group, Device, or Device Group.
Part 3 of 3:
Enroll Devices
-
 Open the enrollment site (i.e. www.yourdomain.com/mydevices) on the device that you wish to enroll.
 -
 Log in with the user's credentials that the device will belong to.
 -
 Click on the Profiles tab
- Download and install both Profiles starting with the Trust certificate.
-
 Click on the Devices tab.
 -
 Click the Enroll button and install the Remote Management Profile.
 -
 Your device is now enrolled and will automatically receive profiles that are associated with the user, group, or device group.
5 ★ | 1 Vote
- Free upgrade guide to OS X Mavericks
- Attention when downloading OS X Mavericks
- How to configure DNS Server on Ubuntu Server 11.04
- How to Configure Users and Groups in OS X Mavericks Server App 3.X
- Common errors when upgrading OS X Mavericks
- The configuration list can install OS X 10.9 Mavericks
- Instructions for configuring IPv6 on Windows Server
- How to install and configure MySQL server on Pi
- Creating SSL Server 2008 Server with ISA 2006 Firewalls (Part 1)
- How to install and open File Server Resource Manager in Windows Server 2012
MORE LIKE THIS
- How to Convert a Doc File to a Docx File
- How to Download Microsoft Word
- How to Insert Fillable Fields on Word on PC or Mac
- How to Copy and Paste in Microsoft Word
- How to Protect a PDF File from Copying
- How to Type in Korean on a Computer
- How to Recover Word Documents
- How to Reinstall Wireless Drivers
- How to Connect a Wireless Mouse
- How to Trim a Video on PC or Mac
-
 Create an AI voiceover for poems and inspiring stories.
-
Instructions on creating a Froggy Jumps game on Educaplay
-
How to make a piano game using Scratch
-
Instructions on how to add ChatGPT to Google Sheets
-
How to rotate any page horizontally in Word
-
How to install SPSS on a MacBook: A step-by-step guide.
 Create an AI voiceover for poems and inspiring stories.
 Instructions on creating a Froggy Jumps game on Educaplay
 How to make a piano game using Scratch
 Instructions on how to add ChatGPT to Google Sheets
 How to rotate any page horizontally in Word
 How to install SPSS on a MacBook: A step-by-step guide.