Table of Contents
Vacuum cleaners are items selected by many families to clean each room, clean up all kinds of dirt. Most machines have a rather bulky body, no matter how portable.
Along with Network Administrator started to become a technology engineer with a portable vacuum cleaner as instructed. Note, there are specific GUIDE VIDEO at the end of the article!
1. Raw materials to prepare a vacuum machine:
- 2 soft drink bottles of hard shell type.
- 1 empty canister, coca can or cow's milk can to make a propeller.
- Iron wire is about 0.5 mm thick - 2mm.
- Motor 5v.
- 7.4v battery or 6v charger.
- Jack DC (DC motor) 5v.
- 1 plastic tube, wire surface.
- 1 cloth to make a filter.
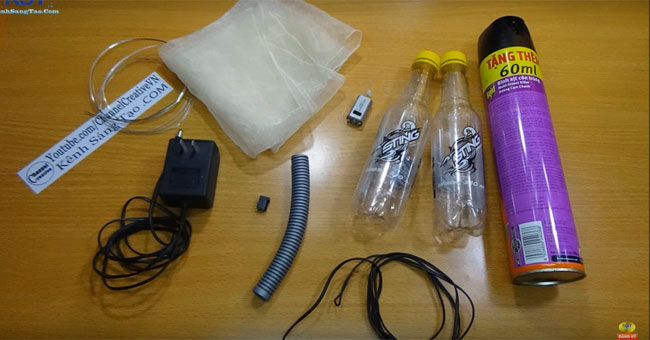
Raw materials for making vacuum cleaners.
You can refer to a number of vacuum cleaner models with many different manufacturers, diverse and abundant at META online shopping channel:
2. Instructions for making handheld vacuum cleaners:
Step 1:
Cut the water bottle into two unequal bodies and heads.
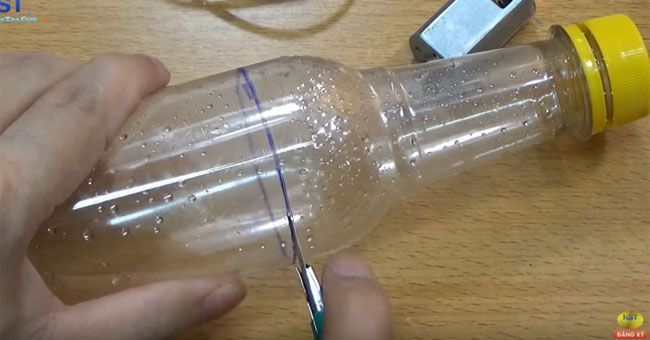
Cut plastic bottles into two parts.
Step 2:
Cut the can into a circle with a diameter close to the mouth of the cut body in step 1. From the center of the circle continue to draw a second small circle.
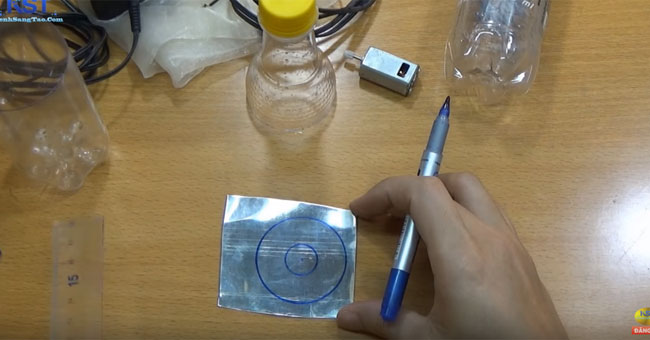
Create a propeller
Step 3:
Then divide the circle into 8 equal parts. You use scissors and cut the 8 parts to create a fan. The cutoff limit is the outer ring of the second circle. 8 sections bend to form a fan.
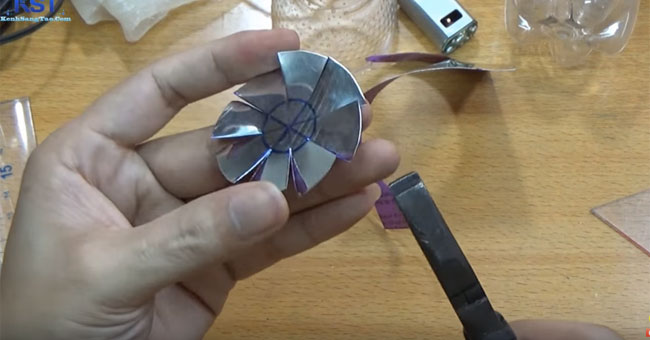
8 section bends into a fan shape.
Step 4:
Use a drill or screwdriver head to drill a small hole right at the center of the propeller.

Create small holes right in the center of the fan.
Next, attach the gear of the motor head that fits snugly into the hole. Use glue to fasten both ends.
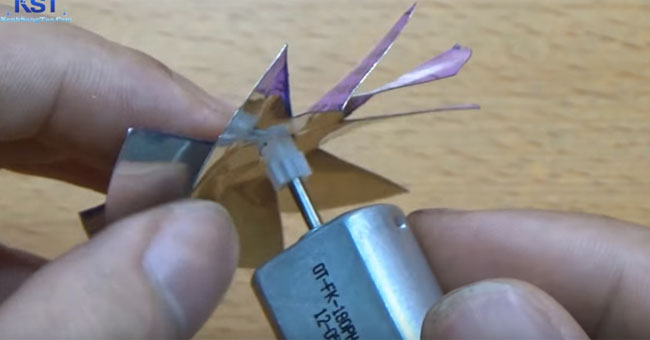
Attach the gear part of the motor to the hole in the center of the fan.
Step 5:
Attach the power cord to the 2 ends of the motor.
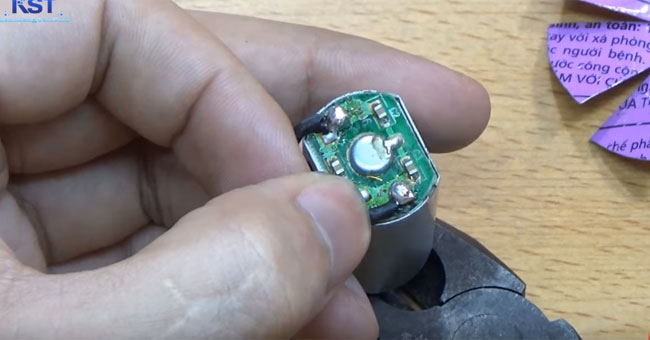
Attach the wire to the motor.
Step 6:
Drill small holes around the tail of the bottle body.

Drill holes around the lower part of the bottle body.
Use about 2 30 cm lengths of iron wire tied around the motor to form a plus sign as shown below. Remember to twist the ends of the iron wire.
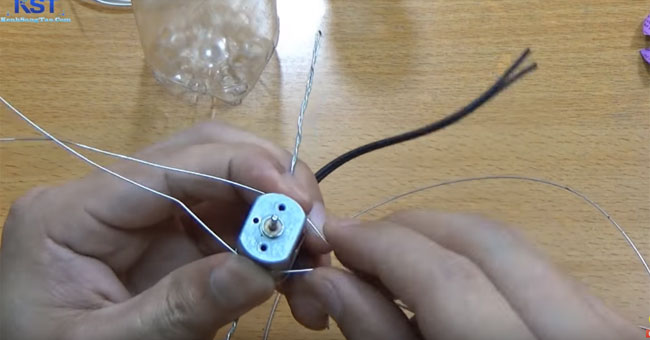
Using iron wire tied around motor tissue into a plus sign.
Step 7:
Attach the motor to the body of the bottle. Apply AB glue around the motor head and the iron ends.
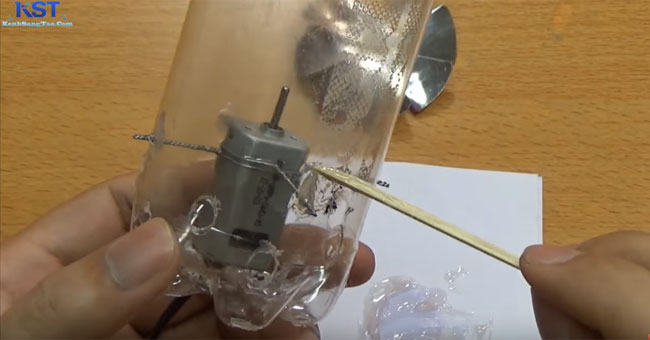
Attach the motor to the body of the bottle.
Then use decals that stick around the bottle. Depending on the color or decorative details for the vacuum cleaner, you can choose any kind of decals.

Paste decals around the body of the bottle.
Step 8:
Use a screwdriver and pliers to attach the propeller, fixed into the motor.
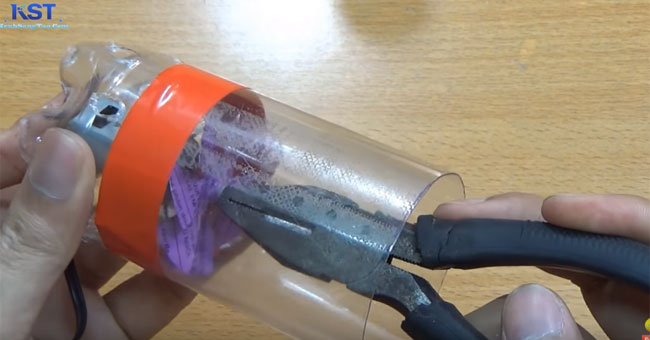
Attach the fan to the inside of the motor.
Step 9:
Solder the 5v DC jack to the two motor wires at the bottom of the bottle. Use fixed glue DC 5v at the bottom of the bottle.

Solder 2 wires into the 5v DC jack.
Step 10:
Use the other plastic bottle to cut a small piece and attach it to the top of the bottle body containing the motor with foam tape. Use scissors AB to apply around that connection.

Attach a part of the bottle to the top of the bottle body.
Step 11:
Use curling iron wire into a circle so that it fits into the bottle.
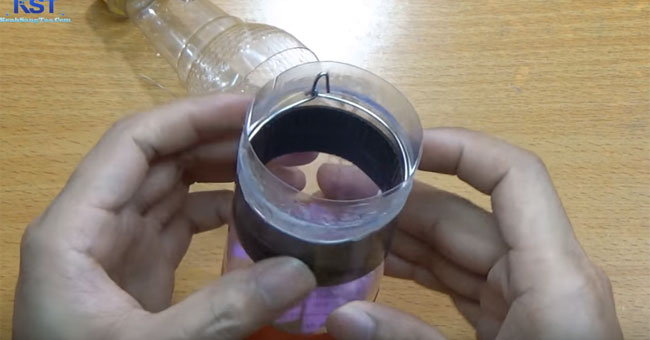
Put the circular iron in the bottle.
This iron works as a dust shield when we attach the cloth to the inside, also fix the cloth into iron pieces with glue.

Create a dust filter film
Step 11:
Use the top of the plastic bottle attached to the bottle body to form the complete machine. Cut holes in bottle caps so that they fit snugly into plastic pipes. Use glue to fasten them together.
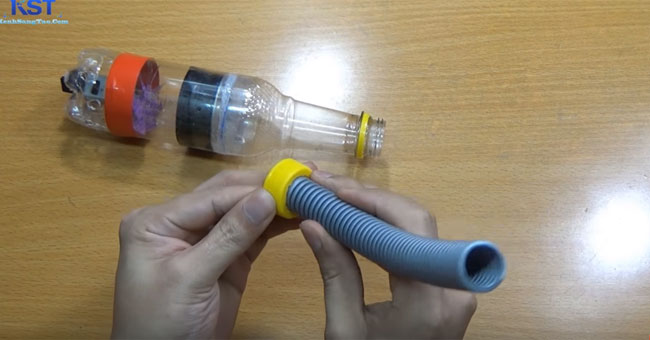
Attach the plastic tube to the bottle cap to form a dust collector.
Cut two small pieces of iron to make the switch and solder the wire.
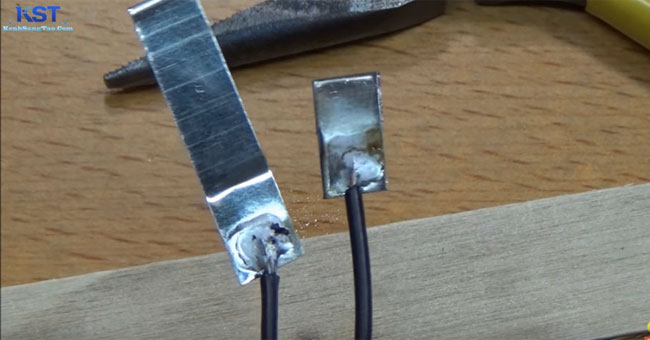
Weld the wire into two small pieces of iron as a switch.
Next, use glue to attach the iron to the body of the bottle. Depending on the position you hold your hand to press the switch.
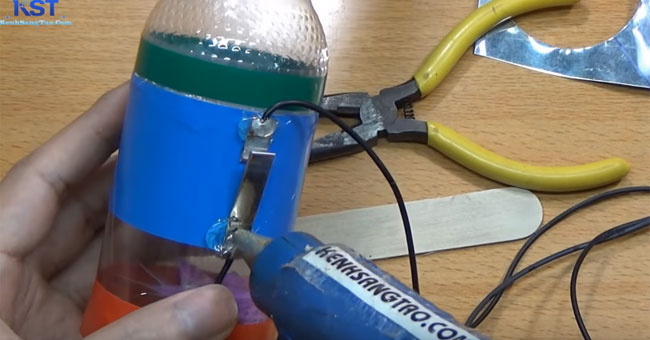
Create switches for vacuum cleaners
Step 12:
Attach the power cord to the 5v DC jack under the bottle body, then plug in the power to use.
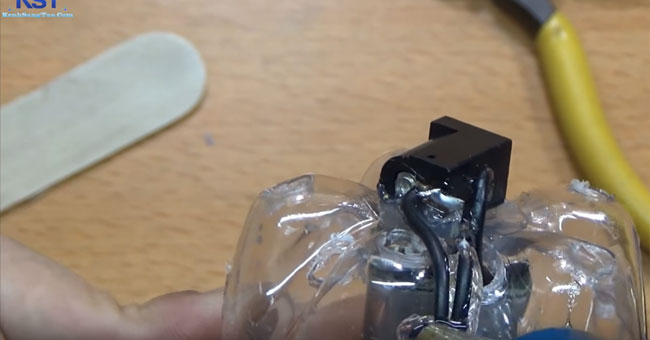
Solder the wire to the 5v DC jack.
So you can use this mini vacuum cleaner right away. When plugging in and turning on the switch, the dust will be sucked in and the fabric inside will prevent it from falling into the motor.
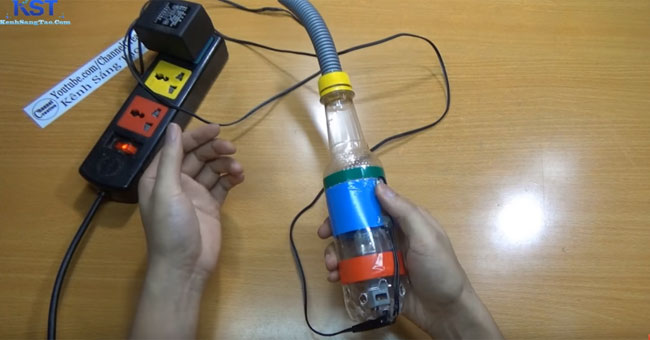
Plug in the power and use a vacuum cleaner.
3. Watch the instruction video as a portable vacuum cleaner:
Let's work together and admire your achievements.
Refer to the following articles:
- How to make super simple mini fan radiator fan.
- 3 simple ways to check the configuration and hardware information of computers and laptops.
- Four step instructions for installing more RAM.
I wish you all success!
FAQ
What is vacuum cleaner?
Attach the wire to the motor.
What makes vacuum cleaner notable?
Step 7: Attach the motor to the body of the bottle.
What are the key facts about vacuum cleaner?
Attach the motor to the body of the bottle.
Related Articles
 Is It Safe to Use a Vacuum Cleaner to Suck Water?5 minutes read
 Good Tips to Help Use Vacuum Cleaners Effectively8 minutes read
 What Kind of Mini Vacuum Cleaner Is It4 minutes read
 Which Model Industrial Vacuum Cleaner Is Best?7 minutes read
 Top Vacuum Cleaners Priced Under 2 Million Are Hunted for the End7 minutes read
 How Does a Vacuum Ec-hx100 Work5 minutes read
Reader Comments 0
Sign in with email or Google to join the discussion.