Effectively use table features in Excel 2010
For repeating or similar data in Microsoft Excel, you can use the table feature to work most effectively. Microsoft Office 2010 version has new improvements in terms of graphics, so the use of the table also becomes simpler..
For repeating or similar data in Microsoft Excel, you can use the table feature to work most effectively. Microsoft Office 2010 version has new improvements in terms of graphics, so the use of the table also becomes simpler.
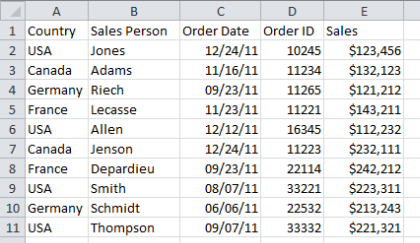
We start with an Excel file as follows:
To convert it to a tabular format, select the data area, click the Insert tab, and click the Table icon. A window will appear asking you to define the data area for the table:
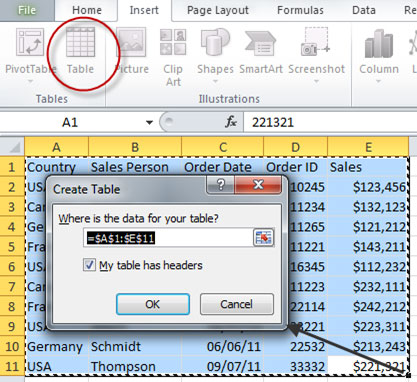
You just need to press OK because you have selected the previous data. The results are as follows:
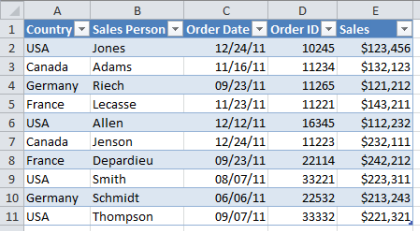
This is the default standard format of the table. Now that you have converted the data to a tab, a new Table Tools tab will appear in the ribbon bar:

One of the first things you can do is to change the format of the table automatically by clicking on one of the available templates:

This will help your spreadsheet look more professional while you don't waste your effort. Next, notice the newly added arrow in the first row of each column:

Clicking on one of the arrows will receive a drop down menu similar to the following:
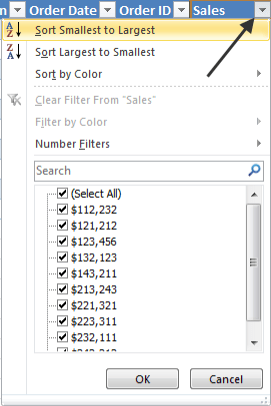
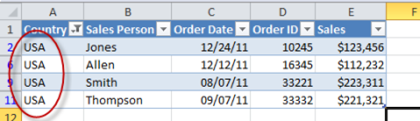
Using these options you can sort or filter data. To sort, select one of the available sorting functions. To filter the data, type the desired data and press the Enter key:
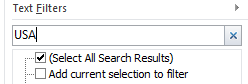
You will receive a summary table that includes only the data you need. If you want to delete the filter, click on the arrow again and select Clear Filter from "." :
You can easily add a new one to the table by typing the heading name right next to the already existing heading:
Or you can add a row in the middle of the table. Previous formats will be applied automatically to new rows and columns. If you drag down the scroll bar, the first heading heading is always floating, making it easy to control the data added later.

Excel also provides a means to easily remove duplicate data in the table. On the Table Tools tab, select the Remove Duplicates icon:
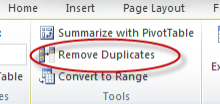
A popup window shows you how to arrange duplicate data to remove them. When you click the OK button, it will delete duplicate cells for you.
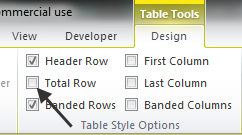
Another useful feature is Total Row . To use you tick the box Total Row in the area Table Style Options :
Excel will automatically add a row to the bottom position of the table:
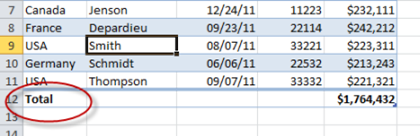
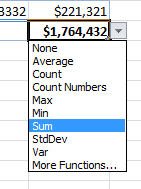
All columns with money format will be added to. Clicking on each cell in the Total row will see a significant number of calculations that Excel provides as follows:
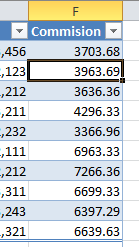
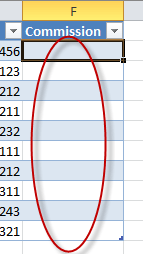
Finally, we will examine another interesting feature of Excel that is automatically generating data. When you add a new column to the table, for example Commission , then type a formula in the first box to calculate:

Immediately after pressing the Enter key, this formula will automatically be applied to all remaining cells in the column: