The following article provides detailed instructions for you to create tables in Excel.

To create the table, follow these steps:
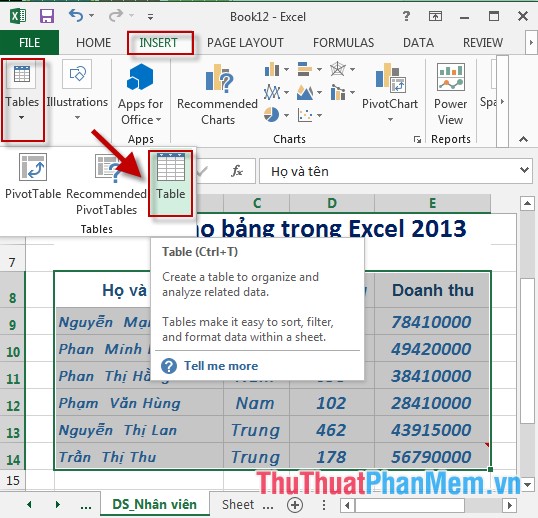
Step 1: Go to the Insert tab -> Tables -> Table:
Step 2: The Create Table dialog box appears -> in the Where is the data for your table section, select the data area to create the table -> OK:

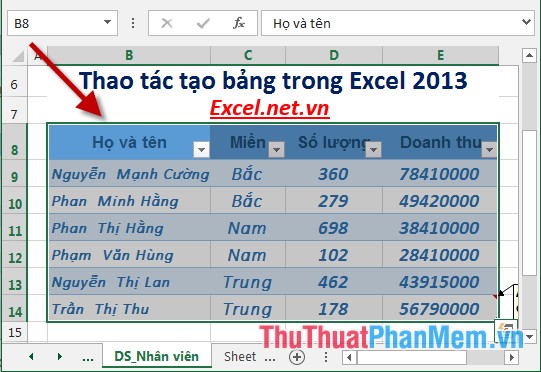
Step 3: After selecting OK, the data table has been created as shown below:
Step 4: In case you want to change the display style of the table, do as follows: Click on the table -> go to the Design tab -> select the display type of the table in Quick Style:

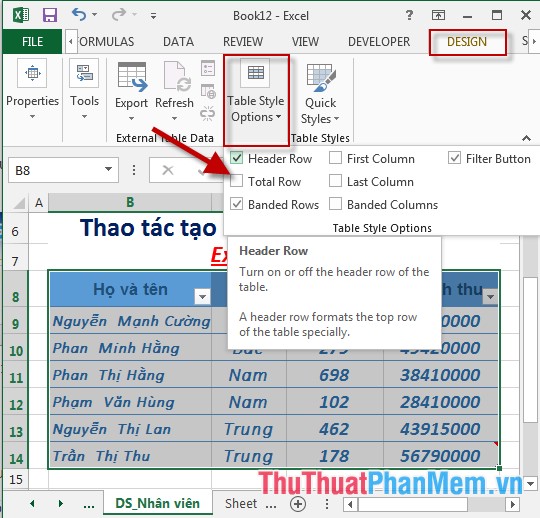
Step 5: Or you can select the contents shown on the table by clicking the Table Style Options item in it:
- Section Header Row: Hide / show the title of the table.
- Section Total Row: Hide / show the total row at the bottom of the table.
- First Column: Display special format for the first column of the table.
- Last Column: Display special format for the last column of the table.
Above is a detailed guide for creating tables in Excel 2013.
Good luck!


 How to center a table in Google Docs
 Instructions on creating a table of contents automatically in Word.
 How to use the VLOOKUP function in Excel: formulas and detailed examples.
 How to create a Pivot Table in Google Sheets
 How to use the DMAX function in Google Sheets
 How to create an automatic table of contents in Word 2019/2016/2010/2007