Edit tables in Access 2016
In this lesson, you will learn how to create and rearrange fields in tables, how to ensure data is formatted correctly and consistently by setting validation rules, character limits, and data types in the school
Table of Contents
After working with the database, you can see that some changes need to be made to the data storage tables. Access makes it easy to change tables to suit your database needs.
In this lesson, you will learn how to create and rearrange fields in tables, how to ensure data is formatted correctly and consistently by setting validation rules, character limits, and data types in the school The last part of the lesson will provide some additional options to perform simple mathematical functions in the table.
Modify the Access 2016 table
Add and organize schools:
Access makes it easy to reorder existing fields in the table and add new fields. When adding a new field, you can even set the data type, which will indicate what kind of data can be imported into that field.
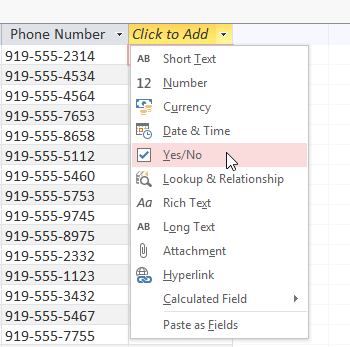
There are many types of fields that can be added to the table:
- Short Text: This is the default and best option for most text data in Access. You should also select it for digital data if no calculations are required, such as phone numbers or postal codes.
- Number: This is the best type for numerical data to be calculated, such as the number of items ordered or sold.
- Currency: Automatically format numbers in the currency used in your area.
- Date & Time: Allows you to select a date from the calendar that appears.
- Yes / No: Insert a checkbox in your field.
- Rich Text: Allows you to add formatting to text, such as bold, italic.
- Long Text: Ideal for a large number of texts, like product descriptions.
- Attachment: Enables attachment of files, such as images.
- Hyperlink: Create links for URLs or email addresses.
To have a new field added to the existing table:
Open the desired table, then click the title with the word Click to Add . If you already have several fields, you need to scroll to the right to see this text.

A menu appears, select the type of data you want:
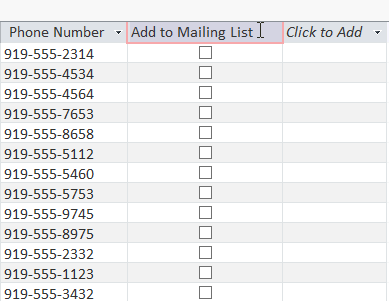
Enter a name for the field and press Enter :
Move a field in the table:
Select the field you want to delete, then hover over the bottom border of the field title. The cursor will become a cross with 4 arrows.
Click and drag the field to a new location:
Release the mouse, the field will appear in the new position:
Advanced option to work with the field on the board
Computers are not as smart as people think. For example, writing databases and databases you might understand is the same thing, but the computer doesn't think so. You must enter data in standard format to help organize, calculate and better understand your data.
There are three main rules that can be set for a field: data type, character limit, and validation rules.
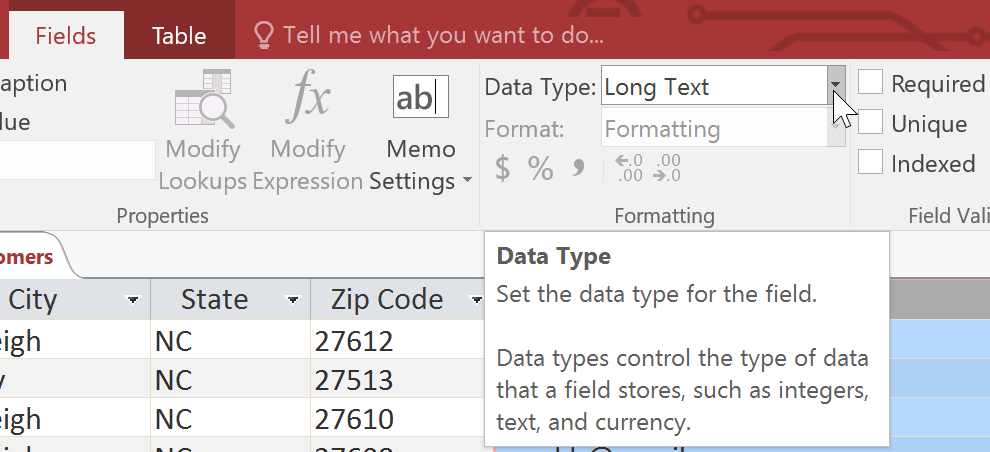
Change the data type previously set:
Select the field whose data type you want to change. Click the Fields tab> Formatting group> click the Data Type arrow.
Select the desired data type:
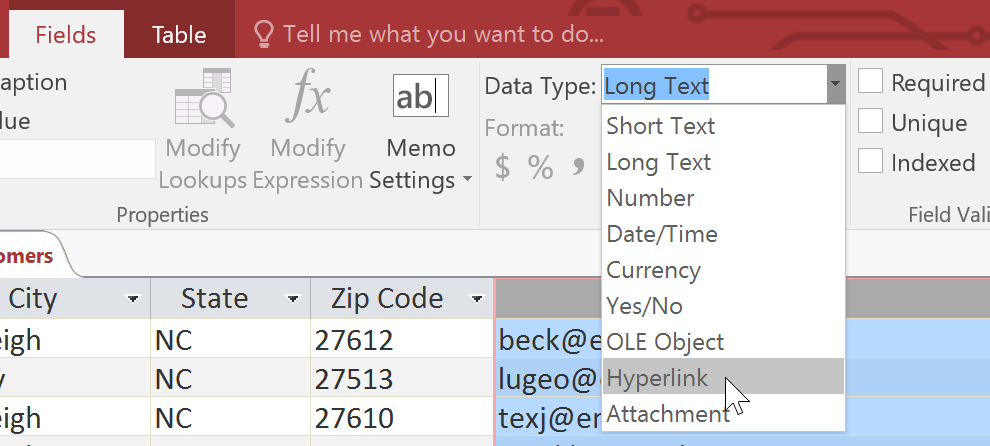
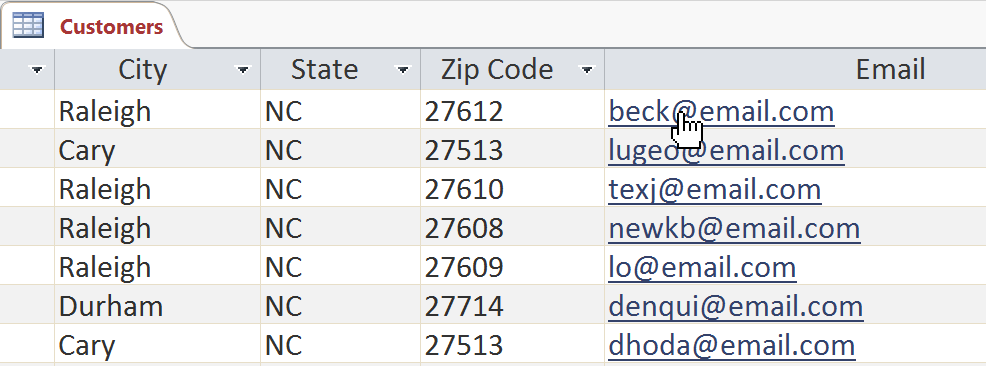
The field data type will change. Depending on the selected data type, you can see the changes in the table. For example, because the data type setting in the Email field is Hyperlink, all email addresses in the field will be converted to clickable links.
Character limit in the field:
This limit is a set of rules for the number of words signed in the field (letters, numbers, prohibitions and even spaces). This can help keep your log data concise, even forcing users to enter data in a certain way.
However, you can only set the character limit for the field defined as Text.
To limit the characters in a field, do the following:
Select the field you want to set up, click the Fields tab> select the Properties group . In the Field Size , enter the maximum number of characters you want to allow in this field. Save the table to the applicable limit.

Validation rules:
Validation rules indicate which information can be entered into the field. When a validation rule is issued, the user cannot enter data that violates the rule. For example, if you ask a user to enter a city name in a table with contact information, you can create a restriction rule that accurately responds to a US postal code. This will prevent users from entering non-standard or non-postal data.
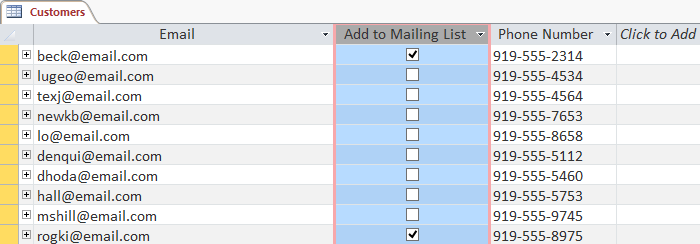
In the example below, we will apply this rule to the Customers table. This is a pretty simple rule, we will name all valid answers that users can enter, which means that in addition to the above, users cannot enter anything else. on the record.
To create a validation rule, do the following:
Select the field you want to add validation rules to. Here, we set up rules for the State field.
Select the Fields tab, find the Field Validation group> click the Validation command> select Field Validation Rule .
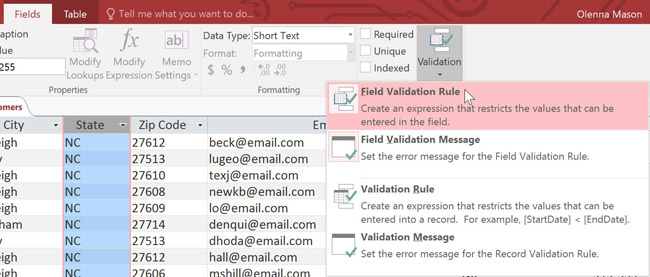
The Expression Builder dialog box will appear. Click on the text box and enter the validation rule. In the example, we want to restrict the data in the State field so that the postal code of the state entered is the correct code. We will enter the responses in quotation marks and separated by 'Or,' then Access will know that this field can accept the answer 'AL' or 'AK' or 'AZ' or whatever we enter.

When satisfied with the rule set, click OK. The dialog will close. Click Validation again, select Field Validation Message.
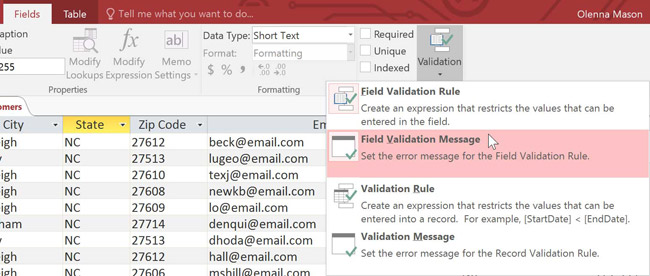
The dialog box appears, enter the word you want to appear in the error message when the user enters data that does not match the validation rule. This message will help users know which data can be entered.
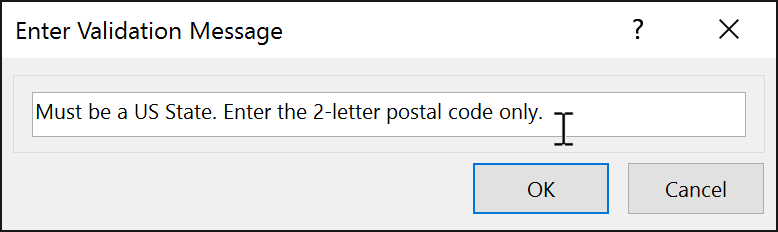
Customize the error message when the user enters the wrong data
When finished creating the error message> OK .
Validation rules are now applied to the field, users cannot enter data that violates this rule.
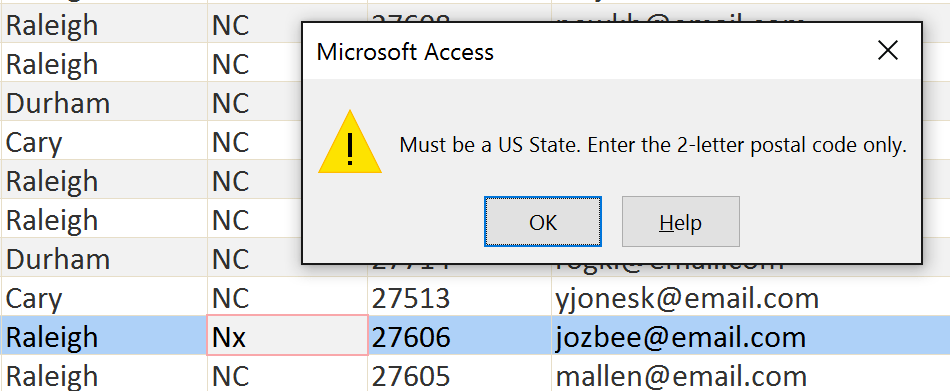
Error message when entering data wrong rules
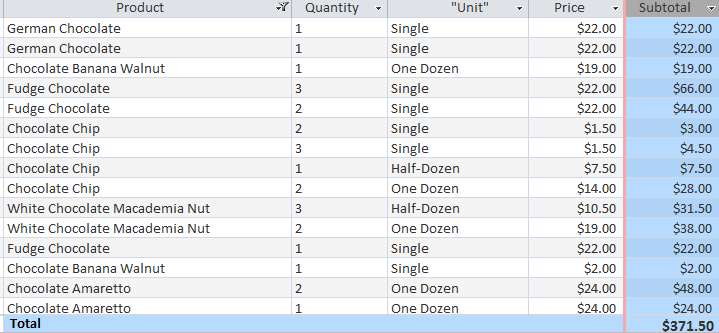
The fields are calculated and the total row
Adding calculated and total rows allows you to perform calculations with data on the table. The calculated field will calculate the data in a record, the total row will be calculated across the entire field. Whenever you see a subtotal of records, that is the calculated field, a row with the total sum of the total children at the end is the total row.
In the next lesson, you will know how to work with data forms on Access 2016 from creating, editing to form formats.
Next lesson: (Have a little rest: P)
Previous post: Create reports in Access 2016 and use advanced reporting options
Was this article helpful?
Your feedback helps us improve.
Related Articles
 MS Access 2003 - Lesson 6: Creating a table in Access12 minutes read
 MS Access 2003 - Lesson 8: Change information in the table9 minutes read
 MS Access 2007 - Lesson 8: Establish relationships between tables2 minutes read
 Establish relationships between tables in Access 20163 minutes read
 Create Table (Table) in Access 20164 minutes read
 Standardize databases in Access - Relationships between tables5 minutes read
Reader Comments 0
Sign in with email or Google to join the discussion.