How to Use Basic Microsoft Access
Create New Database
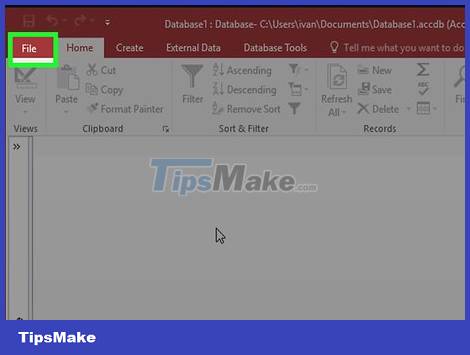
Click on the File tab and then select 'New'. The database contains all the data in various formats. You can choose to open a blank database, a blank web database, or choose one of the pre-made templates.
Empty databases are the standard form of Access, suitable for general use. When creating an empty database will also create a table.
The web database is designed to be compatible with Access's online publishing engine. When creating a web database will also create another table at the same time.
Templates are pre-built databases and are compatible with a wide range of uses. Choose one of the templates provided if you don't want to spend a lot of time designing the structure of the database.
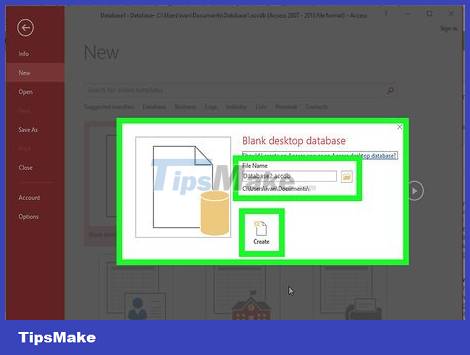
Name the database. After completing the selection of the type, give it a name that corresponds to the contents of that database. This is especially useful when you are working with multiple databases at the same time. Type a file name in the "File Name" dialog box. Select "Create" to create a new database file.
Import Data into Database

Determine the structure that best fits the data. If you create an empty database, you'll want to arrange it in the most logical way and add the appropriate structures. Here are a few ways to format and interact with data in Access:
Tables – this is a common way to store data in a database. The table is comparable to an Excel spreadsheet: the data is arranged in rows and columns. Therefore, it is relatively simple to import important data from Excel and other similar software.
Forms – this is the way to enter data into the database. While you have to enter data directly into the table, using a form is faster and more intuitive.
Reports – this helps to summarize and display data on the database. Reports to analyze the data and give answers to specific questions, such as how much profit the customer is in. It is mainly designed for when it needs to be printed.
Query – this is how data is collected and filtered. You can use queries to display specific queries from multiple tables. You can also use it to create and update data.

Create the first table. If you create an empty database, it will automatically create an empty table. You can start entering data into the table manually, or copy and paste content from another source.
Each piece of data should be written in separate columns (fields), and each record as a separate row. For example, fill in a customer's name in each row, with each column representing different pieces of information about that customer (first name, last name, email address, phone number, etc.).
You can rename the label of each column to easily know what that column is. Double-click the column header to rename it.

Import data from another source. If you want to import data from a specific file or location, you can set Access to receive that information and import it into the database itself. This is an effective way to get information from a homepage or other shared source.
Click the External Data tab.
Select the file type you want to import. Under 'Import and Link' you will see several file types. ODBC stands for Open Database Connectivity, which includes databases like SQL.
Navigate to the location where the data is located. If it belongs to a website, you need to provide the website address.
In the next window, select "Specify how and where you want to store the data in the current database" (Specify how and where you want to store the data in the current database). Select "OK". Follow the steps on the screen to enter data.

Add another table. You will want to keep different records on different databases. This helps the database run smoother. For example, you create a table to store customer information and use another table to store order information. You can link customer information to the order dashboard. Add another table. You will want to keep your different records in different databases.
In the Create section on the Home tab, select the create table button. The new table will appear in the database. You can enter the same information as you did in the top table.
Establishing Relationships Between Tables
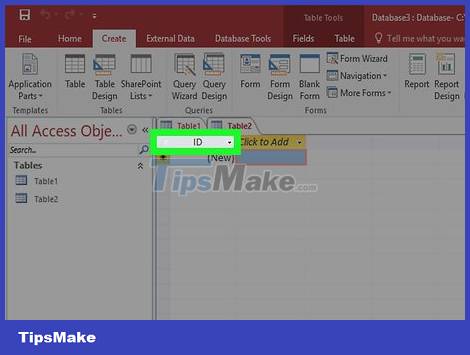
You need to understand how keys work. Each table will have a primary and unique key for each entry. By default, Access creates an ID column to count each item. This column is the primary key. Tables also have foreign keys. These are fields that are linked to another table in the database. The bound field contains the same data.
For example, in the Orders table, you have the ID field of the Customers who ordered the product. You can create a relationship between that Customer ID field and the ID field in the Customer Info table.
Using relationships keeps data relevant, efficient, and easy to read.
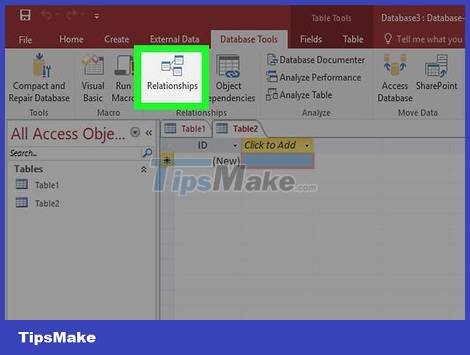
Click the Database Tools tab. Select the Contacts button in the Contacts section. This will open a new window showing an overview of the tables in the database. Each field is listed under the table name.
You need to create a field for the foreign key before you create the contact. For example, if you want to use Customer ID on the Orders table, create a field on the Orders table, name it Customer and leave it blank. Make sure that this field has the same format as the associated field (in this case the sequence number).
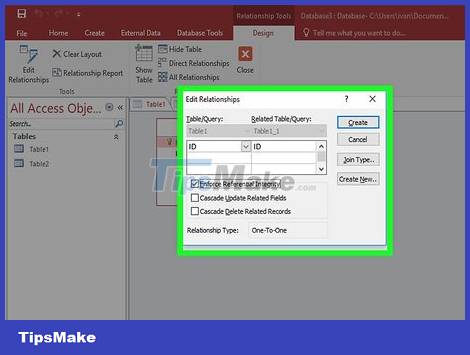
Drag the field you want to set as the foreign key. Drop that field into the newly created field. Click Create on the window that appears to create a relationship between the fields. A path will appear between the two tables, connecting the fields together.
Select the 'Enforce Referential Integrity' option when creating the contact. This means that when the data in one field changes, the other field is also automatically updated. It helps the data to be precisely homogenized.
Create Query

You need to understand the role of queries. A query is an activity that allows you to quickly view, enter, and edit data. There are many types of queries, from a basic search to creating a table based on existing data. Queries are essential tools for making reports.
Queries are divided into two main types: Selection and Action. The select query pulls data from the table and calculates it. Action queries can import, edit, and delete data in a table.
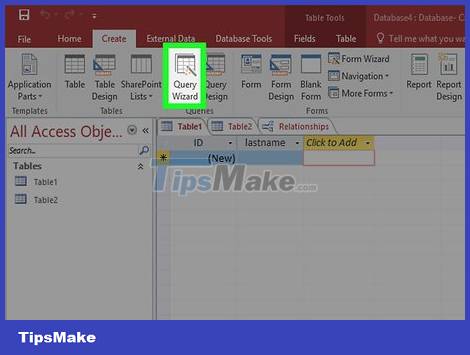
Use the Query Wizard to create a Selection query. If you want to create a regular select query, use the Query Wizard and follow the step-by-step instructions. You can access this function on the Create tab. This allows you to see each specific field in the table.
Create a Selection Query with Criteria
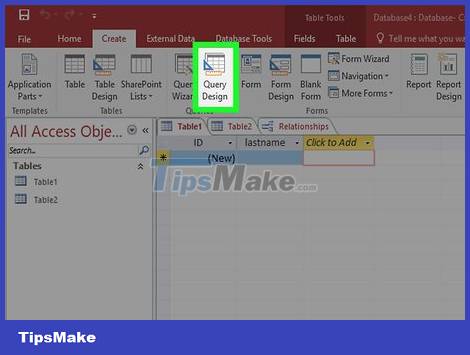
Open the Query Design tool. You can use criteria to narrow down a standard query and display only the required content. To get started, select the Create tab and then select Query Design.
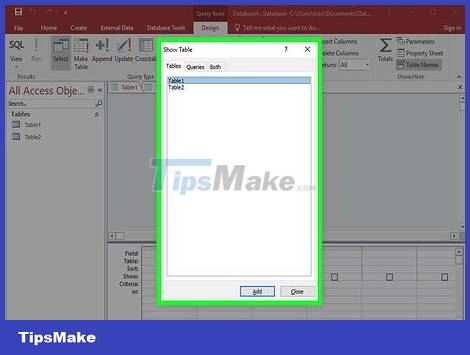
Select table. The Show Table dialog box appears. Double-click the table to run the query, then click Close.
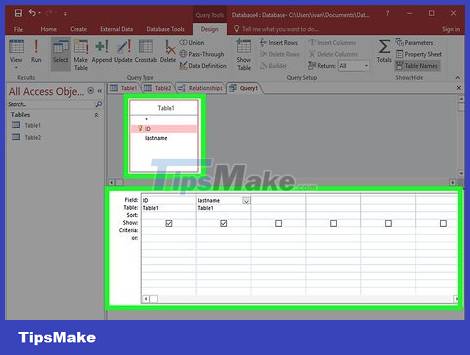
Add the separated field. Double click on the fields you want to add to the query. The fields will be added to the Design panel.
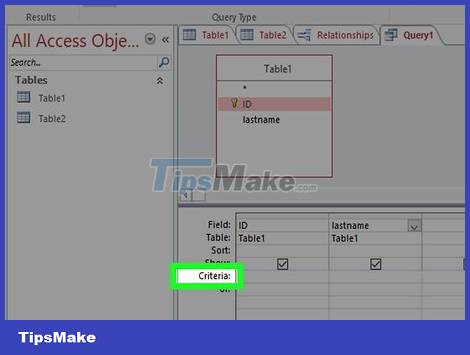
More standards. You can use different standard styles, like text or functions. For example, if you only want to display prices higher than 1 million VND in the 'Price' field, you need to enter >=1 in the standard field. If you only want to display customers in Hanoi, enter Hanoi in the standard field.
You can add multiple criteria to each query.
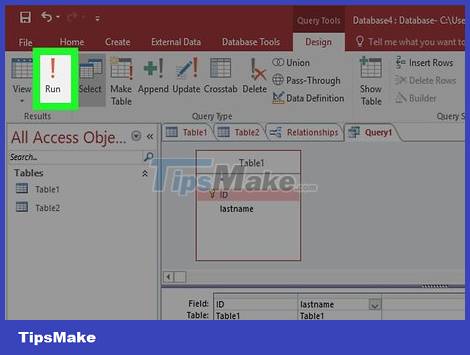
Click Run to see the results. The Run button is located in the Design tab. The Query Results will be displayed in the window. Press Ctrl + S to save the query.
Creating a Selection Query with Parameters

Open the Query Design tool. Query parameters allow you to specify what you want to get each time the query is run. For example, if you have a database of customers from more than one city, you can run a parametric query to ask to display the city results you need to see.
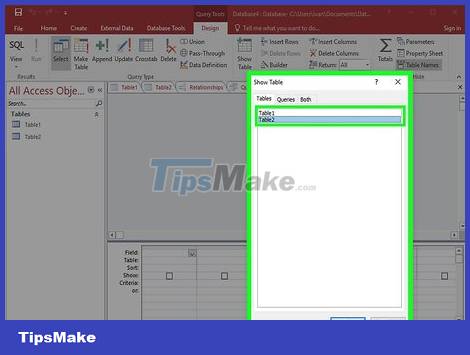
Create a select query and define the table. Add a split field to the query by double clicking on it in the dashboard.
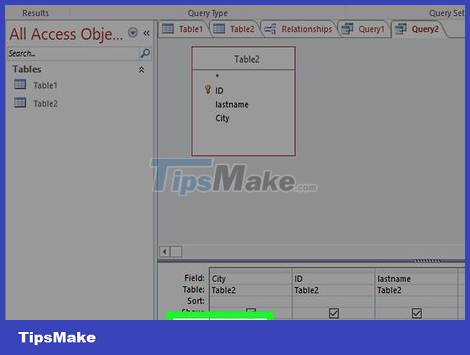
Add a parameter to the Criteria entry. The parameter has a '[]' symbol around it. The text inside the brackets will be displayed on the request when the query is run. For example, to request a city, select the Standard box and type [City Name:].
You can end parameters with a '?' or ':', don't use '!' or '.'
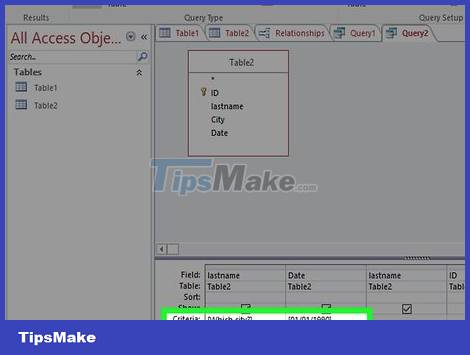
Create a multi-parameter query. You can use multiple parameters to manually scope the results of a query. For example, with the Date field, you can create a date range by entering From [Start Date:] To [End Date:]. You will receive the request when you run the query.
Create a Create Table Query
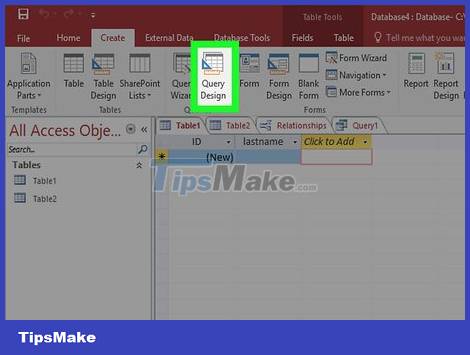
Click the Create tab and select Query Design. You can use queries to separate specific data from existing tables and create a table with that data. This is especially useful if you want to share a specific part of a database, or create a specific form for subdatabase sets. You first need to create a select query.
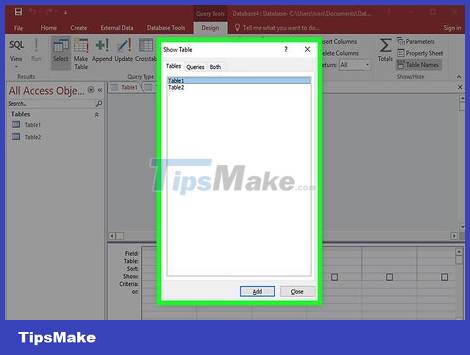
Select the table to get data from. Double click on the table to get data. You can select multiple boards at once if needed.
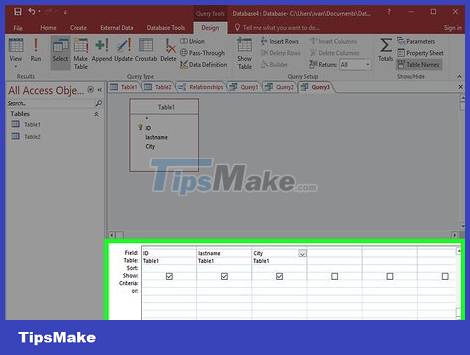
Select the field you want to separate the data from. Double click on the required field from the dashboard. This field will be added to the query table.
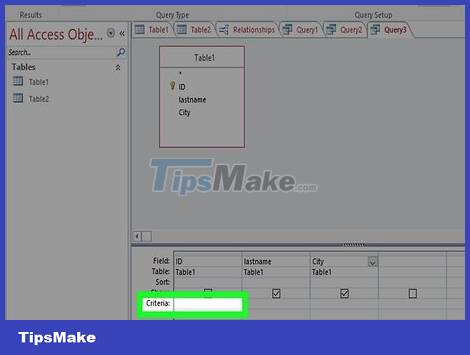
Set standards. If you want to identify specific data from a field, use the standard target to set up the locator. See 'Creating a Select Query with Criteriasection' above for more details.
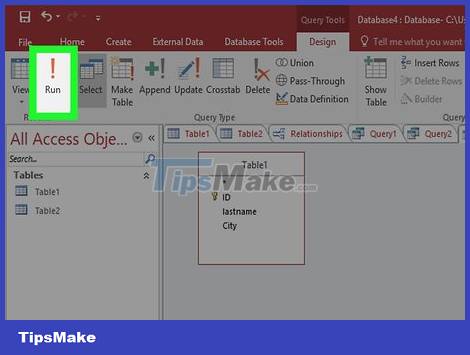
Test the query to make sure it gives you the results you want. Before creating the table, run the query to check the separated data. Adjust the criteria and fields until you get all the data you want.
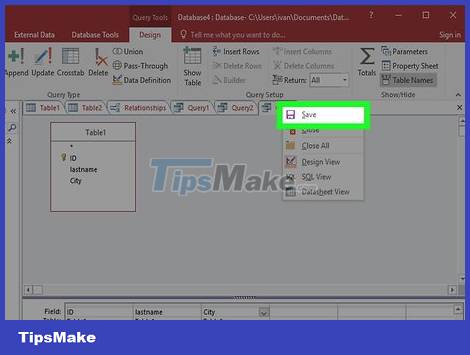
Save query. Press Ctrl + S to save the query. It will appear on the navigation pane on the left side of the screen. Click on the query to select it again, then select the Design tab.
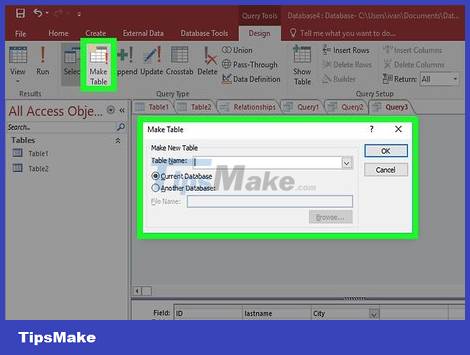
Click the 'Make Table' button in the Query Type group. A window will appear asking you to name the table. Enter the table name and press OK.
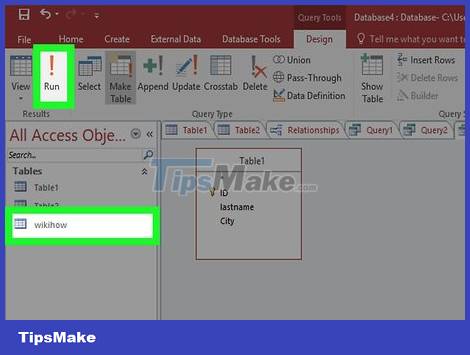
Click the Run button. A new table will be created based on the output from the query. This panel will appear on the navigation pane on the left side of the screen.
Create an Additional Query
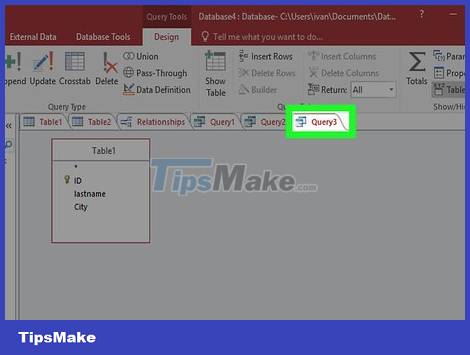
Open the previously created query. You can use additional queries to import data from an existing table into the newly created table. This is quite useful if you need to import more data into the table you just created with the create table query.
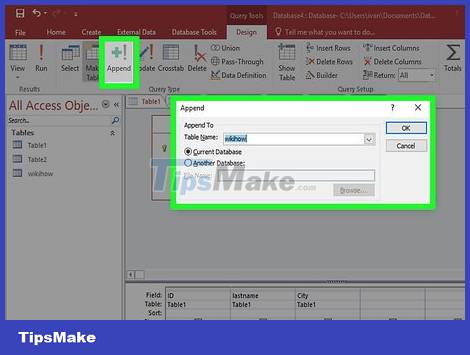
Click the Add button (Append) in the Design tab (Design). This will open the Additional dialog box. Select the table to add.
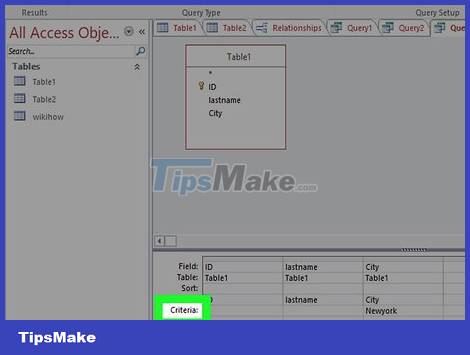
Change the query criteria to suit what needs to be added. For example, if you create a table with the criterion '2010' in the Year field, change it to the year you want to add, for example '2011'.
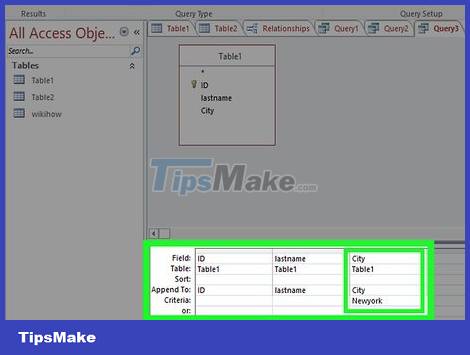
Set the location you want to add data. Make sure to select the field that corresponds to each column you want to add. For example, if you use the above change, the data should be added to the Year field in the Append To row.
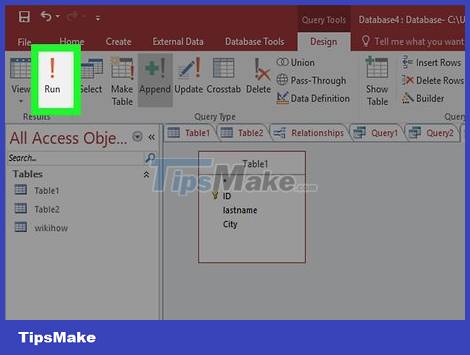
Run the query. Click the Run button on the Design tab. The query will run and add data to the table. You can open the table to verify if the data is correct.
Create and Use Forms
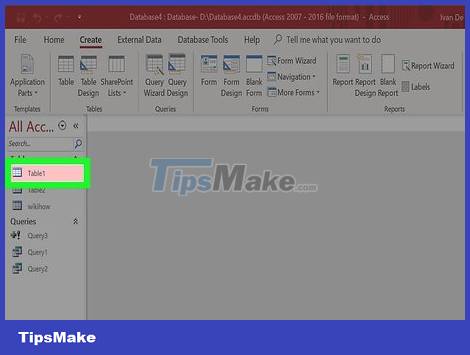
Select the table to create the form. Forms allow you to easily view the data in each field, and quickly switch between records or create new ones. Forms are essential with data extensions, most users find forms easier to use than tables.
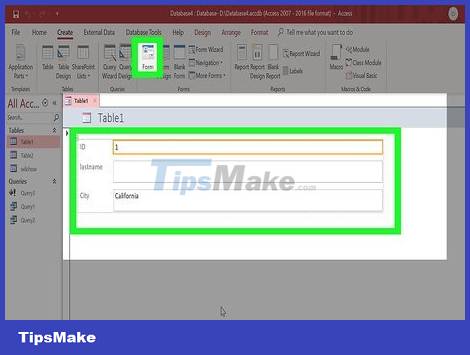
Click the Form button in the Create tab. This will automatically create a form based on the fields in the table. Access does a pretty good job of creating tables when the fields are all the right size, but you can resize and move any element on the form if you want.
If you don't want to see a particular field on the form, right-click the field and select Delete.
If the table has relationships, a table of data will appear under each record, showing the relationship between the data. You can edit connection data more easily this way. For example, each sales rep will have a corresponding customer in the database.
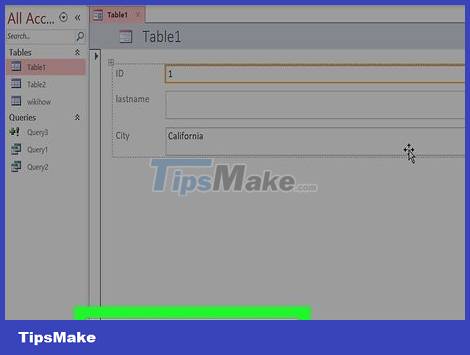
New form navigation. The arrow button at the bottom is used to move between profiles. The fields will apply by recording data when converting between them. You can use this button on the edges to move from the first profile to the last profile.
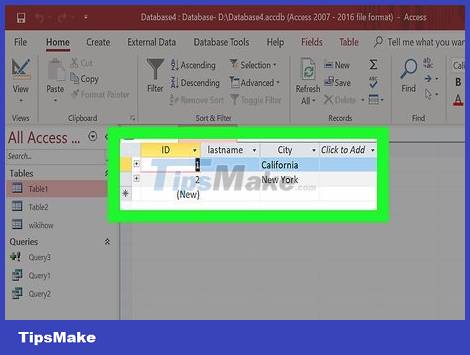
Click the data table button to use the table. It is located in the upper left corner, and allows you to change the values of the table using a form.
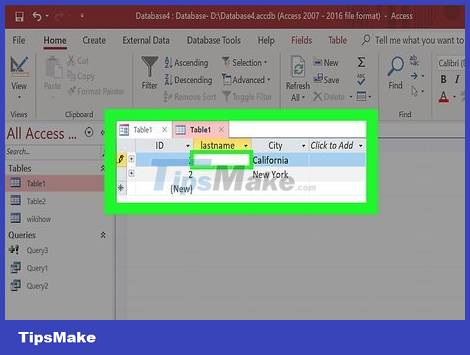
Change profile is available. You can edit the text in any record field to change the data in the table. Changes are automatically updated to the table, as well as to the linked tables.
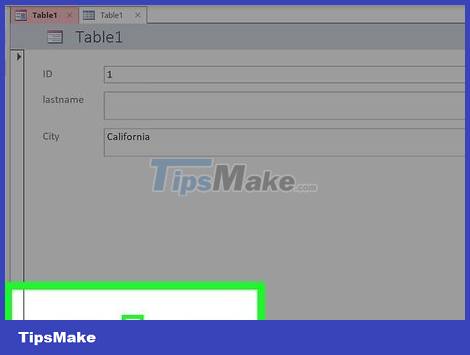
Add new profile. Click on the 'Add Record' button near the navigation button to create a new profile at the bottom of the list. You can use fields to enter data into new records in the table. This new way of entering information is easier than entering it through a table.
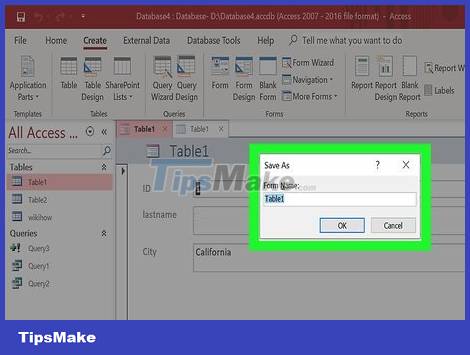
Save the form when finished. Remember to save the form by pressing Ctrl + S so that you can easily access it again next time. It will appear on the navigation pane on the left side of the screen.
Create a Report
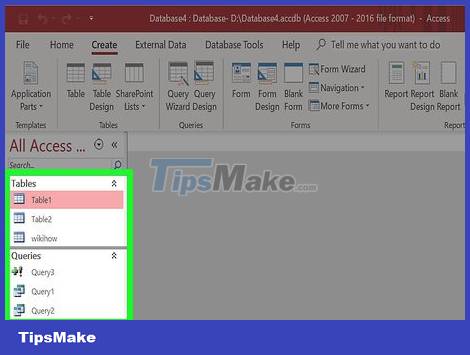
Select the table or query. Reports let you see a summary of your data at a glance. They are typically used for income or transportation reporting, or can be modified for any use. The report pulls data from the table or query you just created.
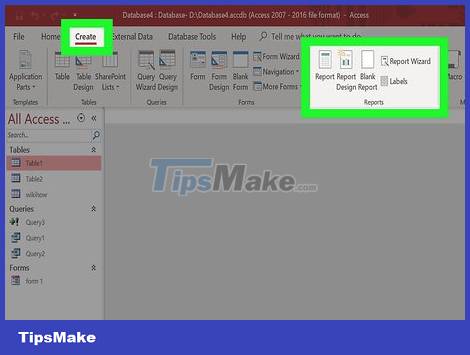
Click the Create tab. Select the type of report you want to create. There are several different ways to generate reports. Access can generate reports automatically, or create them manually.
Reports – generate an automatic report with all data from the source. The data will not be grouped, but the format is sufficient to show what is needed for small databases.
Blank report – creates a blank report that you can manually enter data into. You can select any blank field to generate the report yourself.
Report Wizard – this will guide you through the report creation process, allowing you to select and group data, and then format it correctly.
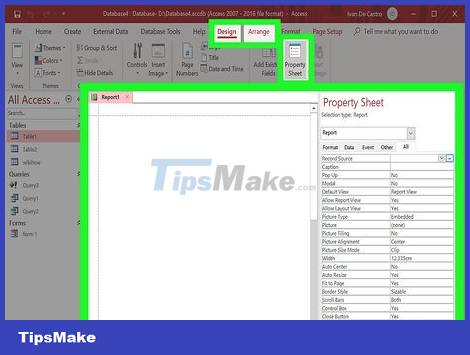
Set the source for the blank report. If you create a blank report, you need to select a source to generate it. First, click the Arrange tab and then select the Property Sheet. Alternatively, you can press the Alt + Enter key.
Select the down arrow next to the Record Source field. A list of available tables and queries will appear. Select one and it will be specified in the report.
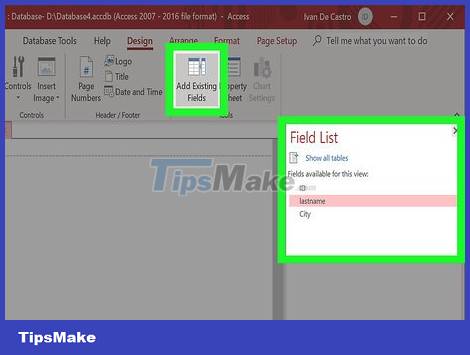
Add fields to the report. Once you have the source, you can start adding fields to the report. Click the Format tab, then select Add Existing Fields. A list of fields will appear in the right pane.
Click and drag the field you want to add to the Design pane. The record will appear in the report. When you add more fields, they will automatically be sorted as existing fields.
You can resize the fields by clicking on the edge and dragging the mouse.
Delete the field in the report by clicking on the title and pressing the Delete key.
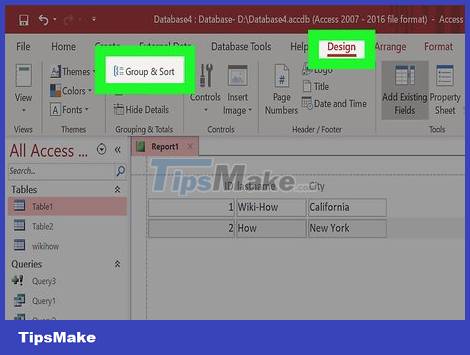
Add groups to the report. Groups allow you to quickly analyze information in reports and organize relevant information. For example, if you want to group sales by region or by seller. The group will allow you to do this.
Click the Design tab, then select Group & Sort.
Right-click anywhere in the field you want to add to the group. Select Group On on the menu.
A title will be created for the group. You can adjust the title to your liking.
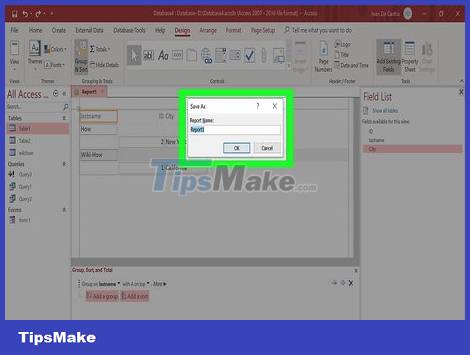
Save and share reports. After completing the report, you can save or share or print it just like any other document. Use reports to share company performance with investors, inform employees, and more.