Clear the Windows 10 Update Cache to free up memory space
Whenever you update the system, Windows automatically saves the updated Windows installation files. Although these files will be useful in some cases. However, if you do not need to use these files, it is better to delete the files to free up memory space.
Whenever you update the system, Windows automatically saves the updated Windows installation files. Although these files will be useful in some cases. However, if you do not need to use these files, it is better to delete the files to free up memory space.

Delete Cache update on Windows 10
Clearing the update cache on Windows 10 is quite simple and easy.
Before deleting the update cache, the first thing we need to do is stop the Windows update service.
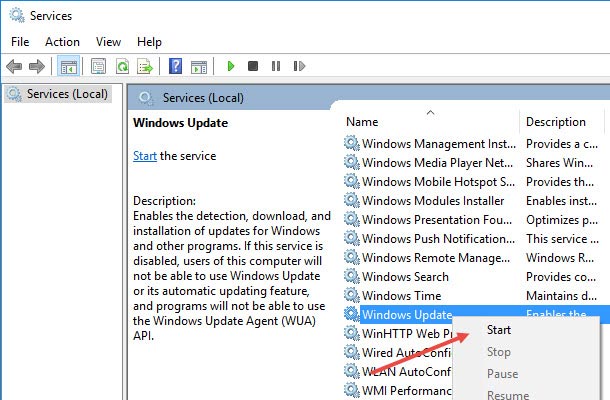
To do this, first enter the Services keyword into the Search box on Start Menu, select and open Service. If you are using Standard user, you can open Services under Admin by right-clicking on Services and selecting Run as administrator .

Next on the Services window, find and double-click the Windows Update option, then select Stop to stop the Windows update service.
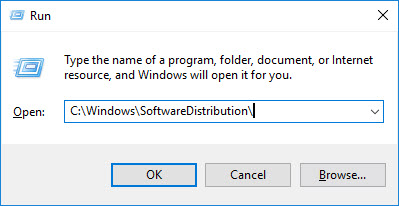
After the service has stopped, press the Windows + R key combination to open the Run command window, enter the following path into the Run window and press Enter to open the folder where Windows stores Windows-related files update:
C: WindowsSoftwareDistribution
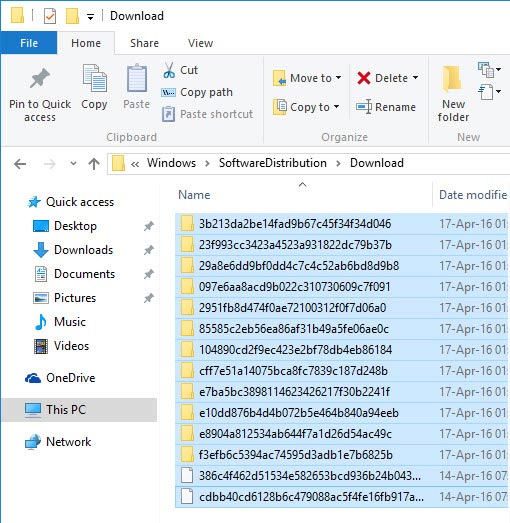
Next open the Download folder, select all the files in the folder and press Delete to delete all the files. If the Admin permission message appears, click Continue to complete the process.
If you want to free up more memory space, you can delete the files in the DeliveryOptimization folder. However, before deleting, you need to disable the Windows Delivery Optimization feature.
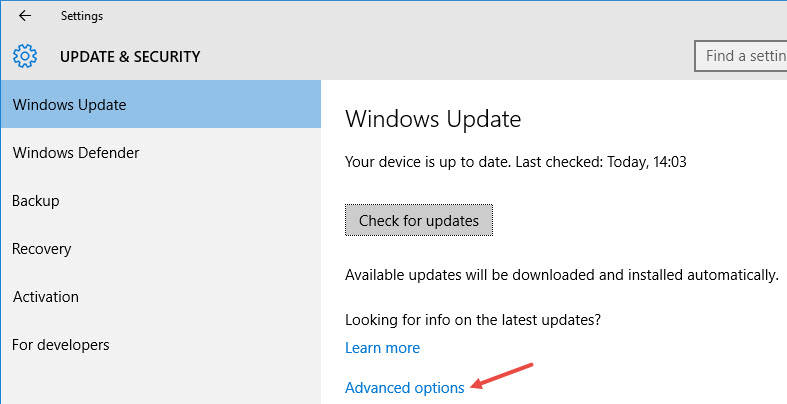
To disable Windows Delivery Optimization, type the Check for updates keyword into the Search menu on the Start Menu to open the Update and Security window.

On the Update and Security window, click the Advanced Options link.
After the Advanced Options window appears, here you click the Choose how updates links are delivered to open the Delivery Optimizations installation window.
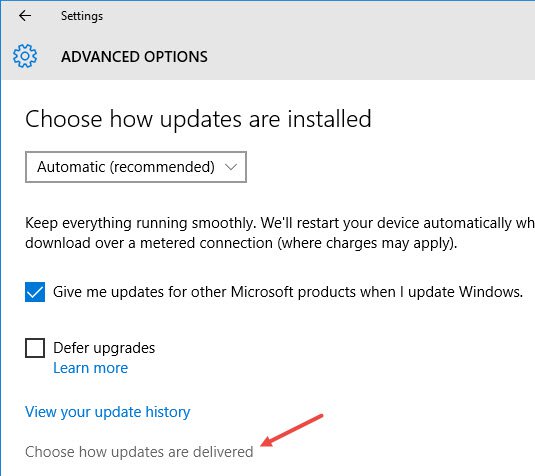
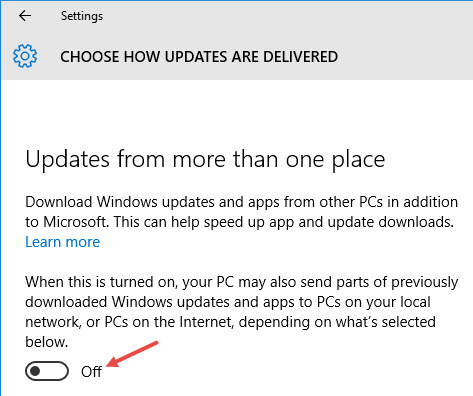
Here you convert the Windows Delivery Optimization feature to OFF .
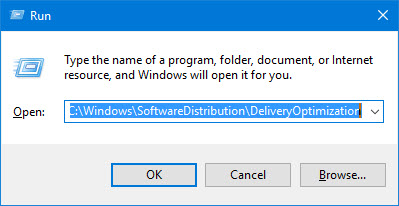
After turning off the Delivery Optimization feature, press the Windows + R key combination to open the Run command window, then enter the path below and press Enter:
C: WindowsSoftwareDistributionDeliveryOptimization
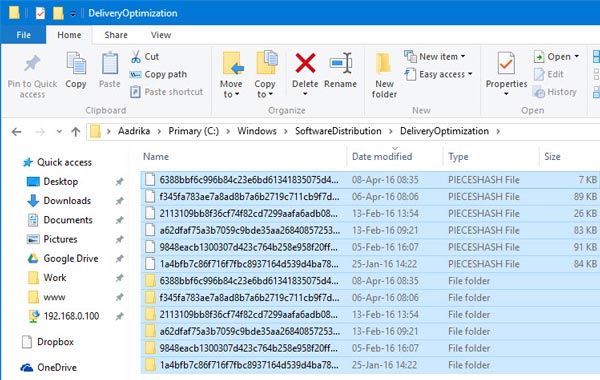
Here, press Ctrl + A to select all files and folders and press Delete to delete all files in this folder.
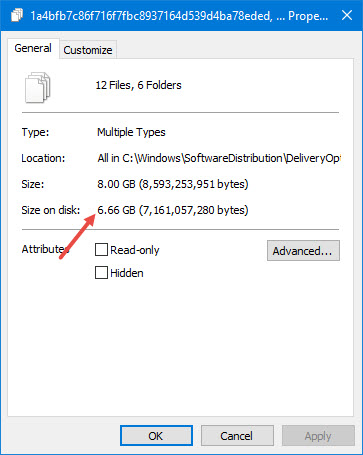
Also, if you want to check the size of all files and folders, you can right-click on those files and folders and select Properties .
Finally go back to the Services window, right-click Windows Update and then select Start to open the service.
Refer to some of the following articles:
- Instructions for activating and using Remote Desktop on Windows 10 computers
- When and how to defragment hard drives on Windows 10?
- Fix Windows 10 error with just one click with FixWin
Good luck!
- Clear the Dropbox cache Windows and Linux to free up memory space
- Instructions to clear cache on Twitter are very simple
- How to clear the Cache in Windows 8?
- How to clear system and Internet cache on Mac
- Instructions for deleting Dropbox's cache on iPhone and iPad
- What is cache? How to clear Cache in Windows 10
- How to turn on auto-release memory mode Windows 10 Creators Update
- Instructions on how to clear application cache on iPhone are super simple
- Clear the cache for Live Tiles on Windows 10
- Trick to clear cache Dropbox, OneDrive and Google Drive
- How to turn off Reserved Storage to free up Windows space
- How to delete old Windows restore points to free up space
- How to free up computer memory Windows 7, 8 / 8.1 and Windows 10
- What is the directory $ WINDOWS. ~ BT, can delete $ WINDOWS. ~ BT or not?
- Free up storage space on your Android device with just 1 tap
- How to free up to 6GB of internal memory for iPhone
- Trick to clear cache Dropbox, OneDrive and Google Drive
- Clear the Dropbox cache Windows and Linux to free up memory space
-
 Table of common BSOD error codes on Windows 11 and Windows 10
-
5 ways to fix Wi-Fi disconnection issues on Windows 11 laptops.
-
Windows 11 Error Code Table and Most Common Issues When Updating Windows
-
Useful AI features in Windows 11
-
Laptop displaying a blue screen: Causes and effective solutions.
-
How to quickly split the screen on a Windows 10, 11, and macOS laptop.
 Table of common BSOD error codes on Windows 11 and Windows 10
 5 ways to fix Wi-Fi disconnection issues on Windows 11 laptops.
 Windows 11 Error Code Table and Most Common Issues When Updating Windows
 Useful AI features in Windows 11
 Laptop displaying a blue screen: Causes and effective solutions.
 How to quickly split the screen on a Windows 10, 11, and macOS laptop.