Instructions for setting up and managing FTP Server on Windows 10
If you want to create a private cloud for sharing and converting large files without restrictions, you can create an FTP Server (File Transfer Protocol Server) on your Windows 10 computer.
Table of Contents
If you want to create a private cloud for sharing and converting large files without restrictions, you can create an FTP Server (File Transfer Protocol Server) on your Windows 10 computer.
See also: Instructions for setting up individual FTP Server using FileZilla

1. Install FTP Server on Windows 10
Similar to previous versions, on Windows 10 also integrated the necessary elements to run FTP Server. Follow the steps below to install FTP Server on your Windows 10 computer:
1. Press Windows + X key combination to open Menu Power and select Programs and Features .
2. Click the Turn Windows features link on or off .

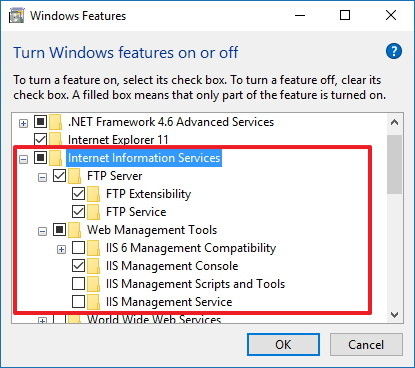
3. Expand Internet Information Services then check the FTP Server option.
4. Expand FTP Server and select FTP Extensibility .
5. Check Web Management Tools with the default options.
6. Click OK to start the installation.
7. Click Close .
2. Configure FTP site on Windows 10
After you have installed the necessary elements to run the FTP Server on your Windows 10 computer, proceed to create an FTP site:
1. Press Windows + X key combination to open the Power User menu and select Control Panel.
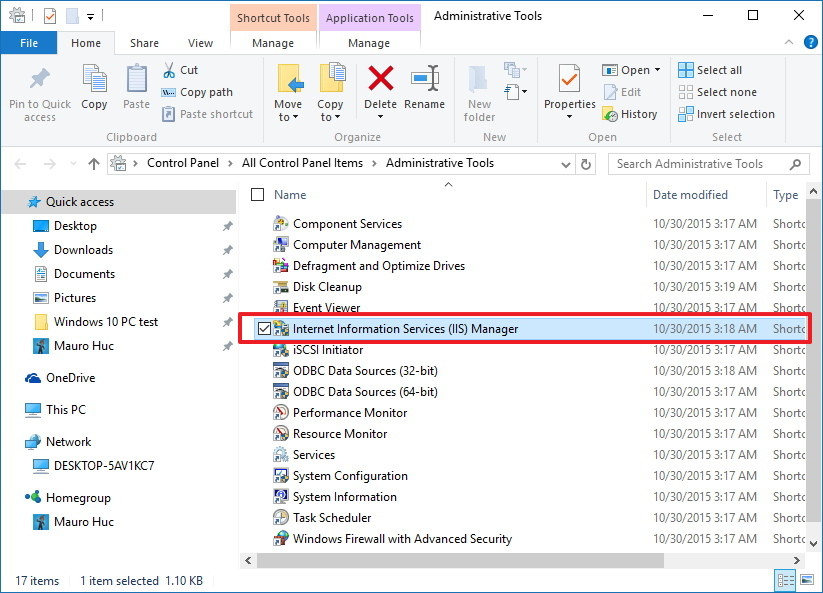
2. Open Administrative Tools .
3. Double-click Internet Information Services (IIS) Manager .
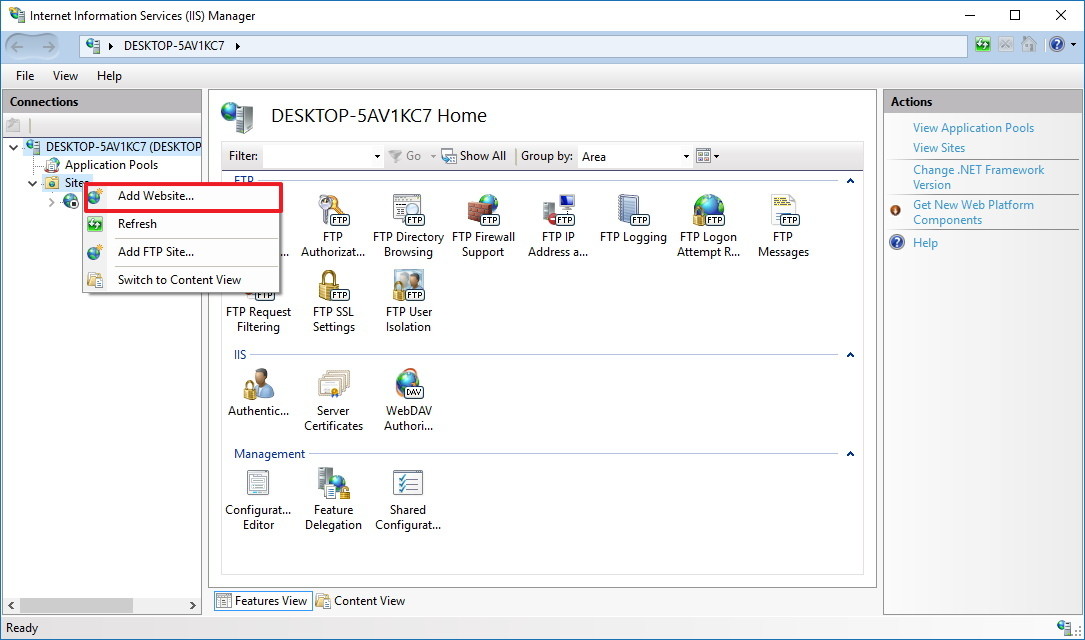
4. Expand the Connection table and then right-click the Site.
5. Select Add FTP Site .
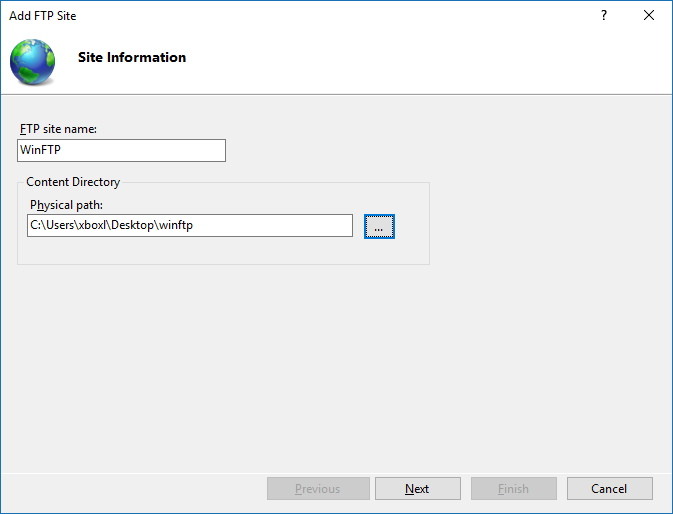
6. Name your new FTP site and enter the path to the FTP directory you want to use to send and receive files.
Note:
You can use the Make New Folder button to create a specific folder containing the FTP file.
7. Click Next .
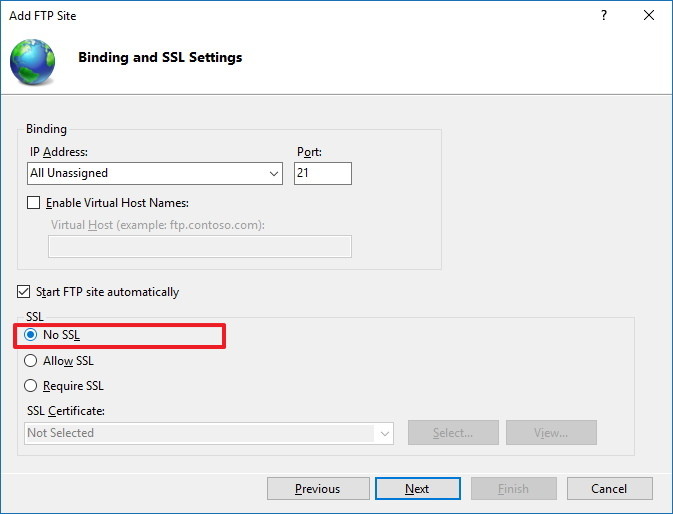
8. On the Binding and SSL Settings interface, remove all default settings, change the SSL option to No SSL .
9. Click Next.
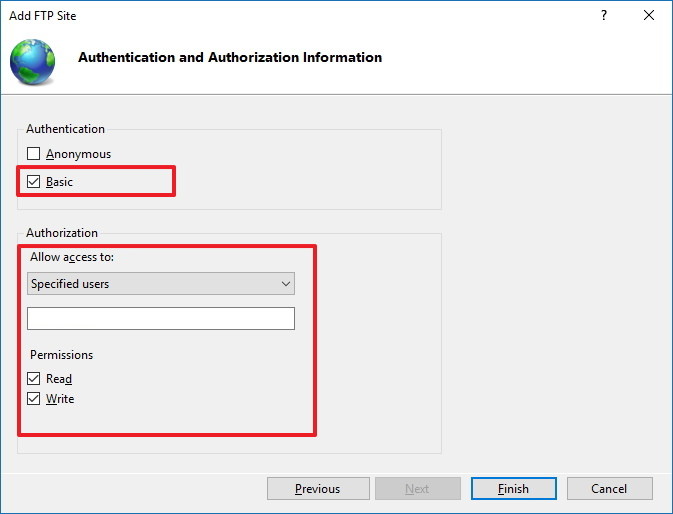
10. At the Authentication section, select the Basic option .
11. At the Authorization section select Specified users from the drop-down menu.
12. Enter your Windows 10 account email address or Local account name to allow you to access the FTP Server.
13. Check the Read and Write options.
14. Click Finish.
3. How to allow FTP Server through Windows Firewall (fire idea)?
If the Windows Firewall is running on your computer, the Firewall will block any connection trying to access the FTP Server.
Follow the steps below to enable FTP Server through Firewall (firewall):
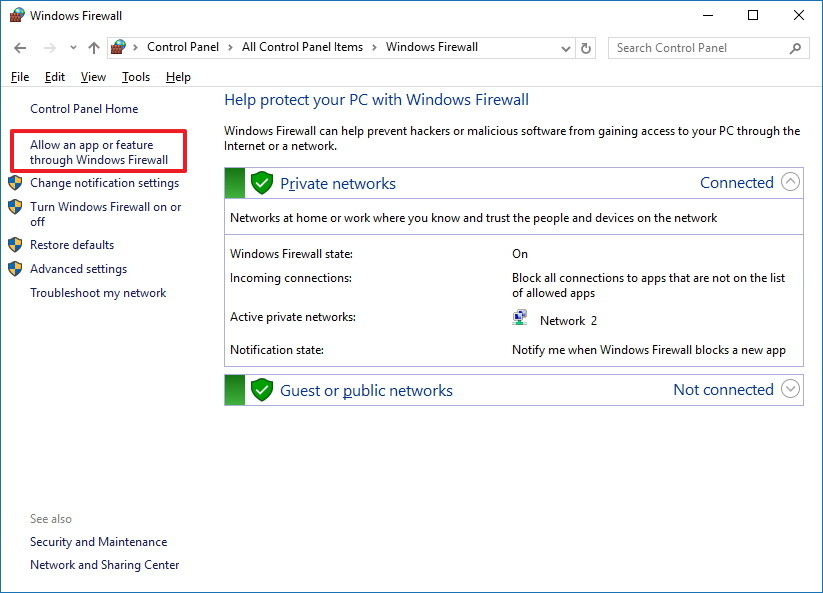
1. Open Start Menu, then enter Windows Firewall and Search box and press Enter.
2. Click the Allow an app link or feature through Windows Firewall .
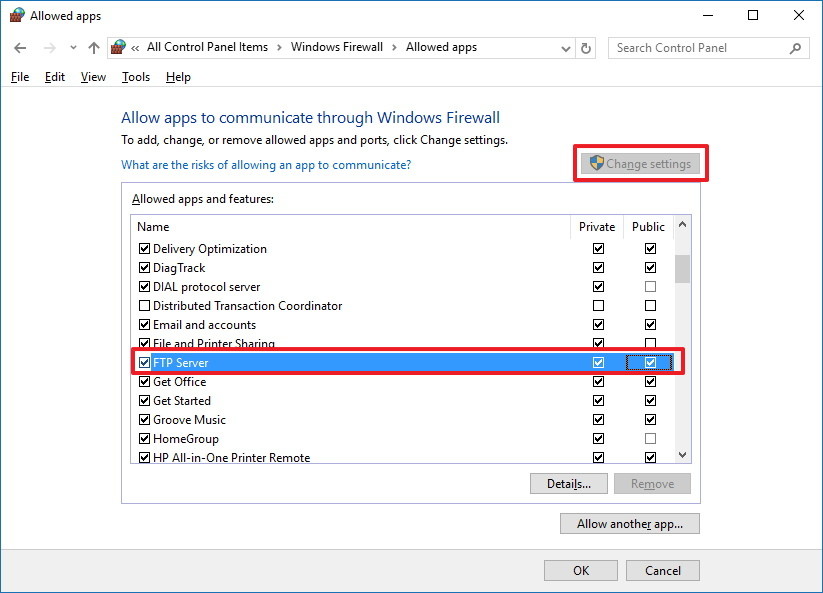
3. Click Change Settings .
4. Select FTP Server and check both Private and Public options .
5. Click OK.
From now on you can use the FTP client to connect to the FTP Server that you just created on the Local Network.
4. Configure the Router to allow external connections like?
In order for your FTP Sever server to connect to the Internet, you must configure the Router to open port number 21 in TCP / IP to allow connection to your computer.
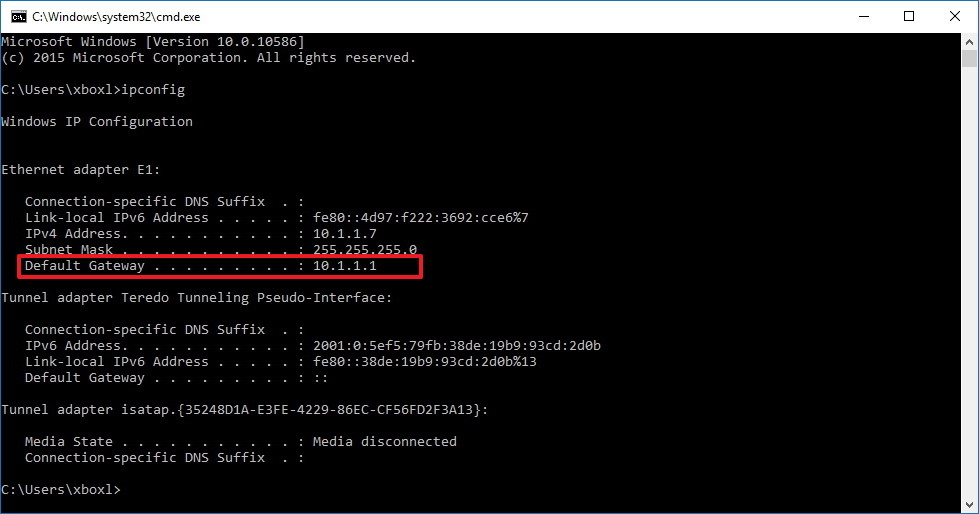
1. Press Windows + X key combination to open the Power User Menu and select Command Prompt.
2. Enter ipconfig command in the Command Prompt window and press Enter.
3. Note the Default Gateway IP address. The Default Gateway IP address is your Router address.
4. Open the default browser on your computer.
5. In the address bar, enter the IP address of the Router (which is the Default Gateway IP address you noted above) and press Enter.
6. Log in with your Router information.
7. Find Port Forwarding (usually this option is under WAN or NAT settings).
8. Create a new Port Forwarding that includes the following information:
Service name: Any name you want to use. Such as FPT-Server.
Port rage: Use port 21.
Computer TCP / IP address : Open Command Prompt then enter ipconfig in the Command Prompt window. IPv4 address is the computer's TCP / IP address.
Local TCP / IP port: Use port 21.
Protocol : TCP.
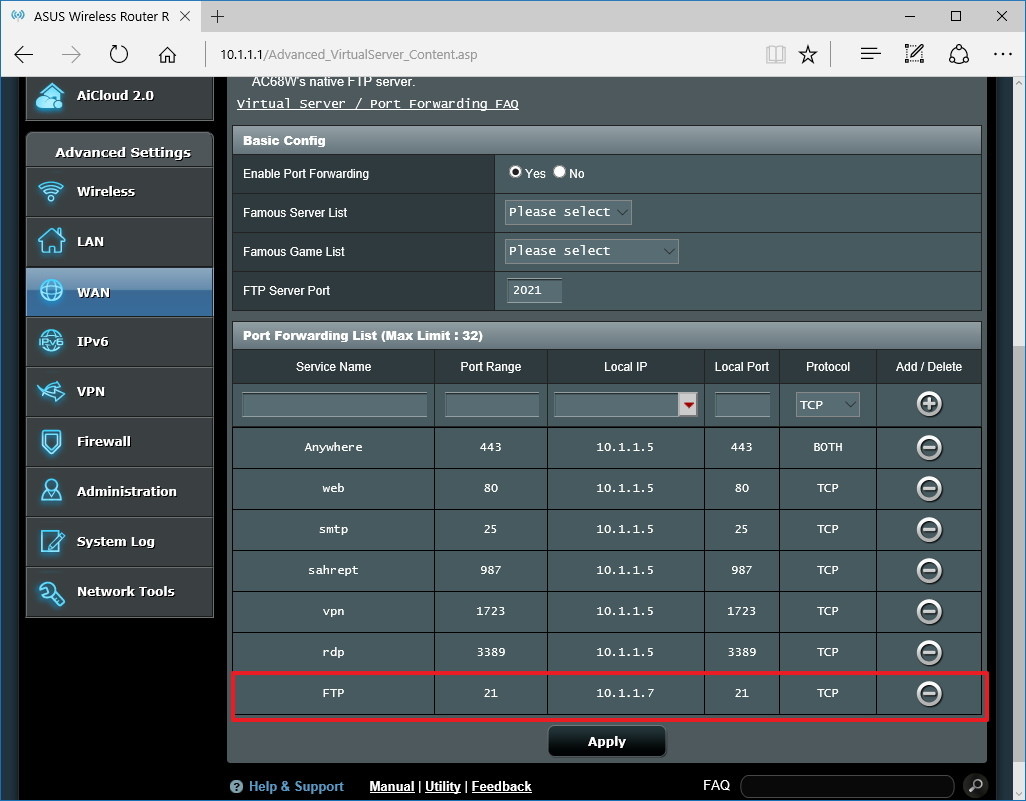
9. Apply changes and save the new Router configuration.
5. Access FTP Server on any computer
Here's how to check the fastest FTP Server after configuring the Firewall and Port Forwarding 21 on the Router:
Open the default browser on your computer and then enter the address bar of your browser's IP address, format the FTP link and press Enter.
Your IP address, for example, is FTP://192.168.1.105.
To check for an FTP Server connected to the Internet, go to Google or Bing and search for What's my IP?
Note again the IP address and then enter that IP address into the address bar of the browser using the link format FTP and press Enter.
6. How to upload files on Windows 10 FTP Server?
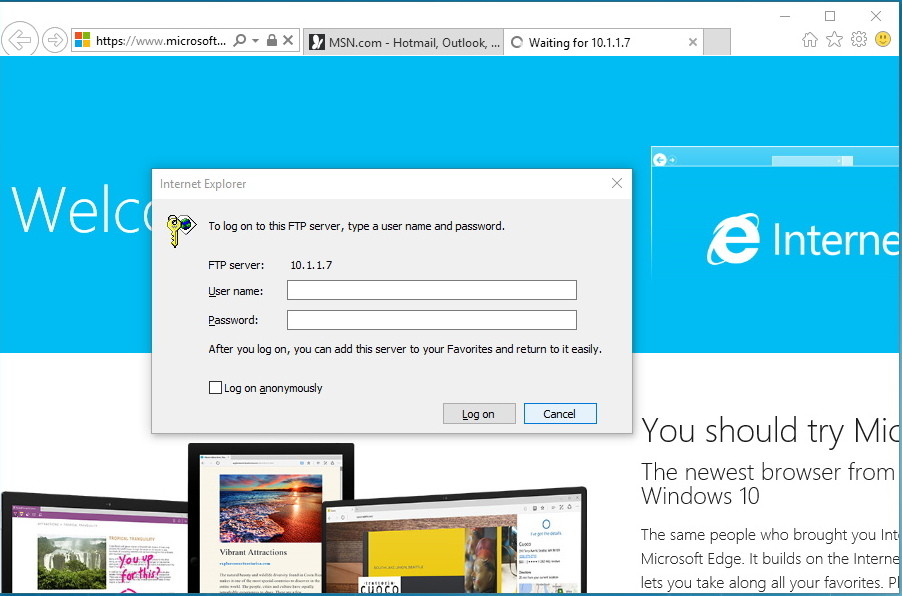
1. Press Windows + E key combination to open File Explorer.
2. In the address bar, enter your Public IP address in the FTP format, such as FTP://172.217.3.14.
3. Enter your username and password.
4. Check the Save password option .
5. Click Log on.

Alternatively, you can right-click Quick Access in the left pane and select Pin current folder to Quick Access to easily reconnect the FTP server in the next time.

7. How to create multiple FTP accounts on Windows 10?
If you want to allow multiple users to access FTP Server, you must create a new Windows 10 account for each user to access, link these accounts to the FTP folder and configure the appropriate settings. To do this, follow the steps below:
Add a new user account on Windows 10:
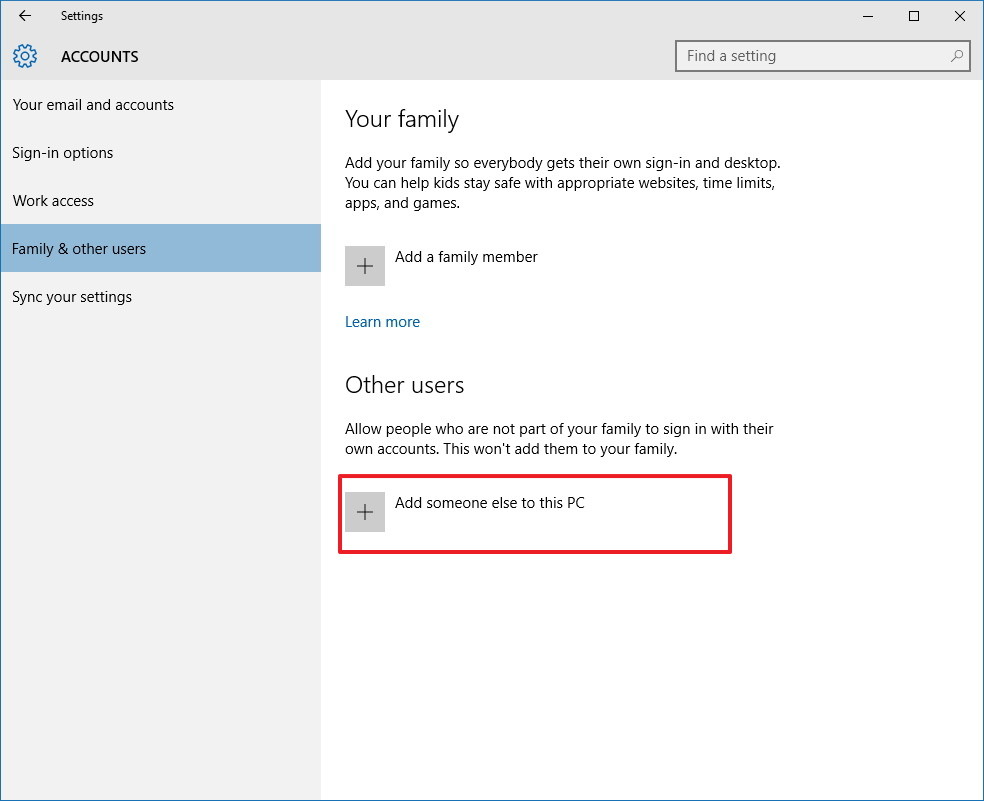
1. Press the Windows + I key combination to open the Settings menu.
2. Click Accounts.
3. Click on Family & other users.
4. Click to select Add someone else to this PC.
5. Click on the link I don't have this sign-in information.
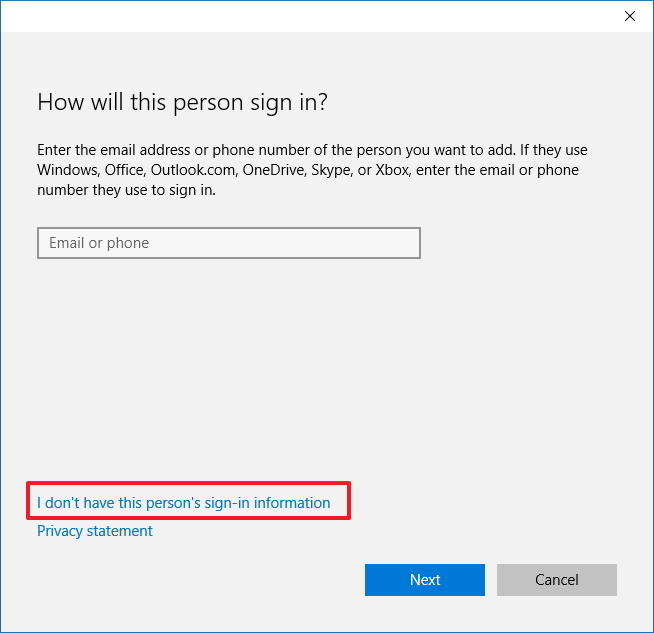
6. Click the Add a user link without a Microsoft account .

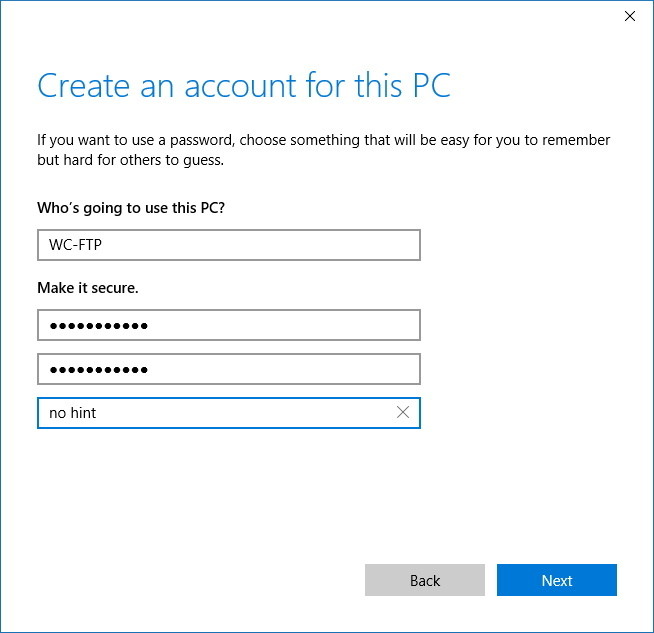
7. Enter the user account information and then click Next to finish.
Add a user account to access the FPT folder:
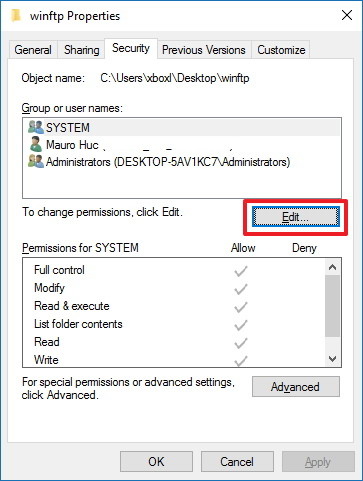
1. Right-click the FPT folder and select Properties .
2. Click on the Security tab .
3. Click Edit.
4. Click Add.
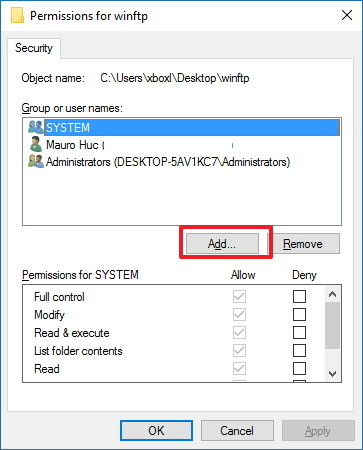
5. Enter the account name of the user account and click Check Name.
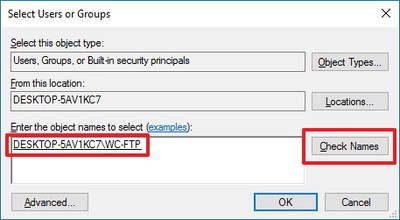
6. Click OK.
7. In the Group or user names section, select the user account name you just created and select the appropriate permissions.
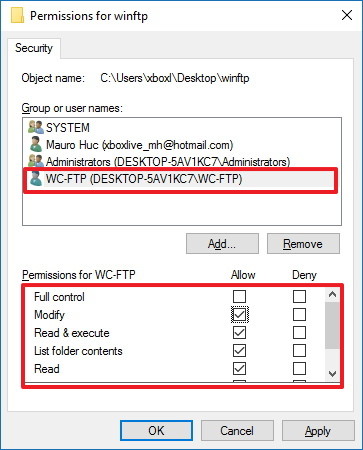
8. Click Apply .
9. Click OK.
Configure a new user account to access FPT Server:
1. Press Windows + X key combination to open the Power User Menu and select Control Panel.
2. Open Administrative Tools.
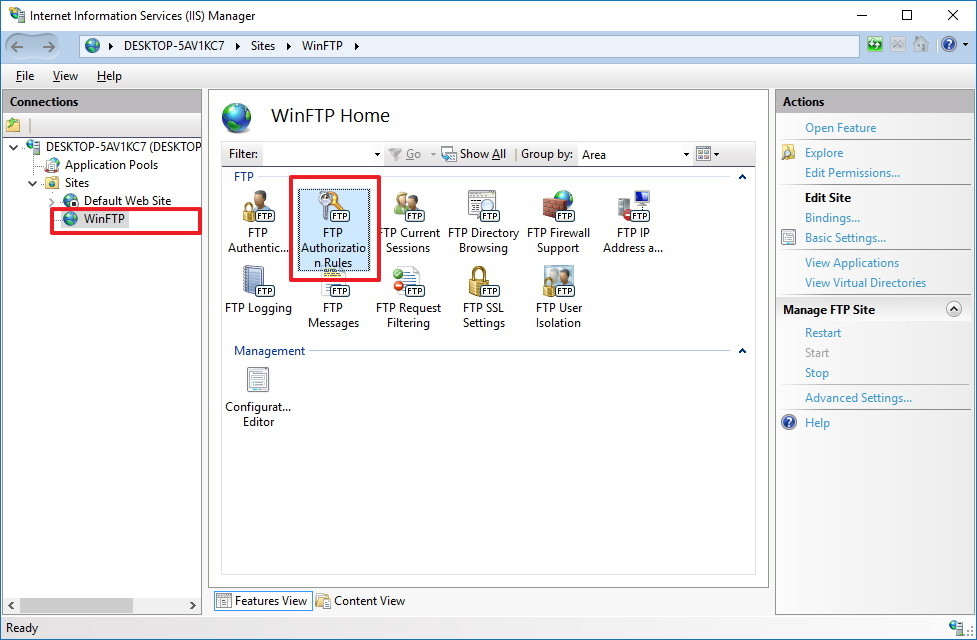
3. Double click to select Internet Information Services (IIS) Manager.
4. Expand Sites.
5. Select FTP site then double click on Authorization Rules .
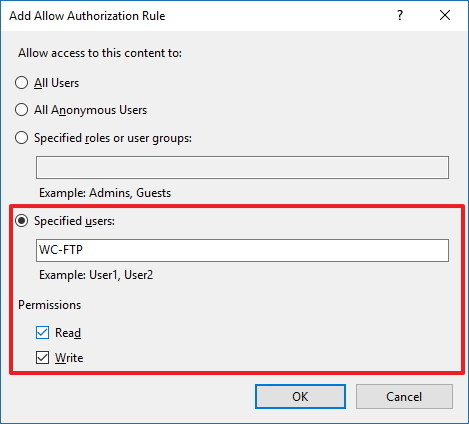
6. Right-click and select Add Allow Rules.
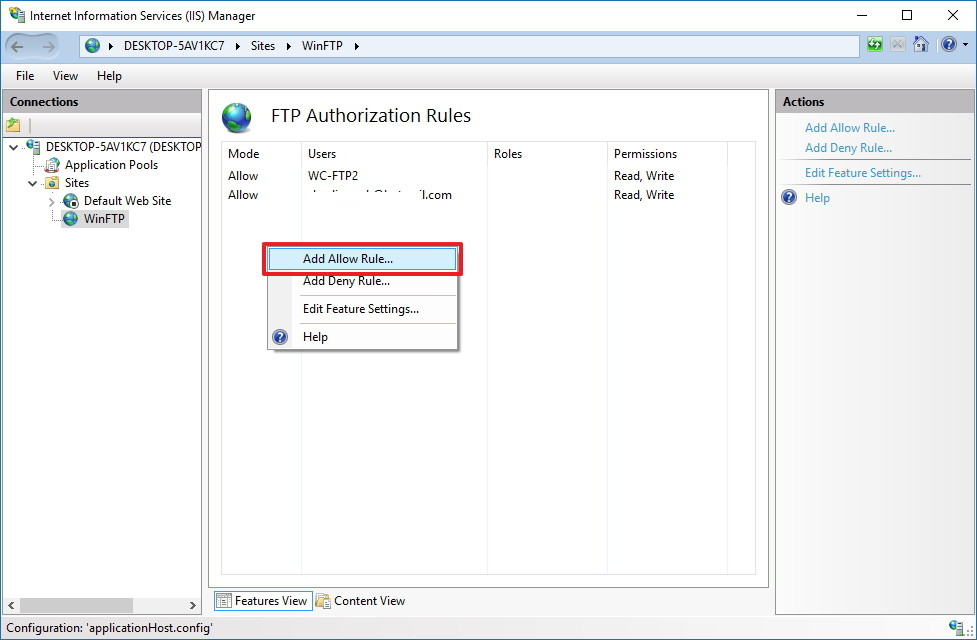
7. Select Specified user and then enter the new user account name you just created.
8. Set permissions to read and write if you want to allow users to access.
9. Click OK .
Refer to some of the following articles:
- All problems with starting Windows in Safe Mode
- Instructions for setting up and managing Network Bridge on Windows 10
- How to delete Wifi saved on Windows 10?
Good luck!
Was this article helpful?
Your feedback helps us improve.
Related Articles
 Instructions for installing Active Directory on Windows Server 20087 minutes read
 Instructions for setting up individual FTP Server with FileZilla10 minutes read
 History of Windows Server through versions12 minutes read
 Top free and paid Syslog Server software for Windows25 minutes read
 Instructions for creating a Home HTTP Server model3 minutes read
 How to set up a local web server (Local Web Server) on Windows, macOS, and Linux6 minutes read
Reader Comments 0
Sign in with email or Google to join the discussion.