How to free up to 6GB of internal memory for iPhone
Deleting or syncing photos to the cloud, uninstalling unnecessary software, etc. are ways to help users' iOS devices with more free memory. However, the memory release tips for this iPhone can only help you free up a few hundred megabytes of space or even delete the photos and applications you like. If you really want to optimize your device for the best way to get more storage space for important things, avoid wasting resources in a useless way, then apply the little trick in today's article. .
The useful trick that TipsMake.com is about to introduce is discovered by Antonio Vilass-Boas, a journalist for Tech Insider. Accordingly, you can free up to nearly 6GB of internal memory for iPhone. Specifically, in my test, Antonio used the 64GB iPhone, including 25GB of used memory, 30GB of free space, the remaining space for the operating system and default applications. Once done, his phone had nearly 6GB of free memory. This number for 16GB iPhone users that is indeed a dream thing. And if you also want to do the same thing, do not hesitate any longer without "learning" this super cool tip.
- Check iPhone memory capacity
- How much storage space do you need on your iPhone?
- How to increase the size of your iPhone when memory runs out
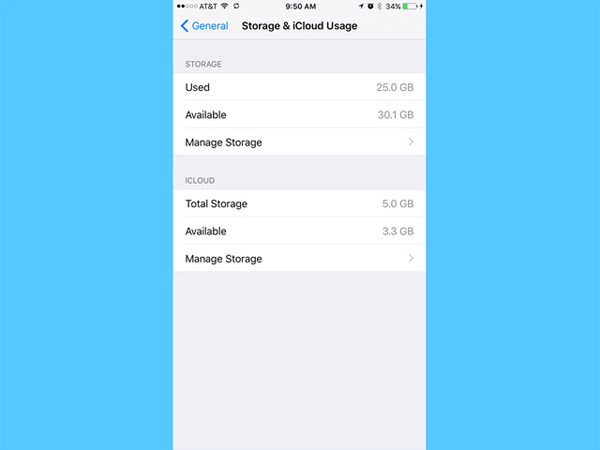
This is the initial memory capacity.
Guide to up to 6GB of internal memory for iPhone
In order to successfully implement this procedure, you must first prepare the following:
- An iPhone.
- A Lightning cable (the better the quality).
- A computer with iTunes installed (Laptop or PC is ok).
The preparation process is complete, and follow the simple steps below:
Step 1 :
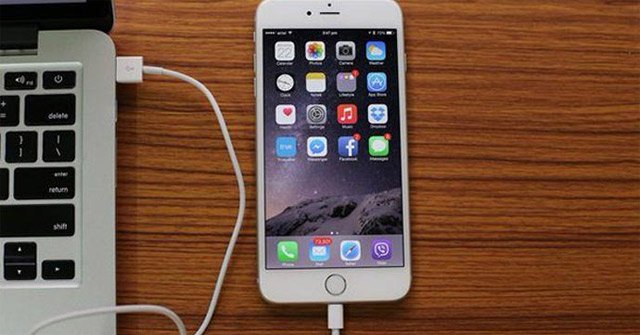
Connect your iPhone to your computer with the Lightning cable, then open the pre-installed iTunes application on your computer.
Step 2:
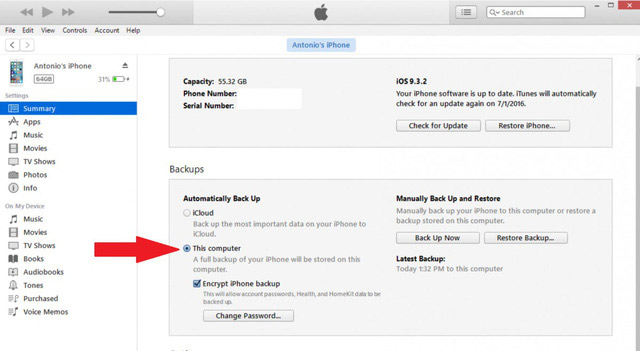
Select by link: Summary> Backups> This computer.
Step 3 :
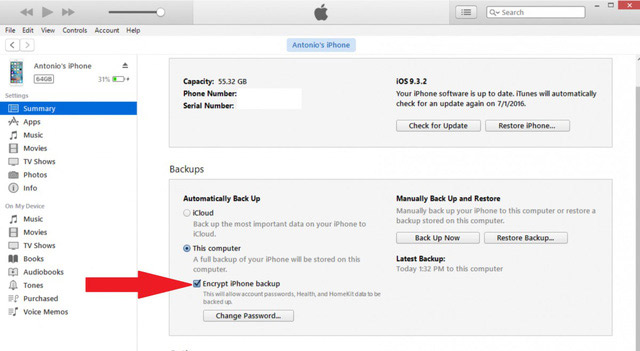
Now check the Encrypt iPhone backup section , the system will ask us to enter the password to continue the steps to release 6GB of internal memory for iPhone. You enter the password into it and must remember it carefully because this password is still used in the following steps.
Step 4:
Next select Back Up Now and back up the data.
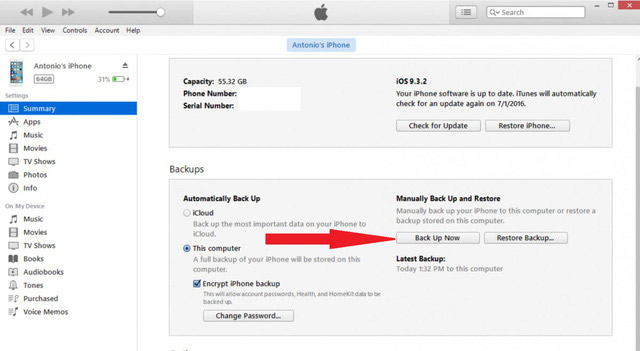
Step 5:
Once Backup is complete, select Restore Backup .
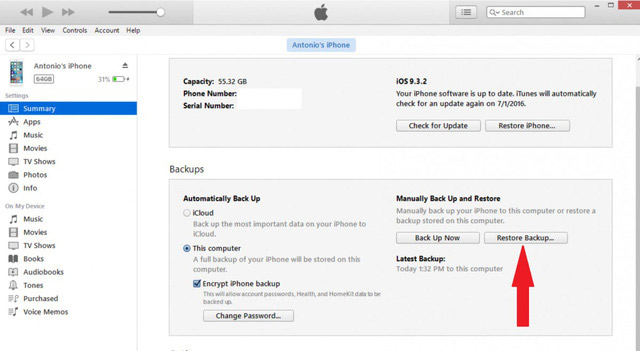
Step 6:
Do turn off the Find my iPhone feature to perform a backup restore. Specifically, you access the Settings on iPhone> select iCloud > pull down Find My iPhone section and turn off this mode. Continue to click OK in the notification window and select Restore Backup .
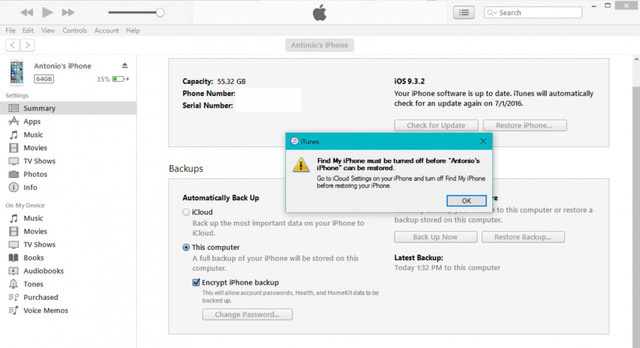
Step 7 :
You need to make sure you're restoring the correct device and clicking the Restore button. Immediately, you will be asked for the Encrypt iPhone backup password to appear in step 3. Enter the password as usual and iPhone will automatically restore the data.
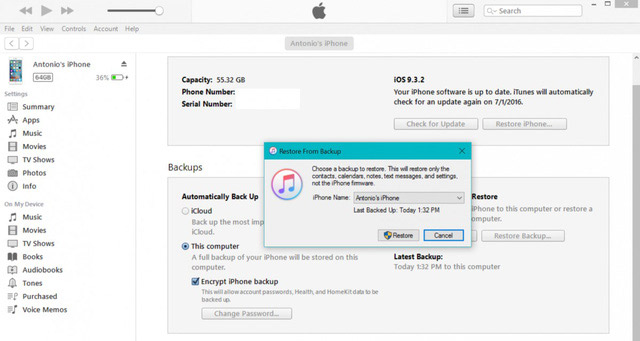
Note:
In case iPhone says there is not enough space for recovering backups, this method is considered useless. You have 2 choices to continue to live with a lack of free memory, and to erase the data on your iPhone until you have enough memory to perform a backup recovery.
Step 8:
Wait a moment, iPhone is restarting itself and setting up some basic settings. All "junk" data will be cleaned up, giving us "all tons" of free memory when the process is finished.
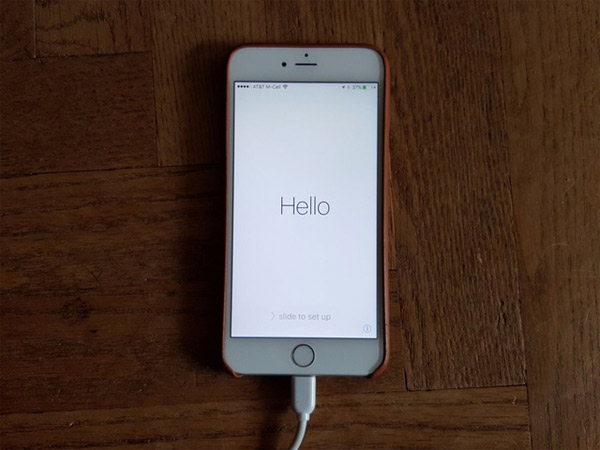
Step 9 :
Access the Settings section on the iPhone and observe the changes in the memory entry. As you can see, the iPhone displays 35.8GB of internal memory, almost 6GB more than the original. Besides, the memory used is only 19.3 GB, is it amazing?
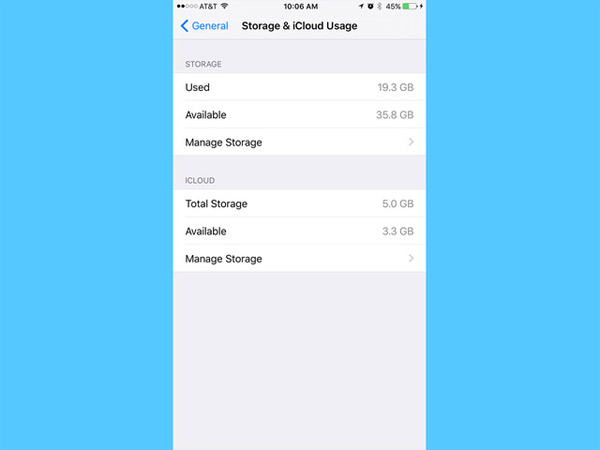 And this is the result of the steps, you have released nearly 6GB of memory for the iPhone.
Note: This method may release a different amount of memory depending on each iPhone version (Applied on devices with iOS 9 or later installed).
Above is a small trick to help you free iPhone memory, to avoid unfortunate errors made to affect the device you should carefully review the instructions and considerations before deciding to start working.
Hope the trick is useful to you.
See more:
- Instructions for checking the available RAM capacity of your device
- Android phone full of memory, what to do to fix?
- Some iPad acceleration tips run smoother