Table of Contents
Understanding Word 2013 requires more than a headline. The overview below breaks down the key facts, changes, and user impact.
- Word 2013 Complete Tutorial (Part 9): Use LINE and Paragraph Spacing
- Word 2013 Complete Guide (Part 10): Bullets, Numbering, Multilevel list in Microsoft Word
- Word 2013 Complete Guide (Part 11): How to create hyperlink links
Please take a look at the video Divide the text column in Word 2013:
Add Columns to Text
1. Black out the text you want to format.
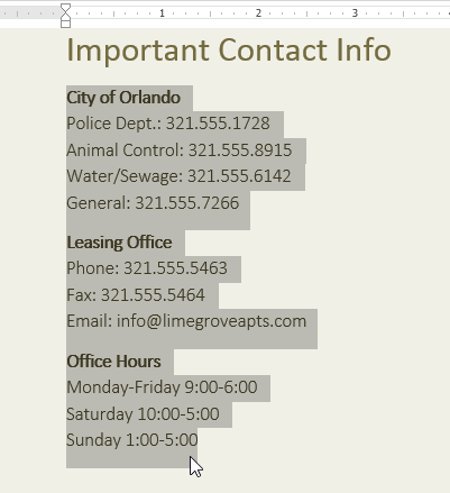
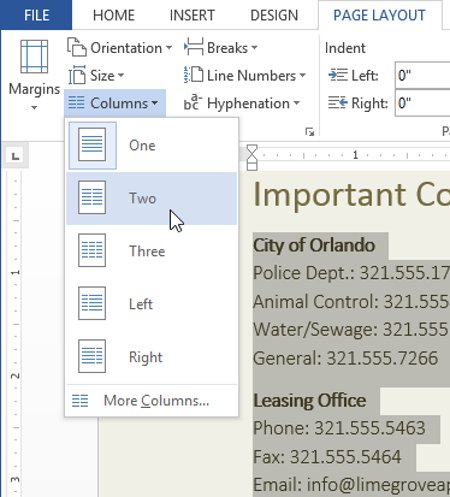
2. Select the Page Layout tab, then click the Columns command. A drop down menu will appear.
3. Select the number of columns you want to create.
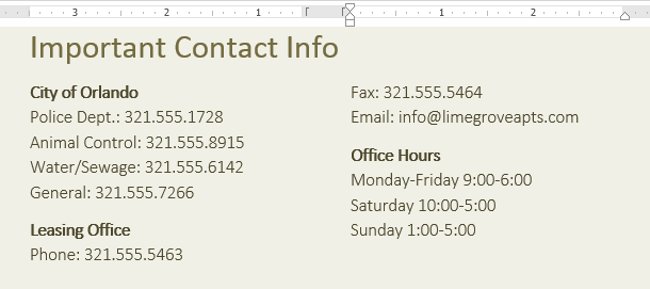
4. The text will be formatted as a column.
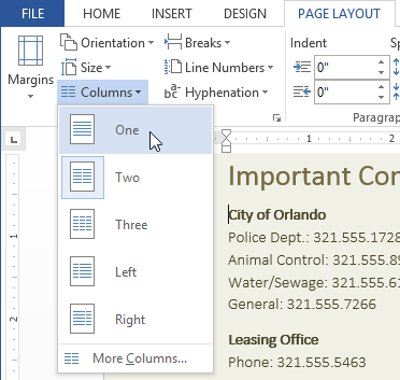
- To delete the newly created column format, place the insertion point anywhere in the column, then click the Columns command on the Page Layout tab. Select One from the drop-down menu.
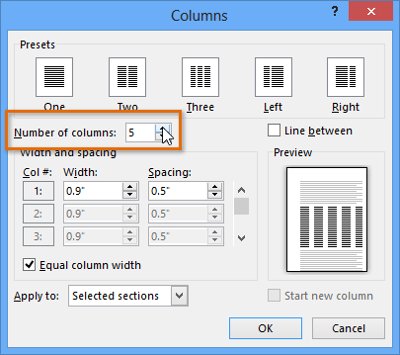
- The options related to columns are not as restrictive as in the list you see. To open the Columns dialog with all options, click More Columns at the bottom of the menu. Then, select the number of columns in the Number of columns section.
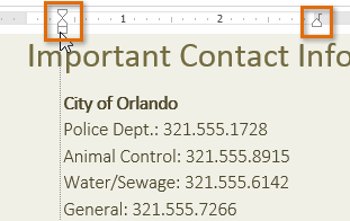
- If you want to change the distance or align the margins of columns, click, hold and drag indent markers on the Ruler bar until the column displays as you want.
Add Column Breaks
After the column has been created, the text will automatically display one after another from one column to another. If you want to control the exact start position of the new column, use the column break feature.
Create Column Breaks
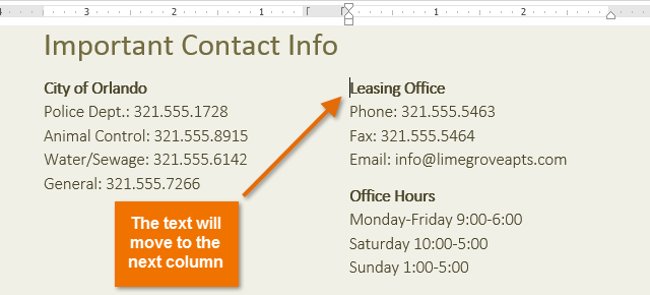
In the example below, we will add a column break to move the text to another column.
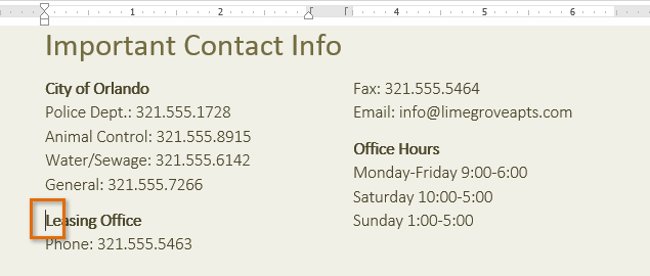
1. Place the insertion point at the top of the text you want to move.
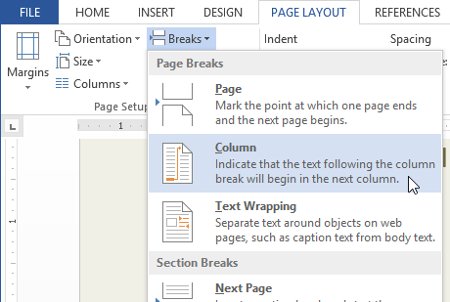
2. Select the Page Layout tab, then click the Breaks command. A drop down menu will appear.
3. Select Column from the menu.
4. The text will move to the beginning of the following column. In the example, it is moved to the beginning of the next column.
To learn more about how to add breaks to your document text, learn more about Breaks - How to break pages, break in section 13 - Our Word 2013 Complete Guide.
Having fun!
FAQ
What does Word 2013 Complete Guide (Part 13): Divide the Text Column explain?
Understanding Word 2013 requires more than a headline.
Who is most affected by Word 2013?
The overview below breaks down the key facts, changes, and user impact.
What are the key takeaways from this topic?
Word 2013 Complete Tutorial (Part 9): Use LINE and Paragraph Spacing Word 2013 Complete Guide (Part 10): Bullets, Numbering, Multilevel list in Microsoft Word Word 2013 Complete Guide (Part 11): How to create hyperlink links Please take a look at the video.
Related Articles
 Word 2016 Complete Guide (Part 13): Divide the Text Column4 minutes read
 Format Column Text in Word3 minutes read
 Decorate Text Like a Newspaper Page in Word6 minutes read
 Tips for Handling Columns in Microsoft Word: Text Column Tricks7 minutes read
 Word 2013 Complete Guide (Part 11): How to Create Hyperlink Links5 minutes read
 Word 2016 Complete Guide (Part 3): Get Familiar with Basic Text8 minutes read
Reader Comments 0
Sign in with email or Google to join the discussion.