How to insert a table, create a table in Word 2016
You probably aren't familiar with tables in Microsoft Word. Tables can be used to organize any type of content, whether text or digital. The table helps your document look more organized and organized. Let's explore the table tips in Word 2016.
Table of Contents
You probably aren't familiar with tables in Microsoft Word. Tables can be used to organize any type of content, whether text or digital. The table helps your document look more organized and organized. Let's explore the table tips in Word 2016.
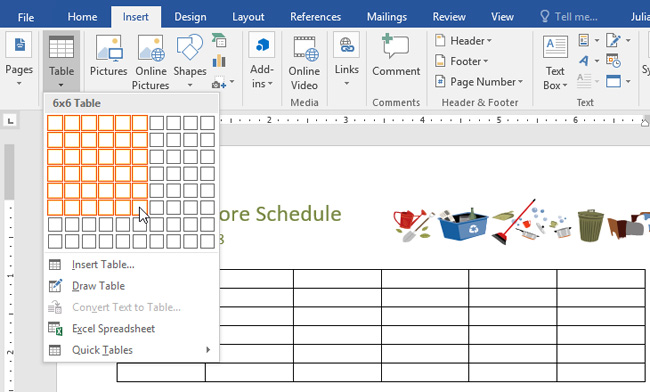
Insert blank tables Word 2016
Step 1: Place your cursor in Word where you want to insert the table.
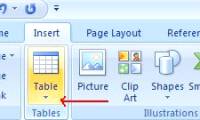
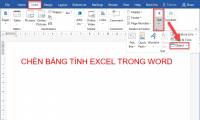
Step 2: Navigate to the Insert tab, then click Table.
Step 3: This will open a menu. Here, you can select the number of columns and rows you want to create.
Step 4: Return to the Word interface, to enter text, place the insertion point in any box, then start typing.

To move between cells, you can use the Tab key or the arrows on the keyboard.
Convert text into a table
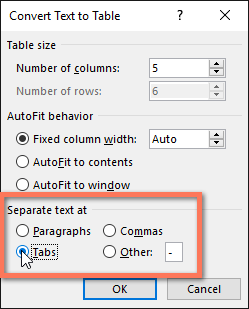
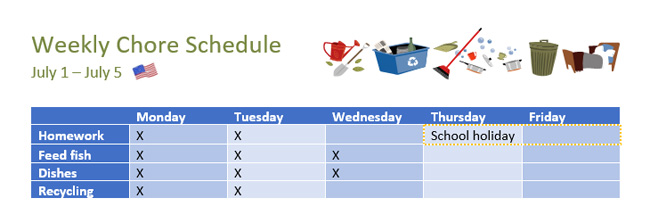
In the example below, each line of text contains a part of the task list, including work and days of the week. Each item is separated by tabs. Word can convert this information into a table, using tabs to separate data into columns.
Step 1: Select the text you want to convert to the table.

Step 2: Access the Insert tab, then click Table.
Step 3: Click Convert Text to Table from the drop-down menu.
Step 4: A dialog box will appear. Select one of the options in Separate Text at. This is how Word recognizes what content is included in each column.
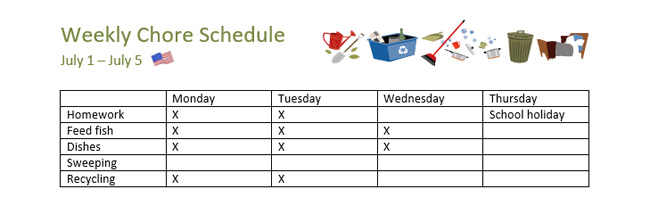
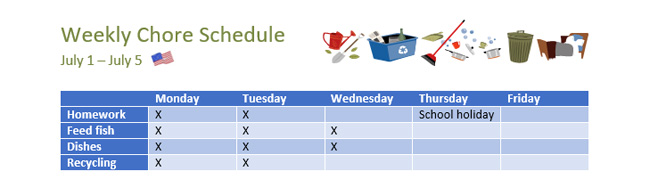
Step 5: Click OK. As a result, the text will appear in the table as shown below.
Edit Word 2016 table
Add rows or columns
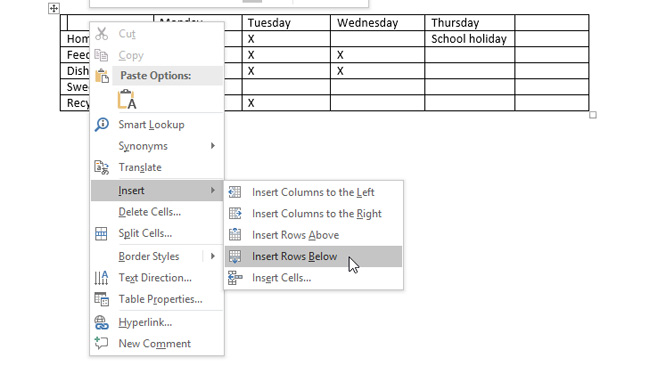
Step 1: Move the mouse outside the table, where you want to add rows or columns. Click the + sign to appear.

Step 2: A new row or column will be added to the table.
Alternatively, you can right-click the table, then click Insert to see the column and row options.
Delete rows or columns in the table
Step 1: Place the insertion point in the row or column you want to delete, then right-click. Select Delete Cells from the menu that appears.
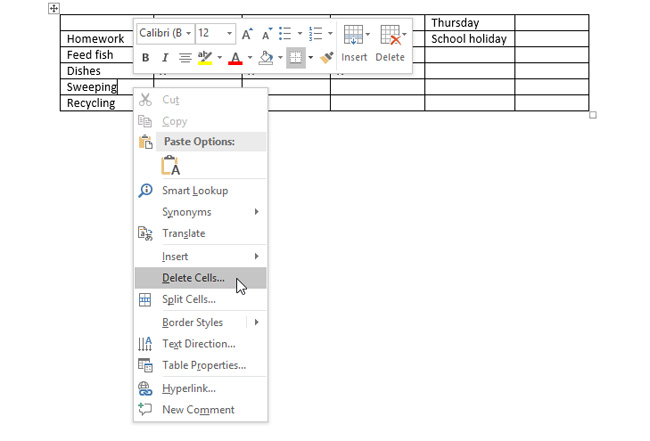
Step 2: Click Delete entire row or Delete entire column in the dialog that appears. Then click OK.

As a result, the selected row or column will be deleted.
Create Word 2016 table style
Table styles allow you to change the look of the created table including a number of designs such as colors, borders and fonts.
Step 1: Click anywhere in the table, then click the Design tab on the ribbon bar.
Step 2: Find the Table Styles group, then click More down arrow to see the full table style list.

Step 3: Click on the table type you want.
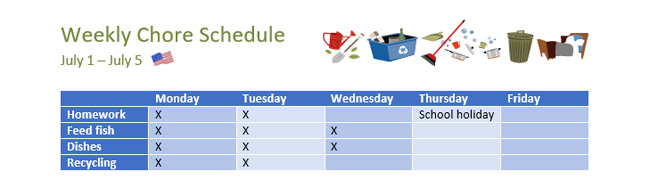
Step 4: For example, the selected table type will appear as shown below.
Edit table style options
Once you've selected the table style, you can enable or disable different options to change its look. There are 6 options: Header Row, Total Row, Banded Rows, First Column, Last Column, and Banded Columns.
Step 1: Click on any location in the table, then navigate to the Design tab.
Step 2: Find the Table Style Options section, then select or uncheck the boxes you want.

Results after editing.
Add borders to the board
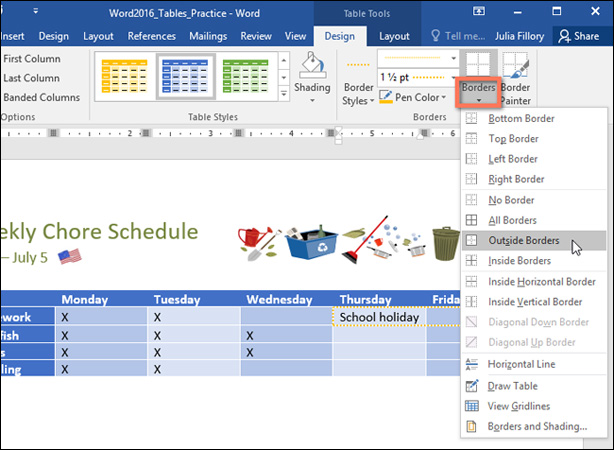
Step 1: Select the cells you want to apply the same border type to.
Step 2: Use the commands in the Design tab to select Line Style, Line Weight and Pen Color.
Step 3: Click the drop-down arrow in the Borders section.
Step 4: Select the border type in the drop-down menu
Results after adding borders.
Good luck!
You can see more:
- Instructions for installing and using Office 2016
- Complete Word 2016 tutorial (Part 20): Align, align, and group objects
Was this article helpful?
Your feedback helps us improve.
Related Articles
 How to create a table in Word 20076 minutes read
 MS Word - Lesson 8: Creating a table2 minutes read
 Instructions for inserting table captions in Word3 minutes read
 How to insert an Excel table into Word3 minutes read
 Manipulating tables in Word2 minutes read
 How to insert and create tables in Word 20165 minutes read
Reader Comments 0
Sign in with email or Google to join the discussion.