Tips for handling columns in Microsoft Word
If you often have to work with the Microsoft Word editing tool, it probably isn't strange to split the column in content. For some types of documents, when users split columns according to the corresponding items, the reader can follow the content more quickly and easily. In the article below, the Network Administrator will bring you some of the necessary tricks in the process of handling text columns in Word content, making the editing process more convenient and efficient.
1. How to create text column borders:
When creating borders around a column of textual content, the reader and the content editors can easily identify which column the text belongs to, which makes it more convenient to edit.
Step 1:
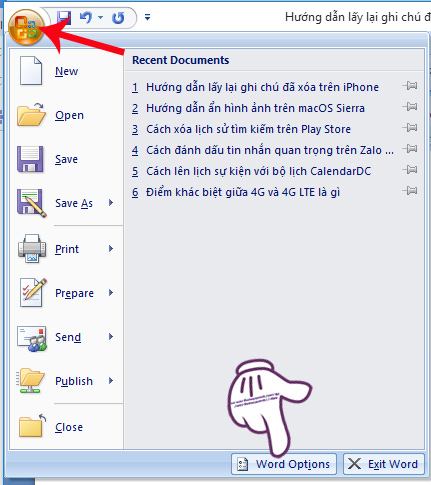
In Word 2007, first in the text interface we will click on the Office icon and then press Word Options .
Step 2:
Next, users click on the Advanced item in the menu list on the left. Look to the right interface, select Show Document Content and select Show text boundaries . Finally, click OK to create a border for the text column.
With Word 2003 version , we will follow the Tools> Options> View path and also select the Text Boundaries section to create a border for the text content column.

2. Quick access to the dialog box for handling Columns columns:
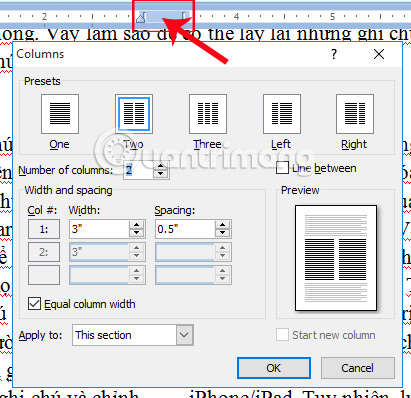
To be able to quickly process text columns in Word content, we will open the Columns dialog. Opening the Columns dialog is very simple, you just need to place your mouse on the text column you want to process in Word content. Next, double click on the blue space on the horizontal ruler as shown below.
3. Adjust size, column width:
Depending on the requirements of the text column in the content, users can adjust the size of the column width. First, open the Columns dialog box according to how to do part 2 above . At the Colums dialog interface, to get the column width equal , we select Equal column width .

However, if you want to manually adjust the center of the column , you can remove the Equal column width traces . Next, adjust the size of the column width in the Width and Distance between columns at Spacing .

4. How to add multiple columns of Word content:
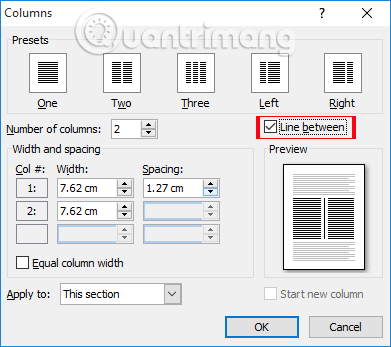
In the Columns dialog, we can create additional columns for arbitrary text content, with the number of columns available in the Presets section, or split the column layout right and left. Or manually add the number of columns of text content in Number of columns section.
When you select the Line between option, a line will appear to separate the columns, creating a clearer layout for the content being processed.
5. Insert the text title in the column after formatting the column:
When we insert a title for each column in the textual content, users can capture the content of a column, as well as columns faster, especially with the content divided into columns.
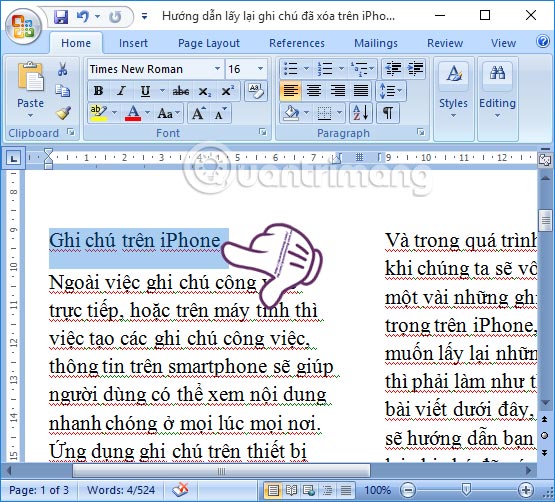
However, there are many cases when users enter a title after creating a column, the title will be on a certain column, but not separate from the column text. If you fall into this situation, you can do the following.
Step 1:
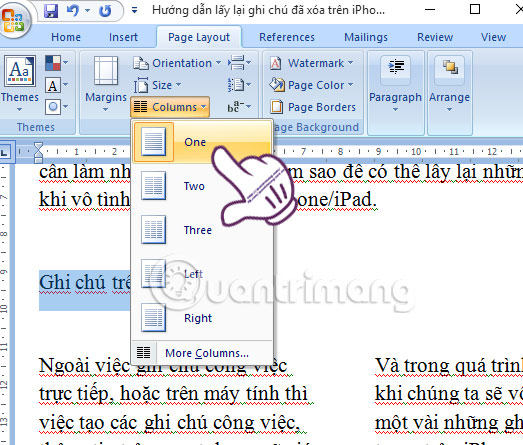
On the column you need to set the title, in the first line enter the column title, please highlight it.
Step 2:
Next, select the Page Layout tab, click on the Columns item and select One .
6. Break the text column faster in Word:
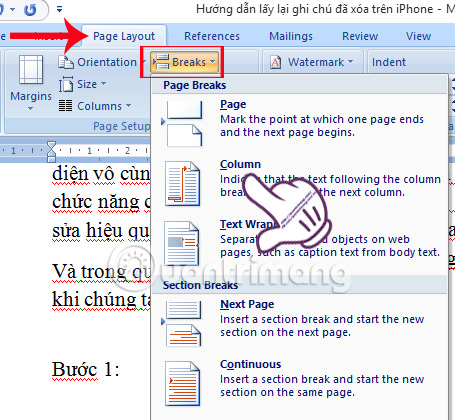
To interrupt the column in the text, we will press Ctrl + Shift + Enter, or press Enter several times to get down the page and move to the next column. However, if you want to break the column faster than the user can perform the following simple operation.
First, place your mouse cursor at the beginning of the text you want to move to the next column, then click on Breaks and click Column .
7. Align content between text columns:
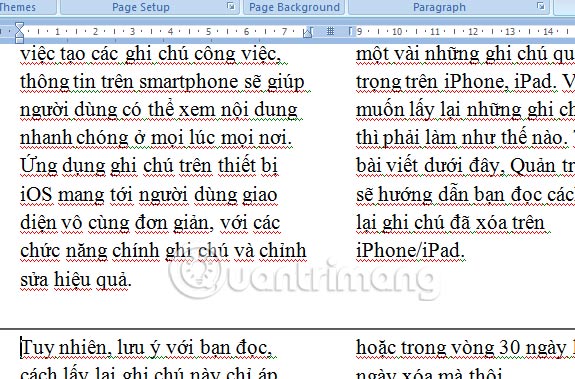
In the process of dividing the column of content, there will be a phenomenon of long columns and short columns. This is due to the number of words in the content of each column as well as the width of each column. This will make the layout of the entire text content heterogeneous. To handle this problem, for columns with long content, we can perform column interrupt operations like the way to do section 6 above.
Thus, the content in that long column will be moved to the next column. Depending on the content of each column and the layout of each lesson, the user selects the content position to interrupt the most relevant star column.
These are some of the tips for handling text columns in Word content. In case the text is divided into multiple columns, with different content you should set the title for the column. Besides, the alignment of short lengths, the distance between columns is also necessary to get a more complete, beautiful Word content layout. Hopefully the above article will help you get some more skills when working with text columns on Word.
Refer to the following articles:
- Create a quick dot (……………) line in Microsoft Word
- Instructions for printing two-sided paper in Word, PDF, Excel
- Simple way to convert PDF files to Word
I wish you all success!