Table of Contents
The Most Detailed Instructions on Drawing, Creating, and Inserting Charts in is easier to approach with a clear overview and reliable steps. This guide organizes the essential information, highlights practical details, and explains what to check along the way.
Key Takeaways
- Review reasons to use charts in word.
- Follow the steps to draw, create, insert charts in word 2013.
- Follow the recommended steps in order to avoid common mistakes with the most detailed instructions on drawing, creating, and inserting charts in.
Reasons to Use Charts in Word
- Helps illustrate data visually - Supports effective comparison and analysis of data - Easy to edit and update when needed.
How to Draw, Create, Insert Charts in Word 2013
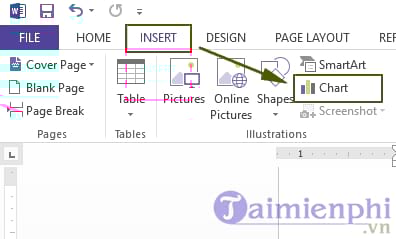
Step 1: Open the text file where you want to insert the chart, on the Ribbon toolbar, click Insert > Chart.
Step 2: The Insert Chart window opens, in the dialog box there are many types of charts, so depending on the data you can choose the appropriate chart.
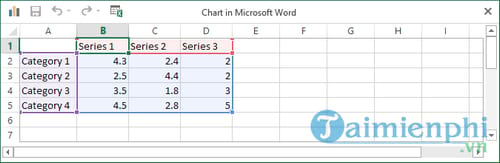
Chart types:
- Column: vertical column chart displays data that changes over time or compares items. In Column, there are different chart types such as: 2D column chart, 3D column chart, stacked column chart and 3D stacked column chart.
- Line: line charts can show trends over time with markers at each data value. In Line charts, there are many types of charts such as: line charts, marked line charts, stacked line charts, 3D line charts.
- Pie: circular chart, representing data in percentage form.
- Bar: horizontal bar chart, similar to Column but organized vertically and with horizontal values.
- Area: area charts are used to show change over time and draw attention to total value over a trend.
- XY (Scatter): XY scatter chart, used to compare data values pair by pair.
- Stock: stock chart, often used to illustrate the fluctuations of stock prices. In addition, this chart also illustrates the fluctuations of other data such as rainfall, temperature.
- Surface: surface charts help you to combine data sets optimally, the colors will indicate areas belonging to the same value range. You can create a surface chart when both the category and the value series are numeric values.
- Doughnut: a doughnut chart shows the relationship between parts and a total, it can include multiple data series.
- Bubble: Bubble chart is a type of xy (tan) chart, this chart is widely used in market research and financial analysis.
- Radar: A spider chart that displays multivariate data, often used to determine performance and identify strengths and weaknesses.
Step 3: After selecting the chart type, click OK. Here I choose chart 2 and we will have a table like this:
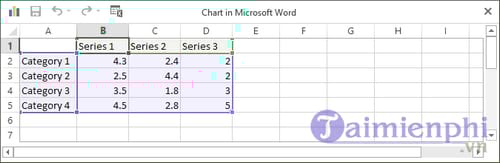
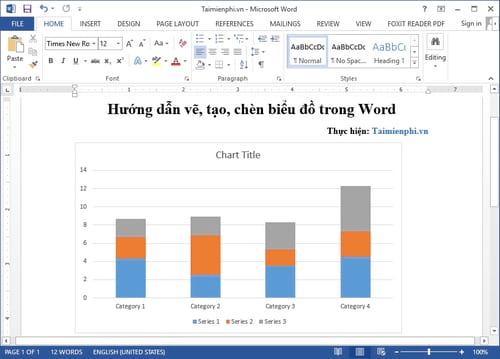
Step 4: You can change the information and data for the chart similar to the image below.
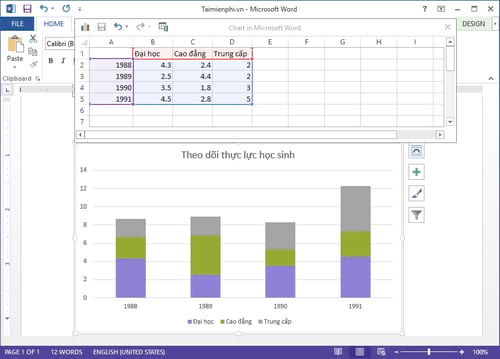
So, inserting a chart in Word 2013 is quite simple and you can easily choose the chart types that suit your needs. Please refer to the instructions for drawing charts in Word 2016 to do it more easily if you are using Word 2016 and are not familiar with the operation.
Final Thoughts
The most reliable way to handle the most detailed instructions on drawing, creating, and inserting charts in is to follow the process in order, verify each important setting, and test the result before moving on. Use the guidance above as a practical reference, then adjust the details for your device, software version, or specific goal.
FAQ
What should I know first about The Most Detailed Instructions on Drawing, Creating, and Inserting Charts in?
Instructions on how to insert charts in Word 2013 with popular types such as columns, circles, lines. To help you illustrate data clearly and professionally.
How do I get the best results with The Most Detailed Instructions on Drawing, Creating, and Inserting Charts in?
Use current software or equipment, follow the steps in order, review the recommended settings, and test one change at a time so you can identify what improves the result.
What should I do if The Most Detailed Instructions on Drawing, Creating, and Inserting Charts in doesn't work as expected?
Check compatibility, permissions, connectivity, and version-specific settings. Restart the relevant device or app, then repeat the process carefully before trying a more advanced fix.
Related Articles
 How to Drawing Charts in Canva4 minutes read
 Instructions for Inserting, Drawing and Creating Charts in Word 20074 minutes read
 How to Draw Charts with AI Accurately and Quickly3 minutes read
 PowerPoint 2019 (Part 22): Charts: Explained9 minutes read
 Instructions for Creating Charts on PowerPoint5 minutes read
 How to Insert and Create Tables in Word 2016: Step-by-Step Guide7 minutes read
Reader Comments 0
Sign in with email or Google to join the discussion.