Create automatic table of contents in Word for Word 2007, Word 2010 to Word 2019
Create automatic table of contents in Word to save time and increase convenience when working on this text editor. Below is a guide to creating a detailed automatic Word index, please follow.
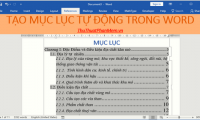
Table of Contents
The easiest way to create an automated table of contents is to take advantage of the Heading Styles you want to include them in the table of contents. For example: Yes Heading 1, Heading 2, . depending on the content of the document.
When you add or delete any Heading from the document, Word updates the table of contents automatically. Word also updates the page number in the table of contents when the information in the document is added or deleted. When you create an automated table of contents, the first thing you think is to mark items in the document. The table of contents is formatted into the Heading levels. Level 1 will include any content formatted with the Heading 1 style.
The tutorial below uses Word 2007, you can do the same to create automatic indexes in Word 2016, Word 2013, Word 2010 even Word 2019, because the way they are made is basically no different. . If you're using Word 2003, see how to create an automatic index in Word 2003 here.
Create automatic table of contents in Word 2007, 2016, 2013, 2010
To make it easier to imagine, creating an automatic table of contents needs to go through 2 steps, step 1 is to mark the table of contents, and step 2 is to display the table of contents. Marking the table of contents is the most important and it determines the accuracy of the table of contents, you need to be careful.
Mark the table of contents
You can mark items in the table of contents automatically in one of two ways: use built-in Headings, or mark individual text items.
Method 1: Use the pre-installed Heading Styles :
- Select the content you want to format into Heading, black out carefully so you don't add spaces or text to the table of contents.
- Click the Home tab
- In the Styles group, click Heading 1 (or select arbitrary heading)

- If you don't see the Style you want, click the arrow to expand Quick Styles Gallery
- If the style you want doesn't appear, click Save Selection as New Quick Style

Method 2: Mark items with Add Text of Table of Contents
- Select the content you want to create Heading by blacking it, apply just enough lines to create Heading, avoid blackening excess
- Click the References tab
- Click Add Text in the Table of Contents group
- Click the Level you want to apply to the selected content

Create automatic table of contents in Word
To create an automated table of contents, follow these steps:
- Place the cursor on the document where you want to set the table of contents automatically (usually the first or last page)
- Click the References tab
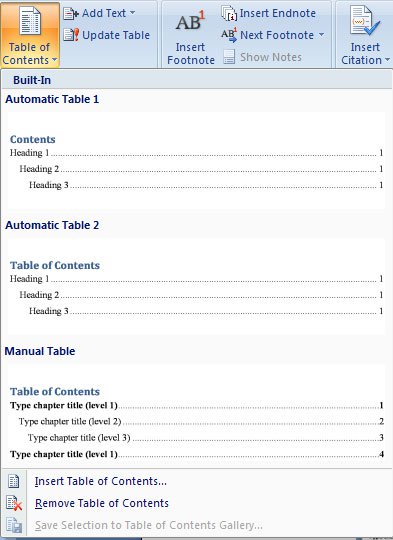
- Click the Table of Contents button and select the available table of contents. If you don't like it, you can click on Insert Table of Contents and format the table of contents in your own way.
- On Word 2016, 2019 versions, you have an option to Custom Table of Contents to edit the table of contents.
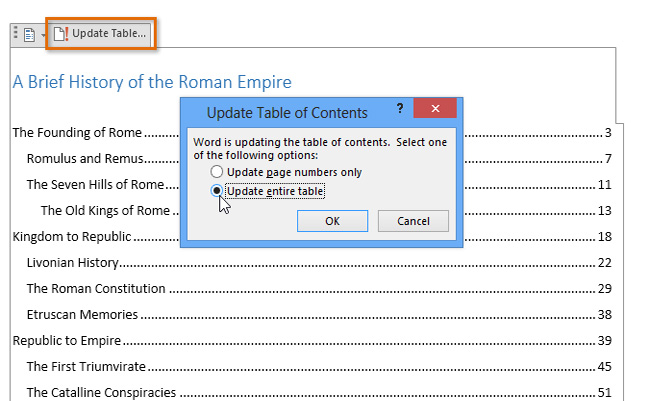
Update Table of contents:
If you add or delete Heading. Table of contents can be updated by:
- Apply Heading or mark items as mentioned above
- Click the References tab in the Ribbon group
- Click Updat Table, there are 2 options to update the table of contents: update the page number and update the whole page. If you do not edit the names of the Headings, but only edit the text to change the page number, you just need to update the Update page numbers only.

Delete the table of contents automatically
To delete the table of contents automatically, follow these steps:
- Click the Referencs tab on the Ribbon group
- Click the Table of Contents
- Click Remove Table of contents.
Video tutorial to create automatic table of contents on Word 2019
If you need to create a list of tables for your documents, do not type manually manually, refer to the instructions for creating an automatic chart catalog in Word of Word.
Was this article helpful?
Your feedback helps us improve.
Related Articles
 How to create an automatic table of contents in Word 2019/2016/2010/200710 minutes read
 Create automatic table of contents in Word 20038 minutes read
 How to create automatic table of contents in Word 20133 minutes read
 How to create automatic table of contents in Word 20164 minutes read
 How to do automatic table of contents in Word 2013, 20164 minutes read
 Instructions on how to create automatic table of contents in Word quickly 20205 minutes read
Reader Comments 0
Sign in with email or Google to join the discussion.