Table of Contents
Learning how to add AutoText in word 2016 document quickly doesn't have to be complicated. This updated guide presents a clear workflow, practical checks, and troubleshooting advice you can use while completing the process.
Key Takeaways
- Review when should you use AutoText.
- Follow the steps to add autotext in word 2016 document.
- Learn how to add new autotext in word 2016.
When Should You Use AutoText?
- When you frequently enter fixed phrases (company name, slogan, address). - When you want to ensure consistency in documents. - When you need to optimize data entry operations.
How to Add Autotext in Word 2016 Document
1. Add New Autotext in Word 2016
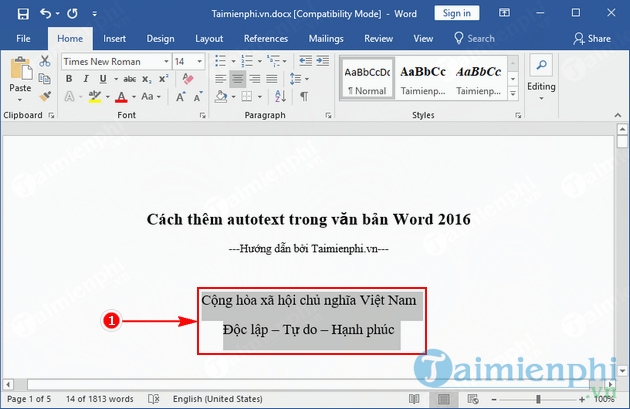
Step 1: Select and highlight the text you want to abbreviate, like the image below, I choose the familiar slogan Socialist Republic of Vietnam.
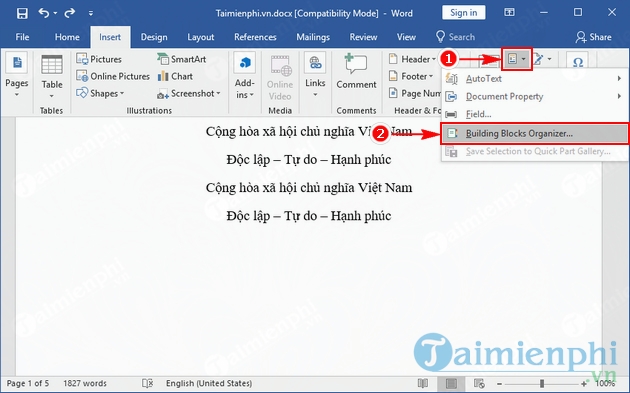
Step 2: On the Word 2016 toolbar, open the Insert tab, select Quick Parts.

Step 3: In the Quick Parts slide window, select AutoText, then select Save Selection to AutoText Gallery.

Step 4: In the Create New Building Block window, you need to pay attention to the Name section. This is where you put the abbreviation for the phrase you want to abbreviate, as shown below, I put the abbreviation for my phrase as ch.
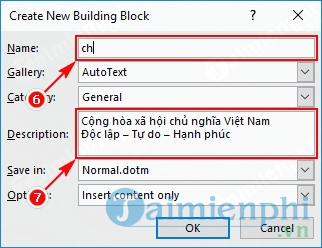
You can also add a description to the Description section for your abbreviation if you have multiple phrases to abbreviate. For the rest, you should leave it as default and not change it.
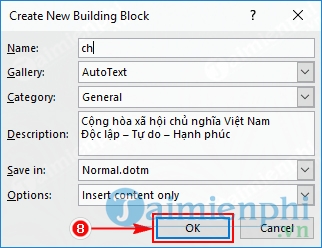
Step 5: Click OK to confirm.
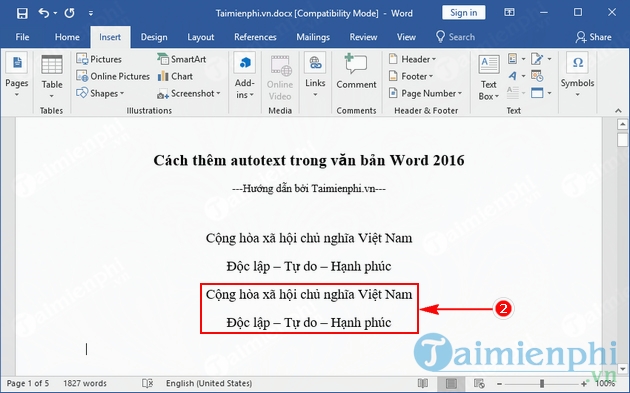
So you have finished adding AutoText to your Word document. Type your abbreviation into the document. This helps you check if it works.
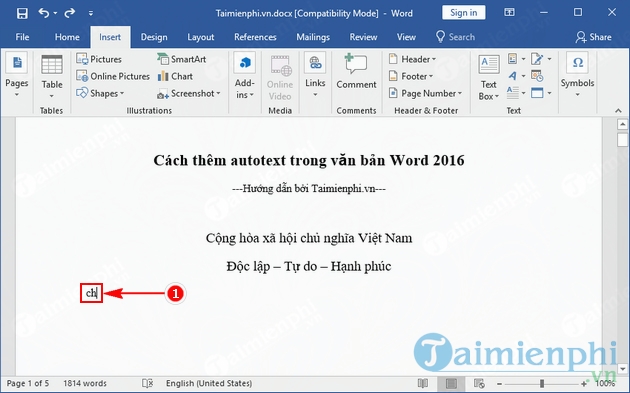
Next press F3, the result will be as shown below.
2. Use Saved AutoText
During use, if you are not satisfied with the existing AutoText, you can edit them according to the steps below:
Step 1: Reopen Quick Parts (see step 2 in the instructions above), in the slide window select Building Blocks Organizer.
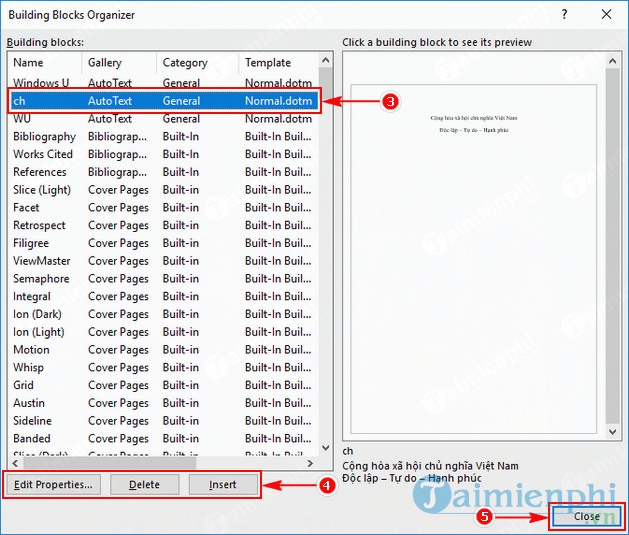
Step 2: In the Building Blocks Organizer window, find the abbreviation you want to edit, there will be 3 functions for you to choose from:
+ Edit Properties: Edit the selected AutoText. + Delete: Delete the selected AutoText. + Insert: Insert the selected AutoText into the text.
After editing, click Close.
This guide has guided you how to add AutoText in Word 2016 in a simple way, helping you quickly enter commonly used phrases without having to retype many times. Wish you success.
Final Thoughts
The most reliable way to handle add AutoText in word 2016 document quickly is to follow the process in order, verify each important setting, and test the result before moving on. Use the guidance above as a practical reference, then adjust the details for your device, software version, or specific goal.
FAQ
What should I check before I add AutoText in word 2016 document quickly?
Use the latest available software, confirm that your device meets the requirements, and make sure you have the necessary permissions, account access, or backup before changing anything.
Why might I be unable to add AutoText in word 2016 document quickly?
Common causes include outdated software, missing permissions, incompatible settings, incomplete setup steps, or a temporary network problem. Recheck the process from the beginning and restart the app or device if needed.
Is it safe to add AutoText in word 2016 document quickly?
It is generally safe when you use official tools, review every permission, and back up important data before making system-level or account-level changes.
Related Articles
 How to Create Autotext in Word14 minutes read
 How to Add Autotext in Word for Faster Typing6 minutes read
 How to Use the Autotext Format of Microsoft Word1 minutes read
 Create Autotext in Word 2007, Edit Documents Faster: What You Need to Know5 minutes read
 How to Turn a Scanned Document into Microsoft Word Document8 minutes read
 Create Master Document in Word 2010 from Many Word Files7 minutes read
Reader Comments 0
Sign in with email or Google to join the discussion.