Table of Contents
This article examines Tutorial and explains the main developments, practical implications, and context readers should understand.
Tutorial Overview
>> Eliminate red-eye phenomenon in photos
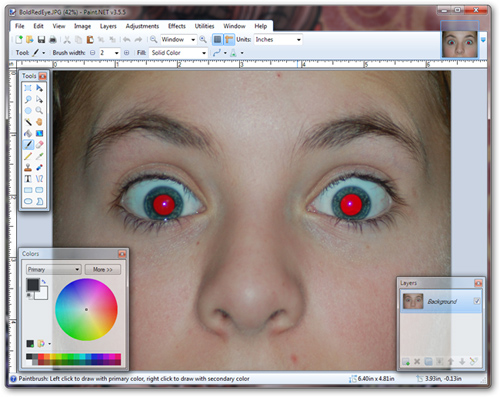
Here, you need to use the support tool called Color Replacement Tool on the Tools menu:
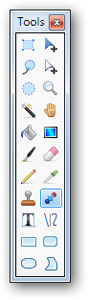
Press R to display the following color picker:
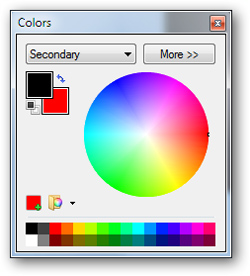
You choose the color you want. In the illustration image, we will choose the main color is black, while the secondary color is red, corresponding to replacing the red in the eye with black we choose:

Adjusting the Brush Width accordingly, in the example above it is quite large, so we will select a Brush Width of 100. Also change the Tolerance parameter if we cannot erase the red areas on the eye:
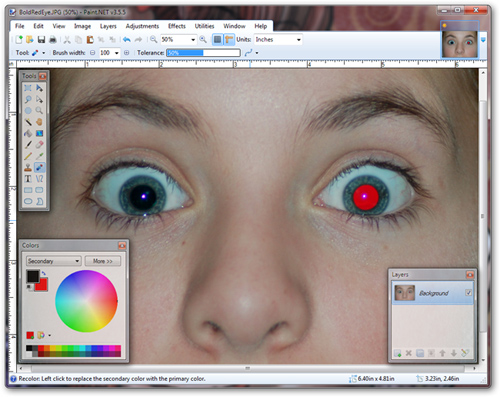
Do the same with the other eye:
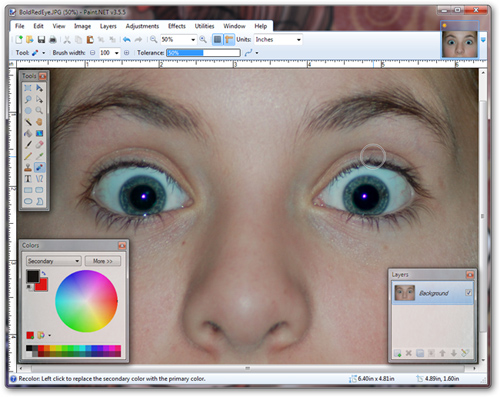
So you have completed the basic operations to remove the 'red eye' effect in lightless photos quickly, just meticulously while deleting and choosing colors so that it is natural., you have the image you want. Good luck!
FAQ
What is the main topic of Remove the Red-Eye Effect in Photos with Paint. NET: Tutorial?
This article examines Tutorial and explains the main developments, practical implications, and context readers should understand.
Why is Tutorial important?
Tutorial Overview >> Eliminate red-eye phenomenon in photos Here, you need to use the support tool called Color Replacement Tool on the Tools menu: Press R to display the following color picker: You choose the color you want.
What should readers remember about Tutorial?
In the illustration image, we will choose the main color is black, while the secondary color is red, corresponding to replacing the red in the eye with black we choose: Adjusting the Brush Width accordingly, in the example above it is quite large, so we will.
Related Articles
 Paint.net 4.3.4 - Paint.net 4.3.4 Download and Installation6 minutes read
 Remove Red Eye Effect with 'Red Eye Remover'2 minutes read
 How to Remove Text from an Image Using Photoshop - Using the Text Removal Tool8 minutes read
 minutes read
 How to Create Sky Effect for Photos with B6125 minutes read
 How to Remove the Gemini Watermark from Photos: Step-by-Step Guide8 minutes read
Reader Comments 0
Sign in with email or Google to join the discussion.