Quickly fix WLAN AutoConfig errors on Windows 11
Want to fix your Wi-Fi problems quickly and effectively yourself? This article will provide you with some tips to resolve the 'WLAN AutoConfig' error on Windows 11.
How to fix the problem
Before attempting more complex troubleshooting steps, start with some basic fixes. Ensure your adapter's WiFi signal is strong enough, and move the WiFi router closer to the mains if necessary. Try restarting both the router and your computer to refresh the system. Check if airplane mode is enabled, as this can cause the computer to lose connection. Make sure it's disabled by clicking the WiFi icon in the taskbar.
Activate the Network Troubleshooter tool.
Network Troubleshooter, a built-in tool, can diagnose and fix problems related to the WLAN AutoConfig service. You can follow these steps:
Step 1 : Press the Win + I key combination to open Settings.
Step 2 : Select System, then select Troubleshoot.
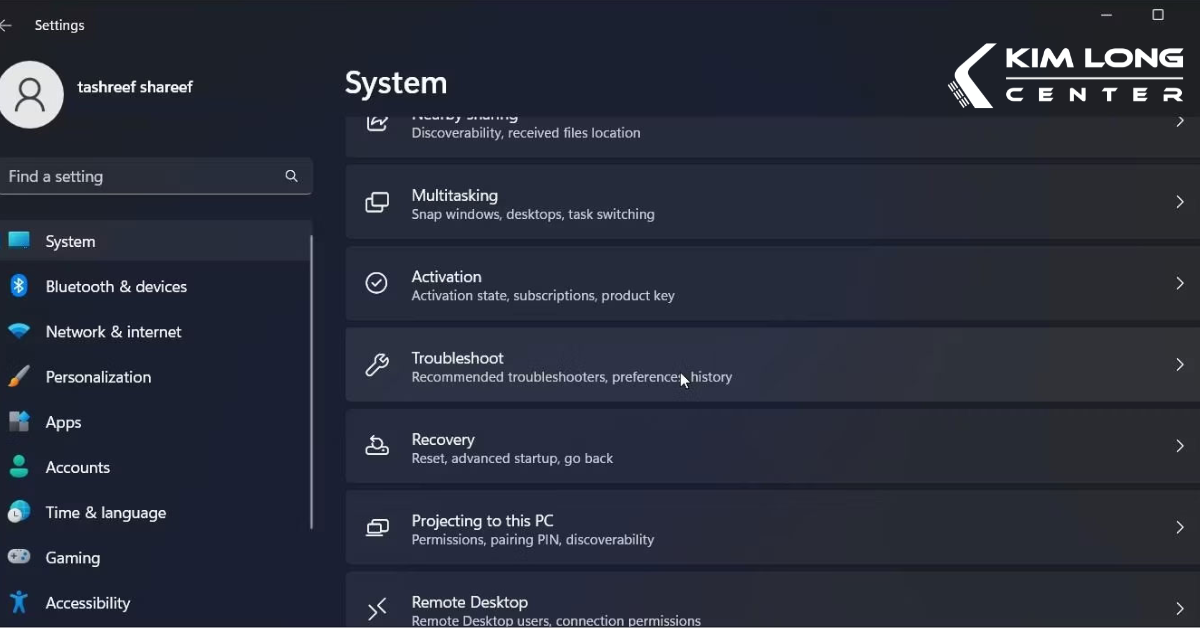
Step 3 : Next, select Other troubleshooters.
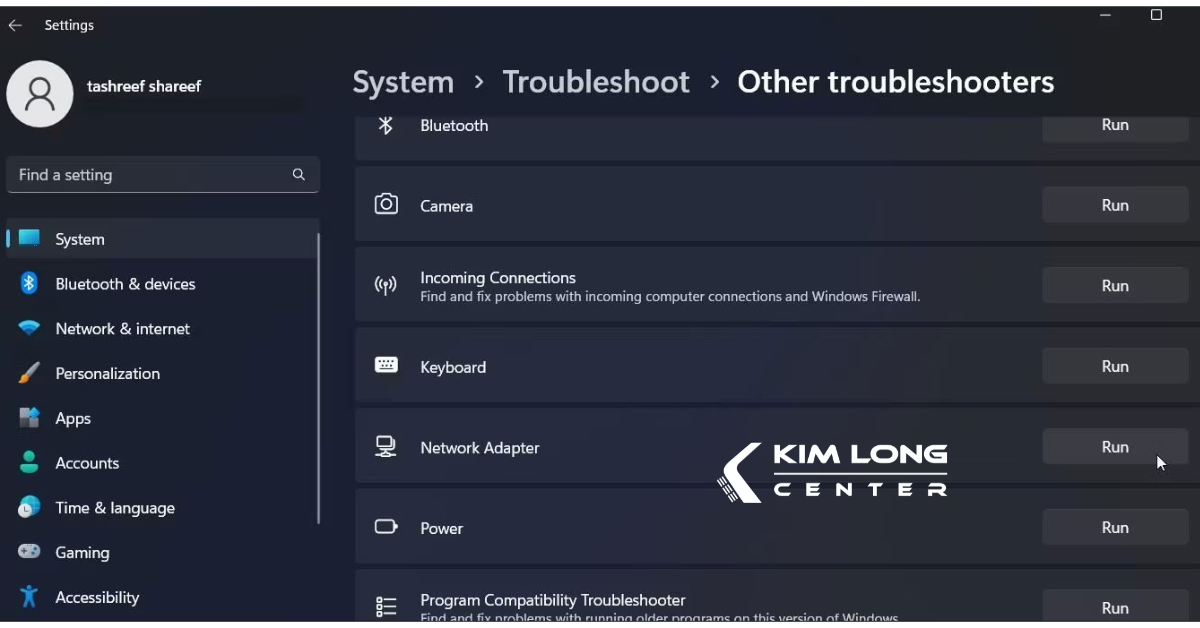
Step 4 : Find and select Network adapter, then click Run. The troubleshooting tool will scan your system for potential problems. Wait a few moments for the utility to complete the scan and display the results.
Restart and refresh the network adapter.
Step 1 : Press the Win + S key combination to open Windows Search.
Step 2 : Type "Device Manager" and select Open.
Step 3 : In Device Manager, find the Network adapter section and click expand.
Step 4 : Right-click on the wireless adapter, then select Enable device from the context menu.

Step 5 : Right-click again and select Update driver > Search automatically for updated drivers.
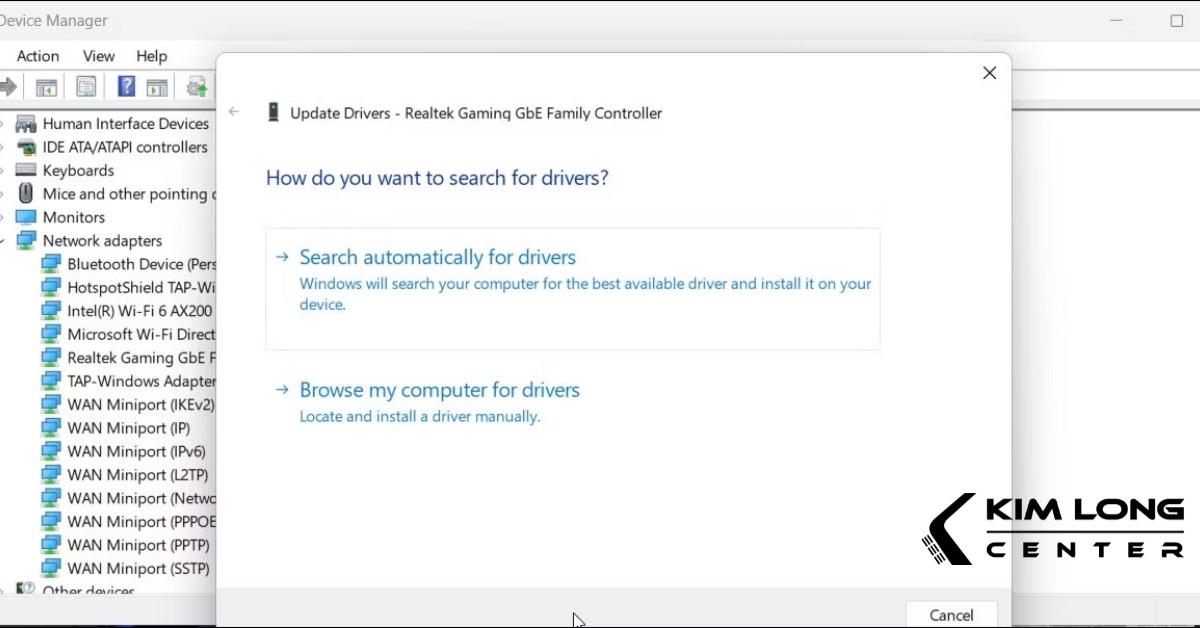
Step 6: Follow the on-screen instructions to complete the update process.
Effectively fix registry errors.
Step 1 : Press the Win + R key combination to open the Run dialog box.
Step 2 : Type "regedit" into the dialog box and press Enter.
Step 3 : When you see the User Account Control notification, click Yes.
Step 4 : Navigate to the following location:
HKEY_LOCAL_MACHINESYSTEMCurrentControlSetServicesDhcp
Step 5 : Find the "DependOnService" string on the right and double-click on it.
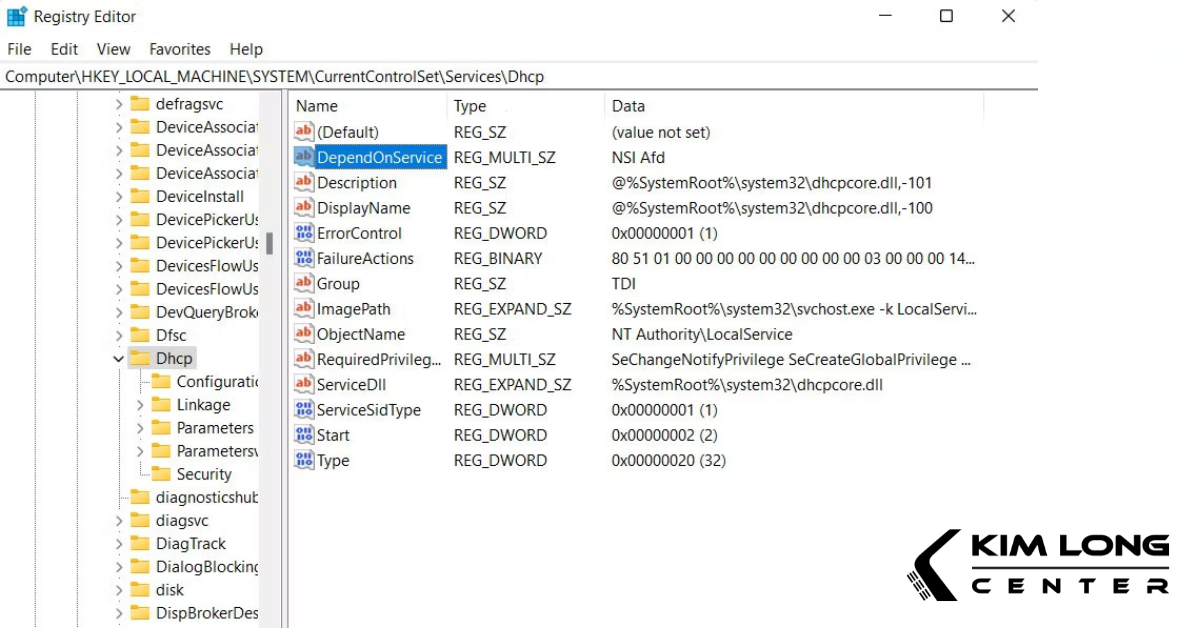
Step 6 : Keep the Afd item and delete the remaining items in the dialog box.
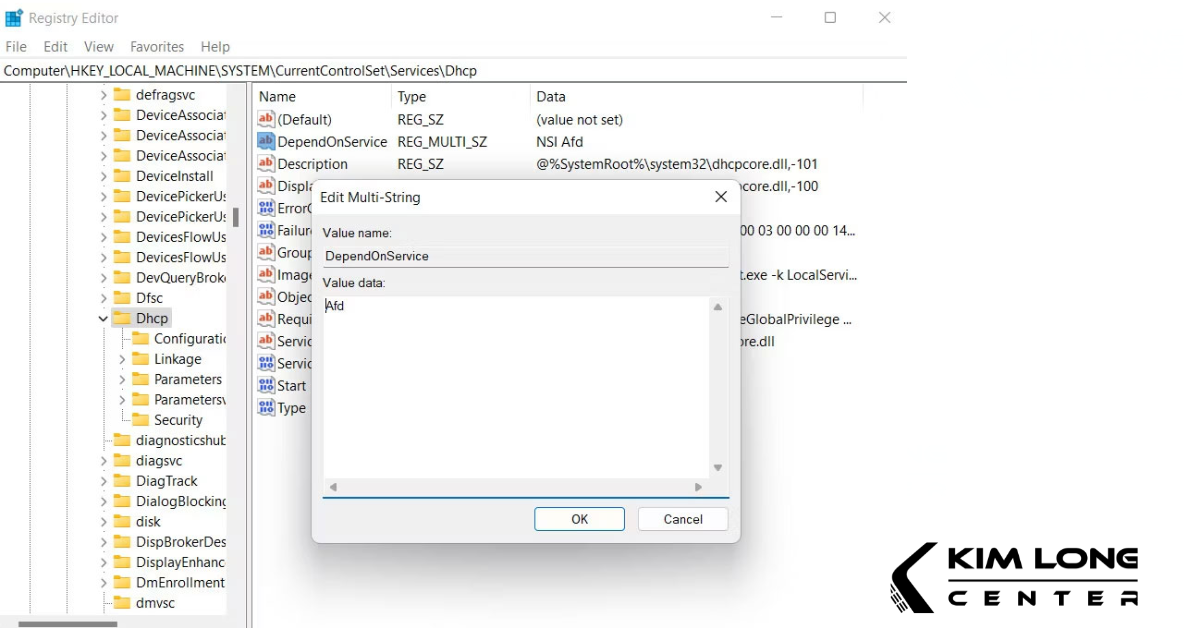
Step 7: Click OK to save the changes and close Registry Editor.
Step 8: Restart your computer.
Restart the service.
Step 1 : Press the Win + R key combination to open the Run dialog box.
Step 2 : Type 'services.msc' into the dialog box and press Enter.
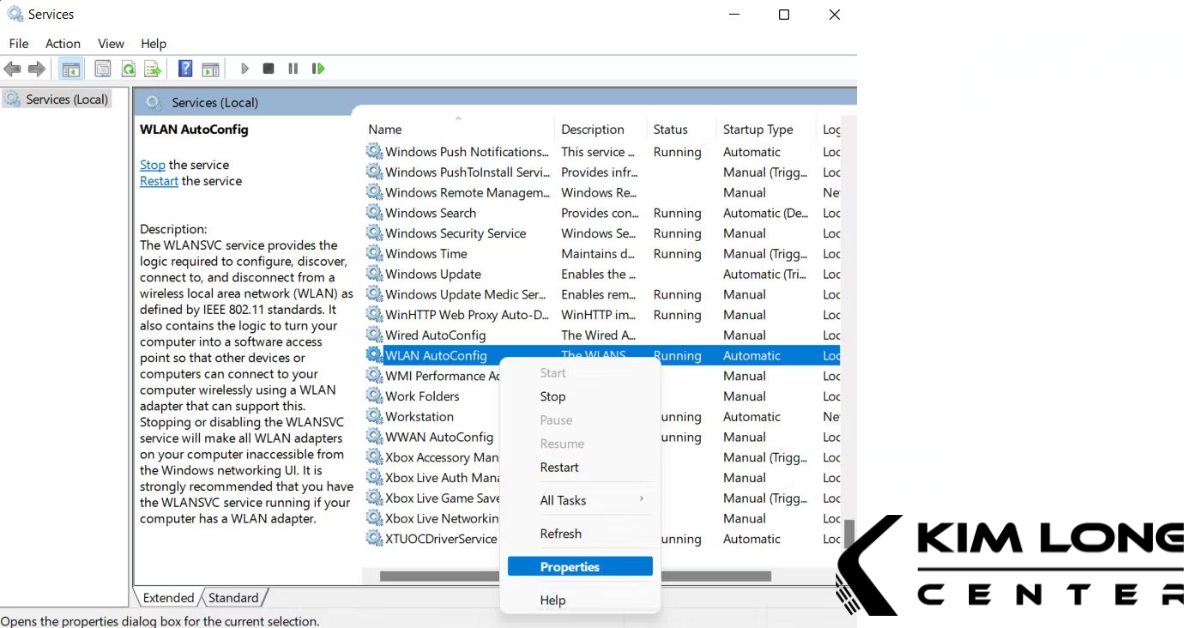
Step 3 : Scroll down and find the WLAN AutoConfig service, then right-click on it.
Step 4 : Next, select Properties from the context menu.
Step 5 : Press Stop, wait a few seconds, then press Start.
Step 6 : Set Startup type to Automatic
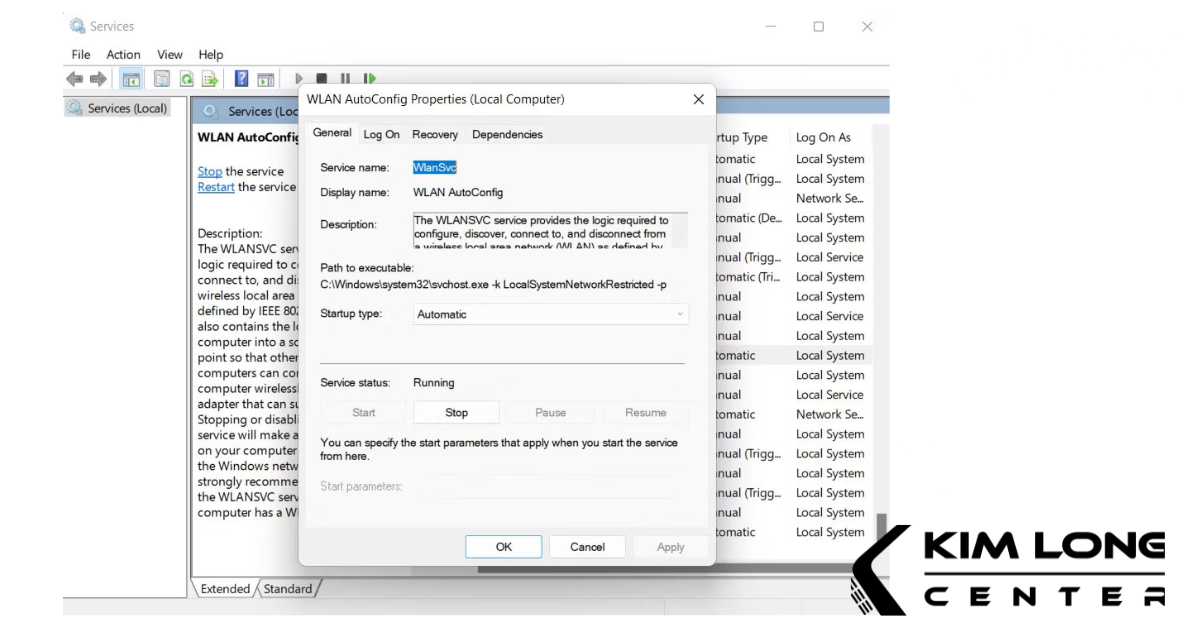
Step 7 : Click Apply and then select OK to save the changes.
Hopefully, this article has helped you quickly fix the "Windows could ngHaot start the WLAN AutoConfig" error on Windows 11. Follow TipsMake for more helpful troubleshooting tips!
- How to fix 'Windows could not start the WLAN AutoConfig' error
- Cisco bit 4 dangerous product WLAN Controller error
- How to create a Wi-Fi/WLAN usage history report on Windows 10
- How to create a Wi-Fi or WLAN Report history in Windows 10
- Configure wireless connection of Windows Vista from CLI with netsh wlan
- 10 Common Windows 10 Errors And The Most Effective Way To Fix It
- How to fix boot errors on Windows 8
- How to fix a wireless network - Part 1
- How to fix some errors when updating Windows 10
- How to quickly turn off Windows 10 PIN, avoid login errors
- How to fix error 0x0000011b when printing over the network on Windows 10
- 3 ways to turn off Your Windows license will expire soon notification on windows
- Steps to fix printer not showing up in Windows Remote Desktop session
- Instructions on how to fix 'The VMware Authorization Service is not running'
- Fix taskbar not hidden in Windows Remote Desktop session
- How to remove updates from Windows Recovery Environment (WinRE)
- How to fix 'Event ID 2505: Server Could Not Bind to Transport' error on Windows
- How to fix Windows cannot find msedge.exe
- How to fix 'This Setting Is Managed by Your Administrator' error on Windows 10
- Top 10 steps to fix Windows Explorer taking up a lot of CPU and RAM on Windows 10
-
 Add your Gmail account to Outlook with POP.
-
How to use Zperiod to automatically balance chemical equations.
-
How to center a table in Google Docs
-
How do I use the Learn Step by Step mode in Perplexity?
-
Instructions on connecting Gmail to n8n via Google Cloud Console
-
Instructions on how to fill in PDF files on iPhone using PDFgear
 Add your Gmail account to Outlook with POP.
 How to use Zperiod to automatically balance chemical equations.
 How to center a table in Google Docs
 How do I use the Learn Step by Step mode in Perplexity?
 Instructions on connecting Gmail to n8n via Google Cloud Console
 Instructions on how to fill in PDF files on iPhone using PDFgear