Instructions on connecting Gmail to n8n via Google Cloud Console
Detailed step-by-step guide to integrating Gmail into n8n via OAuth2 and Google Cloud Console..
In today's era of digitalization and workflow automation , n8n has become a powerful tool preferred by SMEs, growth marketing professionals, and data engineers in Vietnam due to its flexibility and cost-effectiveness. Connecting advertising channels, CRM systems, or Google Sheets with email to send real-time notifications is an inevitable trend.
The role of the Gmail Node in n8n is extremely important; it acts as an automated "delivery station," helping you send confirmation emails, reports, or customer care automatically without manual intervention. This article will guide you through the detailed steps to integrate Gmail into n8n accurately and quickly, helping you master the automated email sending process in the Vietnamese market.
Detailed step-by-step guide to setting up Gmail integration on n8n
1. Initialize a Gmail node on n8n to obtain the OAuth Redirect URL.
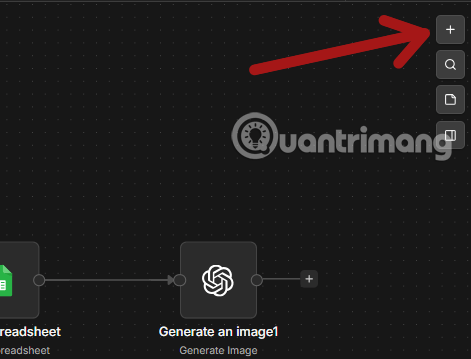
Step 1: On the n8n main screen, click the "Add first step" button or the plus icon +in the middle of the workspace (Canvas) to start creating and adding a new Node to your project.
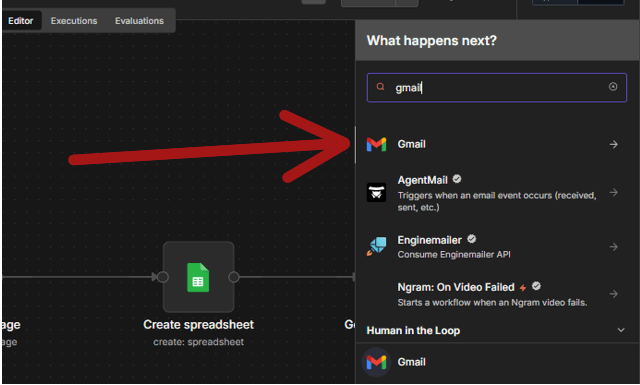
Step 2: A search bar for integrated applications will appear. Enter the keyword "Gmail" into the search box, then select the Gmail application from the list of results to add this node to the diagram.
Step 3: The system will ask you to select a specific action for the Node. Here, you select " Send an email" or other actions to set up the automated email sending scenario.
Step 4: In the Node Gmail details settings on the right side of the screen, find the "Credential for Gmail Account " section . Click the dropdown menu and select " Create New Credential".
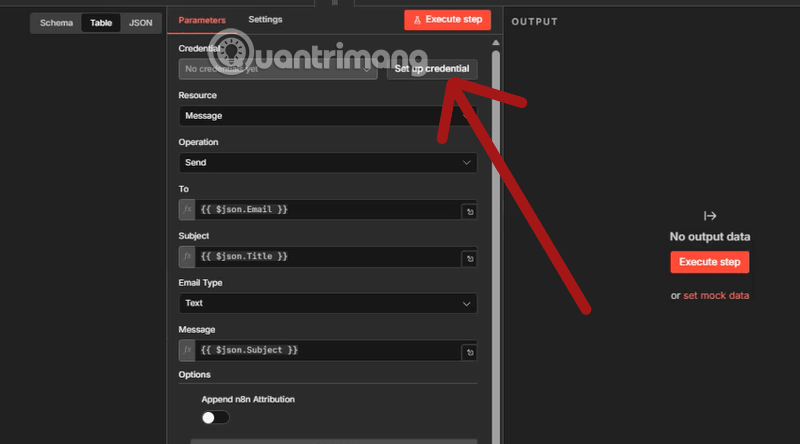
Step 5: In the Gmail Credential interface, you will see OAuth Redirect URL . Select it, and the system will automatically copy the link for you.
2. Set up Google Cloud to integrate Gmail into n8n
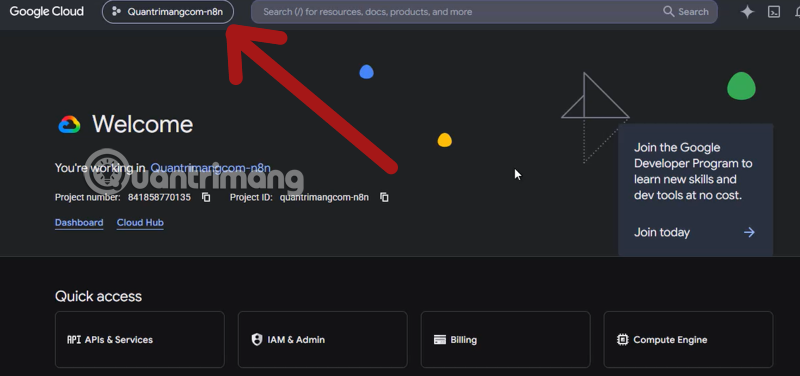
Step 1: Start on the Google Cloud Console homepage. Click the Project selector button in the upper left corner of the navigation bar to open the list of projects. Then select New Project.
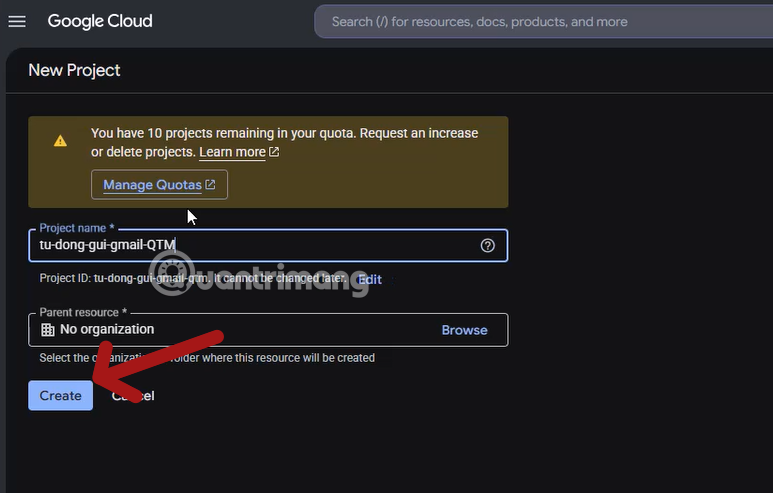
Step 2: A new window will appear allowing you to create a project. Name your project tu-dong-gui-gmail-QTM, then click the blue " Create " button at the bottom to initiate the new project.
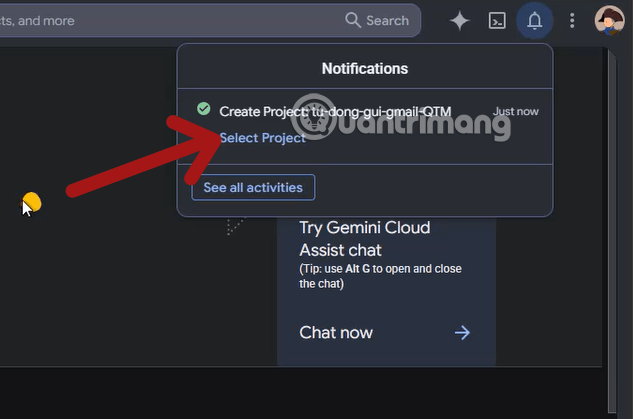
Step 3: Observe the notification panel ( Notifications) that appears in the upper right corner of the screen. Quickly click on the text " Select Project" to immediately start working within the newly created project.
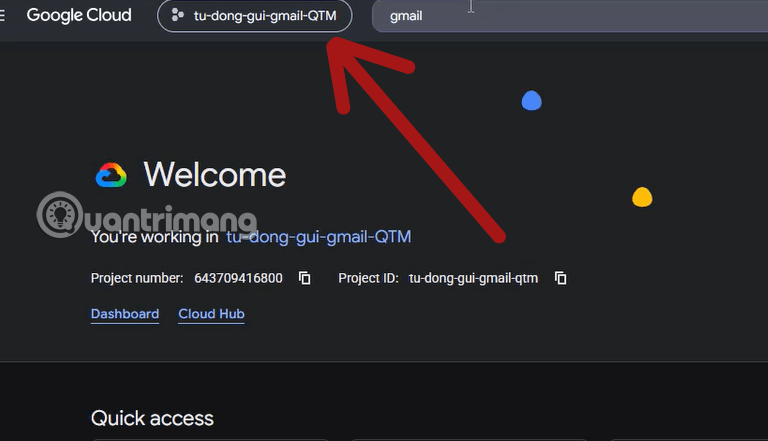
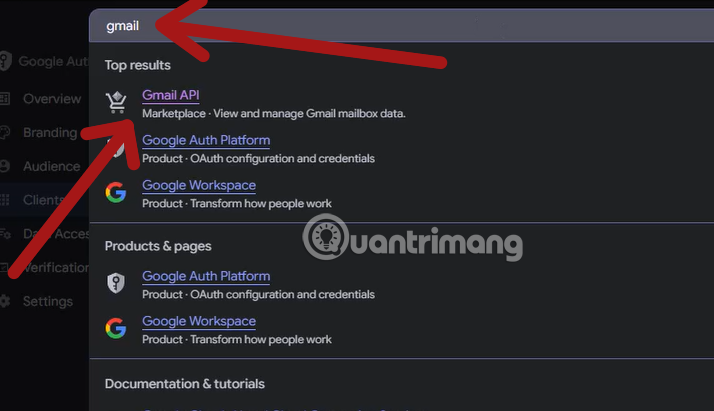
Step 4: At this point, the console interface has confirmed that you are in the project tu-dong-gui-gmail-QTM. The next step is to click on the Search bar at the top of the screen, next to the box displaying your project name.
Step 5: In the search box, type the keyword "gmail". A list of results will drop down; move your mouse and click on the first Gmail API result.
Step 6: The details interface will Gmail APIappear. Here, click the blue Enable button to turn on this API for your project.

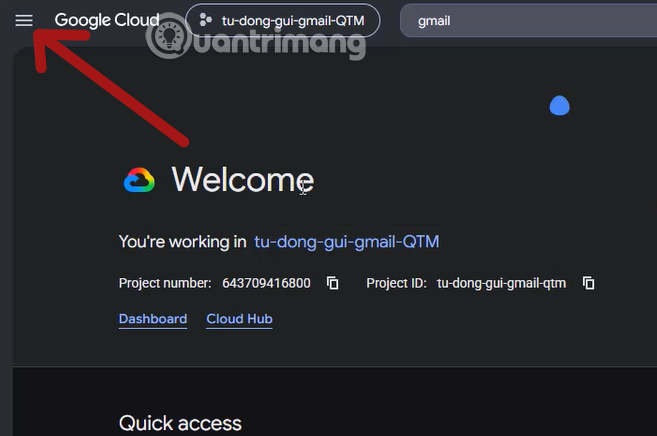
Step 7: After the API is enabled, you need to access the configuration menu. Click on the Hamburger Menu icon (three horizontal lines) in the upper left corner of the console interface.
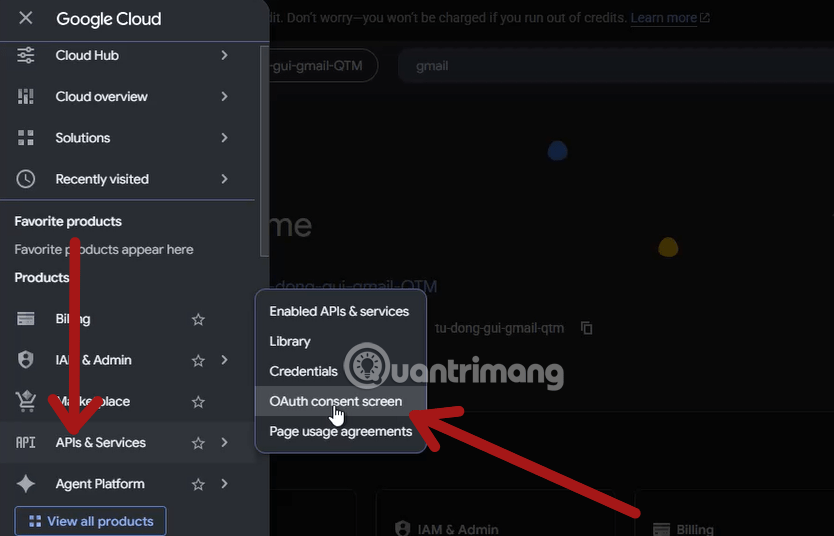
Step 8: From the main menu that just opened, hover your mouse over APIs & Services and click on OAuth consent screen .
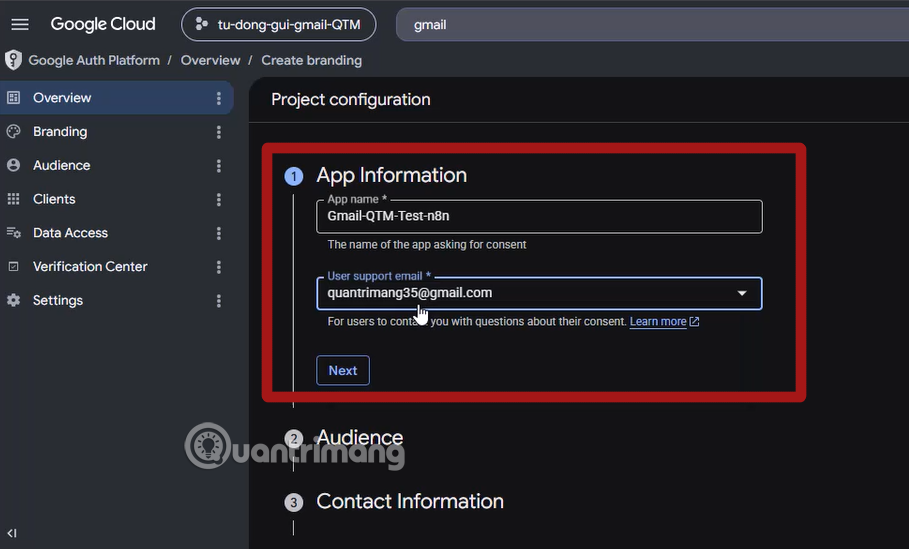
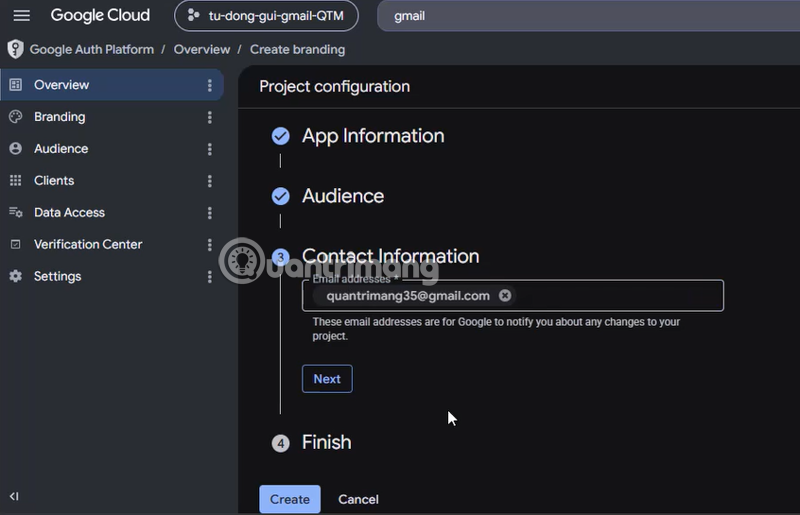
Step 9: In the Project configuration table , under App Information, enter the App name Gmail-QTM-Test-n8nand select the support email address TipsMake35@gmail.com.
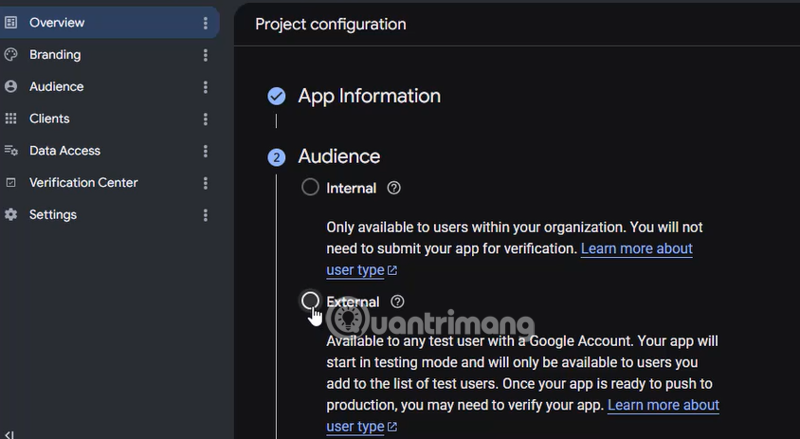
Step 10: Here you will have two options including:
- Internal: Available only to users within your organization's Google Workspace or Cloud Identity ; no app submission to Google for review is required for internal use. Advantages: Fast deployment, low review risk. Disadvantages: Not for external customers.
-
External: allows any Google account to access; when first created, it will be in testing mode and only work for the test users you add; when you want to release the app to production, you may need to verify it with Google, especially if the app requires sensitive scopes.
In the Contact Information section , enter the contact email address you registered and set up in Google Cloud Console, then select Next and finally Create to complete the Project configuration.
3. Create a Client ID, Client Secret, and connect to n8n.
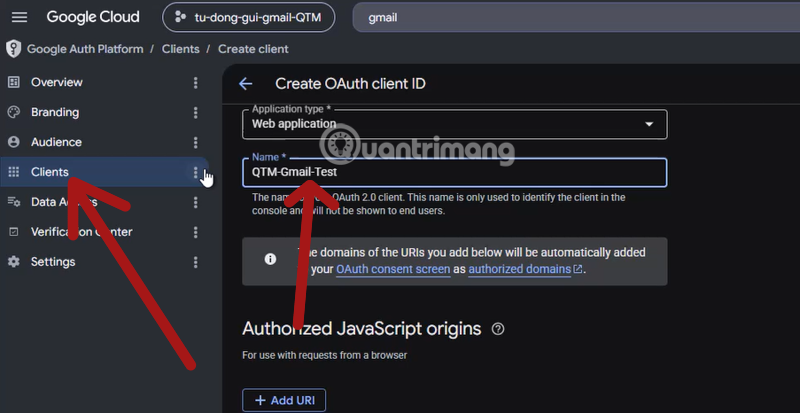
Step 1: After completing the Project configuration, select Client, then in the Application Type section, select Web application. Below, enter a name of your choice.
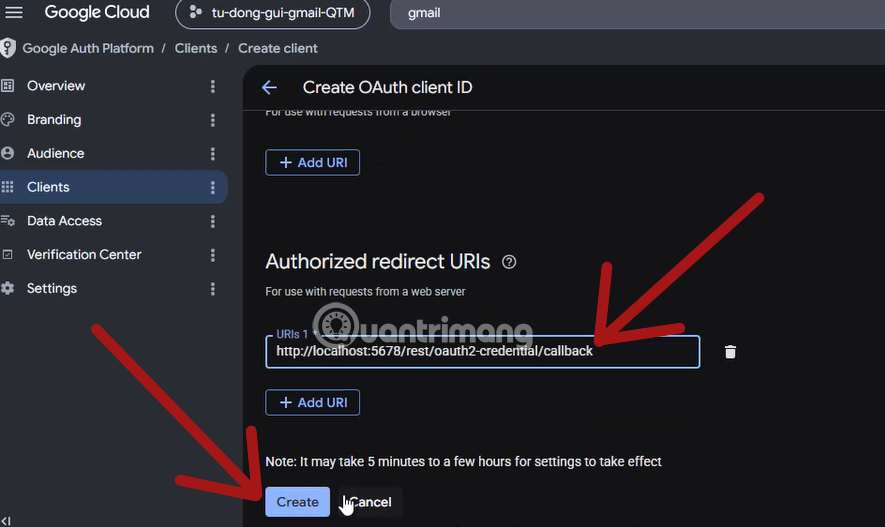
Step 2: Select Add URL.
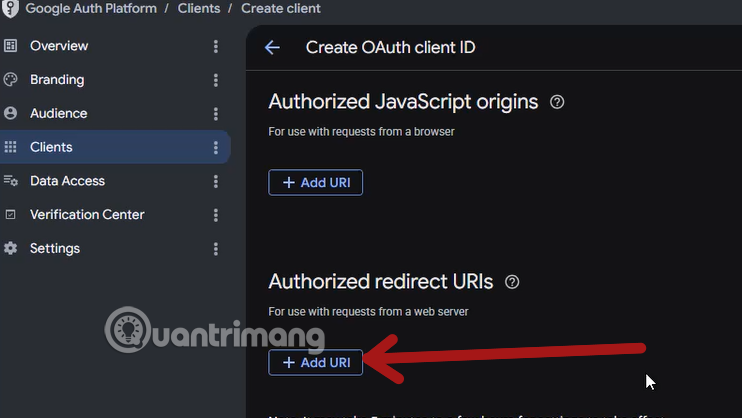
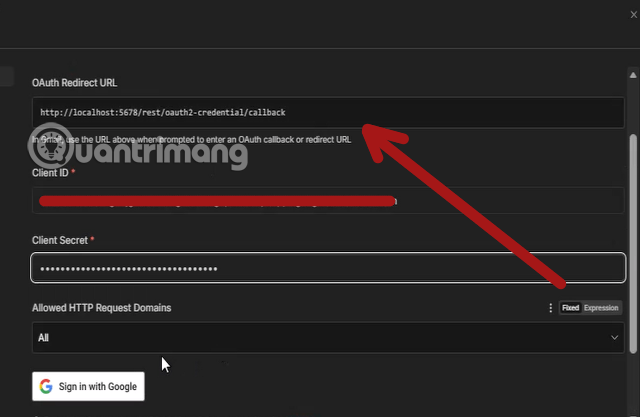
Step 3: Add the OAuth Redirect URL you obtained in Step 1, paste it here, and select Create to complete the setup of Authorized Redirect URLs.
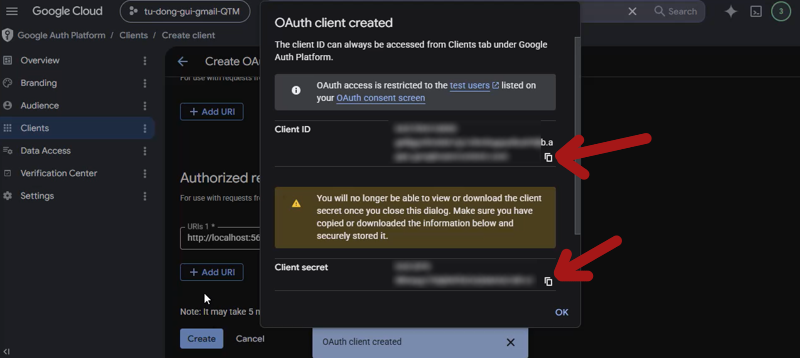
Finally, you will get the Client ID and Client Secret below. Note that you should copy the Client ID and Client Secret to a notes application, because when you close the OAuth client created panel, you will not see the Client Secret again. Later, when you want to retrieve the Client Secret, you will have to recreate it.
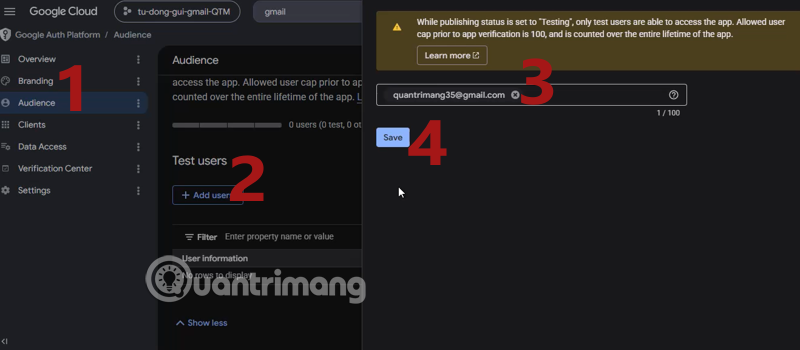
Next, select Audience and choose Add user in the Test user section, then enter the email address you chose to log in and set up on Google Cloud Console and click Save to save the test email.
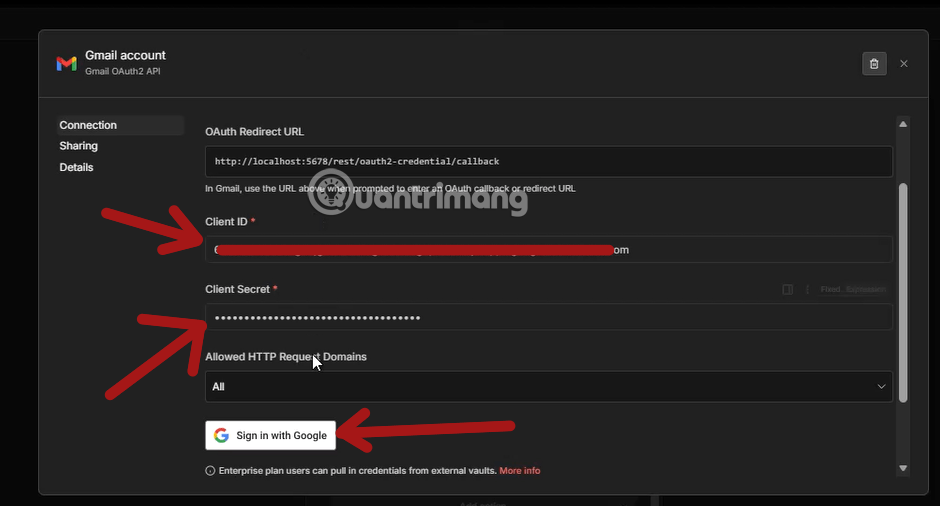
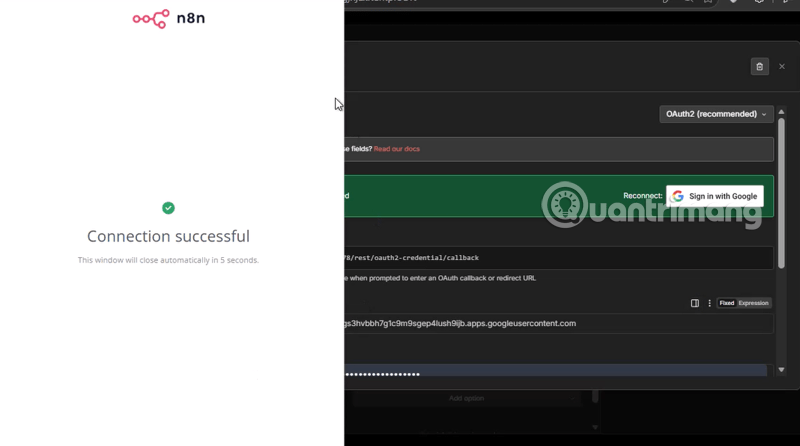
Copy the Client ID and Client Secret obtained from the previous step and select Sign in with Google, logging in with the Google account you previously set up. Remember to agree to allow n8n to access and use the data in your Google account.
When you see the message shown below, it means you have successfully connected Gmail to your n8n.
Important notes when using Gmail Node in n8n in Vietnam.
Google API Rate Limits
When integrating Gmail into n8n via a personal OAuth2 method, you need to be aware of Google's quotas. A typical free Gmail account is limited to sending a maximum of about 500 emails per day, while a Google Workspace account can send up to 2000 emails per day. If your automation script exceeds this number, Node Gmail will report a 429 error (Too Many Requests).
Alternative solutions when self-hosting n8n
For programmers or businesses hosting n8n on VPS in Vietnam, configuring OAuth2 can sometimes be difficult due to secure URL redirection issues. In this case, you can flexibly switch to using an SMTP Email Node connected via Google's App Password or using a Google Service Account . This method ensures high stability and avoids the periodic disconnections experienced with OAuth2.
Conclude
Integrating Gmail into n8n is a strategic move that helps businesses optimize resources, minimize human error, and accelerate customer interaction in the Vietnamese market. By simply following the basic to advanced setup steps above, your system can automatically send hundreds of personalized emails smoothly and accurately every day.