Table of Contents
Note: This article applies to Outlook 2019, Outlook 2016, Outlook 2013, Outlook 2010, Outlook 2007, and Outlook Office 365.
Enable POP to make Gmail work with Outlook
Before using Outlook with Gmail, you need to enable POP in Gmail. Here are the steps:
Step 1: First, you need to log in to your personal Gmail account on your computer.
Step 2: On the main interface, click the gear icon and select Settings .

Step 3: Next, select the " Forwarding and POP/IMAP" option in the menu bar on this interface.
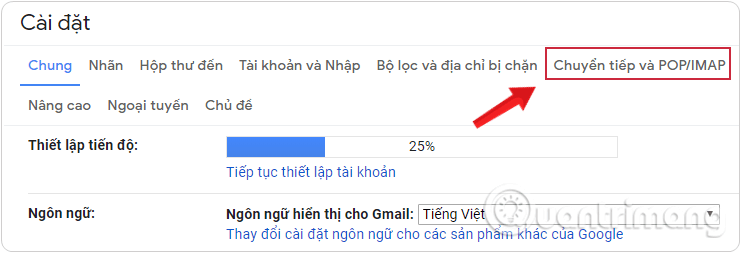
Step 4: Scroll down to the POP download section and click on Enable POP for all mail .
You can also choose the option to enable POP only for mail that arrives from now on.

Step 5: After changing the settings, scroll to the bottom and click the Save Changes button, then close your browser.

How to add a Gmail account to Outlook using POP
To add Gmail and Outlook accounts using POP, follow these steps:
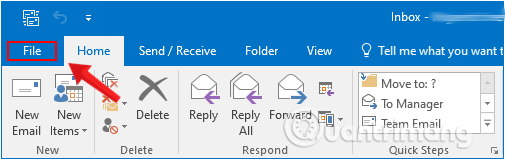
Step 1: Open your Outlook application and then click the File tab.
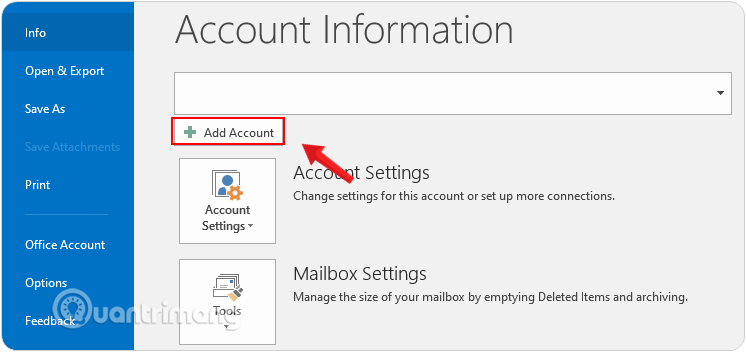
Step 2: On the Account Information interface, click Add Account .
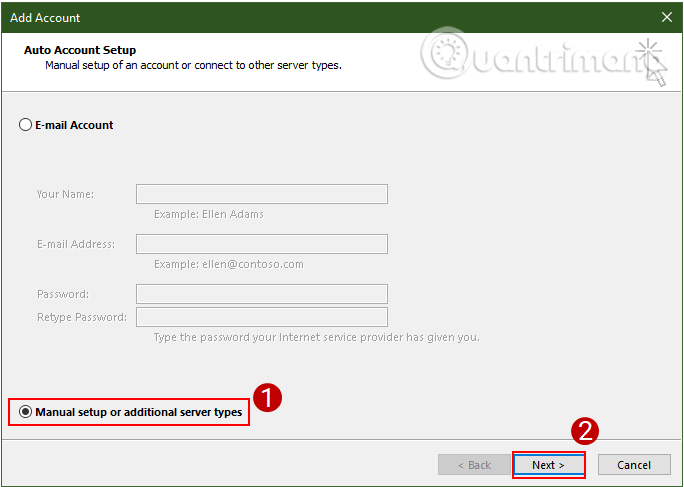
Step 3: A dialog box called "Add account" will now appear on the screen. Here, click on " Manual Setup or additional server types ," and then click " Next."
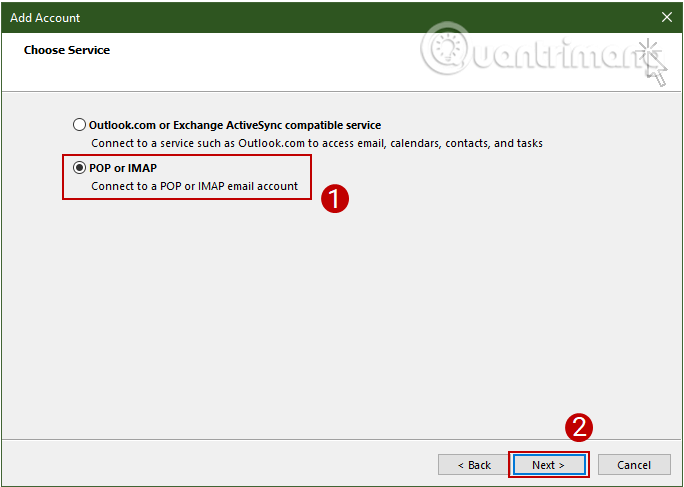
Step 4: Next, on the Choose Service interface, select the POP or IMAP option and then click Next.
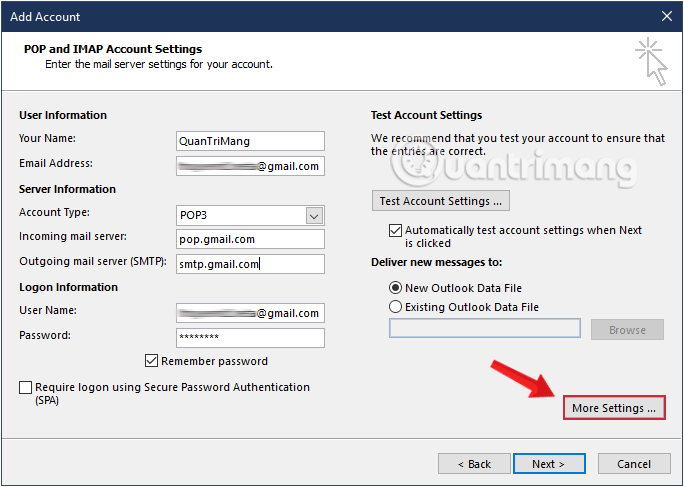
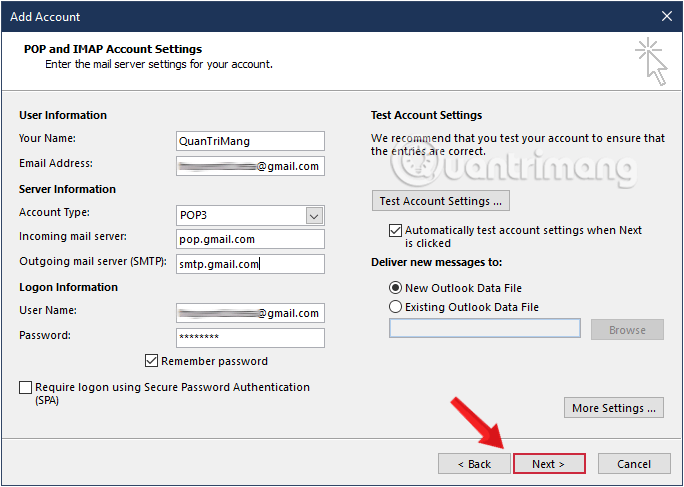
Step 5: On the POP and IMAP Account Setting interface, fill in all the required information in the User Information, Server Information , and Logon Information sections.
- User Information
- Your Name: The name the recipient will see when they receive your email.
- Email Address: Your Gmail address
- Server Information
- Account Type : POP3
- Incoming mail server: pop.gmail.com
- Outgoing mail server (SMTP): smtp.gmail.com
- Logon Information
- Username: Your full Gmail address
- Password: your Gmail password
Step 6: Next, click on More Settings .
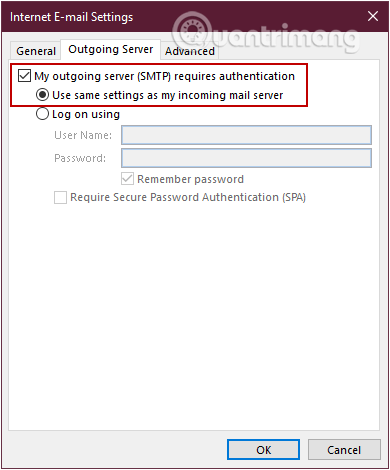
Step 7: The Internet Email Setting dialog box will now appear on the screen.
In this dialog box, click the Outgoing Server tab, then check the box " My outgoing server (SMTP) requires authentication ," and then select " Use same settings as my incoming mail server ."
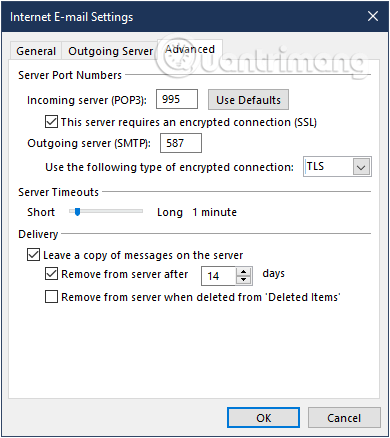
Step 8: Click on the Advanced tab and enter the following parameters:
- Incoming Server (POP3): 995
- Check the box This server requires an encrypted connection (SSL)
- Outgoing server (SMTP) : 587
- Use the following type of encrypted connection: TLS
Step 9: Click OK to save the changes and close the Email Settings dialog box.
Step 10: Next, click Next to proceed to the next step.
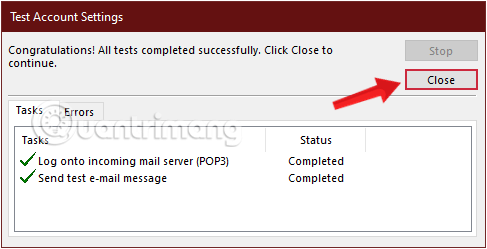
Step 11: Outlook will check the settings and send you a notification email. When the check is complete, click Close .
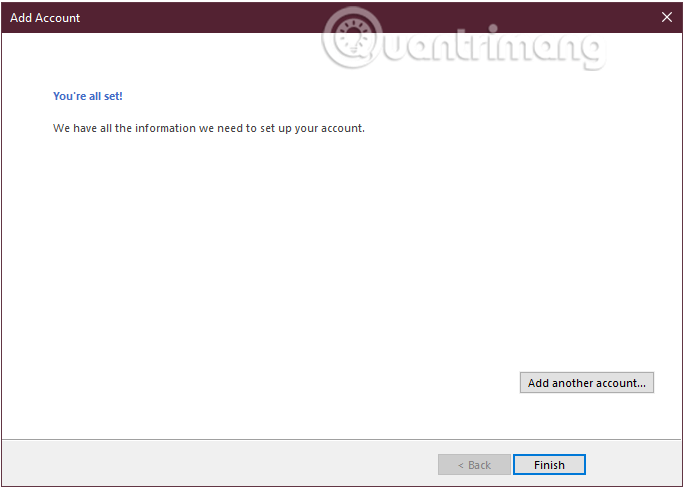
Step 12: At this point, you will see a message on the screen saying " You're all set ". Simply click " Finish" and you're done.
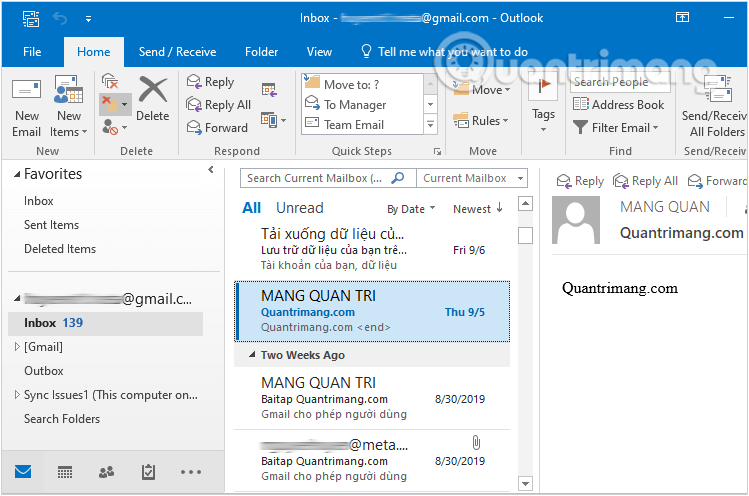
That's it! The Gmail account you just added to Outlook is now displayed in the list of email addresses in the left pane.
Click on Inbox to view your inbox in your Gmail account.
If you encounter errors when adding a Gmail account to Outlook, please refer to the article "How to fix errors when adding a Gmail account to Microsoft Outlook".
Adding Gmail to Outlook using POP is easy and involves a few simple steps. You can add as many email accounts as you want with POP3. Good luck!
Was this article helpful?
Your feedback helps us improve.
Related Articles
 How to Email Gmail to Outlook. Com: Sync Gmail to Outlook4 minutes read
 Add a Gmail Account to Outlook 2013, 2016 - Configure Gmail6 minutes read
 Instructions for Adding Gmail Accounts to Outlook 2013 and 20165 minutes read
 How to Turn on POP / IMAP Gmail to Use in Outlook4 minutes read
 Add Gmail Account to Outlook 2010 with POP4 minutes read
 7 Reasons Gmail Is Better Than Outlook9 minutes read
Reader Comments 0
Sign in with email or Google to join the discussion.