How to troubleshoot Wi-Fi issues on Windows 11
Wi-Fi on Windows 11 sometimes experiences sudden errors, causing you to lose your connection or experience unexpected interruptions even though your computer was working normally just moments before.
- 1. Quick start (Check Wi-Fi/Bluetooth bar, Airplane mode, physical switch)
- 2. Run Network Troubleshooter
- 3. Check your router/modem and test your LAN cable.
- 4. Ping the router to identify the problem (router vs. signal).
- 5. Turn off the power saving mode on your Wi-Fi adapter.
- 7. Update your Wi-Fi driver via Device Manager.
- 8. Delete the saved network (Forget Network) and switch to a private network.
- 9. Change DNS
- 10. Change Wi-Fi frequency band
- 11. Use Network Reset
- 12. Run the netsh and ipconfig commands in Command Prompt.
- 13. Check for and install Windows Update.
- Summary
- 1.1 Check if Wi-Fi and Bluetooth are turned on.
- 1.2 Ensure Airplane Mode is turned off
- 1.3 Check the physical switch (if any)
- 3.2 Try connecting via LAN cable
- How to re-enable the service:
- Delete saved networks (Forget Network):
- Steps to follow:
If you're experiencing this situation, follow these steps to fix Wi-Fi issues on Windows 11 quickly and effectively.

1. Quick start (Check Wi-Fi/Bluetooth bar, Airplane mode, physical switch)
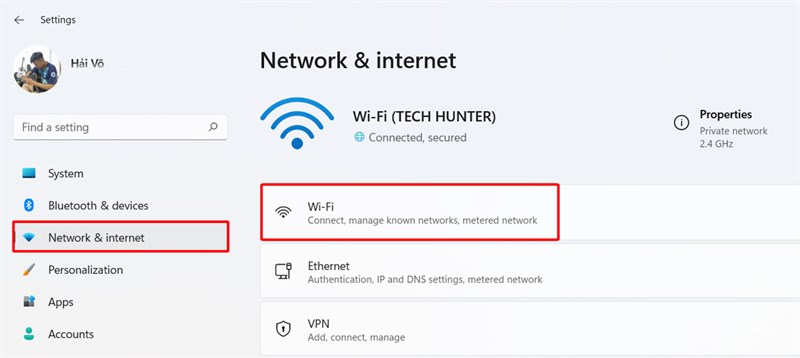
1.1 Check if Wi-Fi and Bluetooth are turned on.
-
Look at the right-hand corner of the taskbar ; if the Wi-Fi or Bluetooth icon is grayed out, click the icon => turn it back on via Quick Settings => make sure it's turned On . If it still doesn't turn on, go to Settings => select Network & Internet or Bluetooth & devices to enable it.
-
If the icon is missing or you cannot enable it, go to Control Panel => Network Connections or Device Manager , find the Wi-Fi adapter and select Enable .
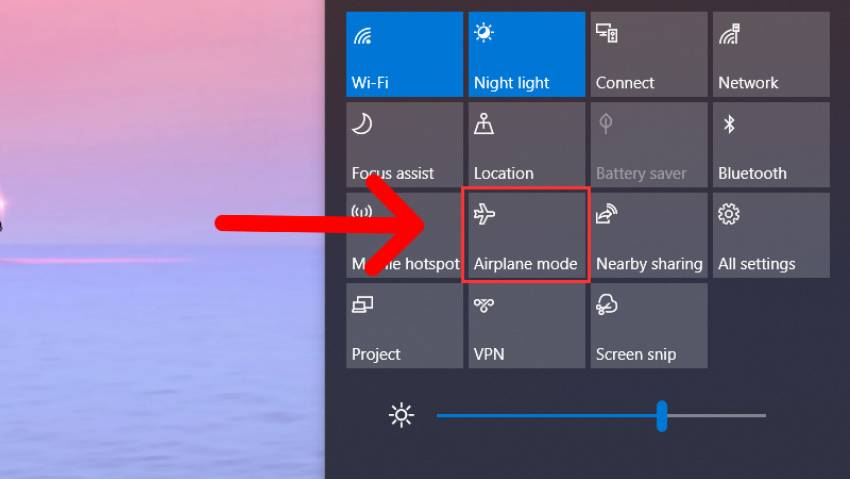
1.2 Ensure Airplane Mode is turned off
-
Click the network/volume icon in the taskbar , then press the airplane mode button in Quick Settings to turn it off.
-
Alternatively, go to Settings => Network & Internet => Airplane mode and switch it to Off .
-
If you can't turn it off, open Device Manager , disable the Airplane Mode Switch Collection option in Human Interface Devices , and then turn it back on.
1.3 Check the physical switch (if any)
-
Some laptops have a Wi-Fi switch or Fn + F2 key combination to turn the wireless module on/off. Make sure this switch/key is in the "On" position , as per the manufacturer's instructions.
2. Run Network Troubleshooter
This is the first step to take when experiencing Wi-Fi problems, as this tool can automatically detect and fix many common errors before you need to intervene further.
How to do it:
-
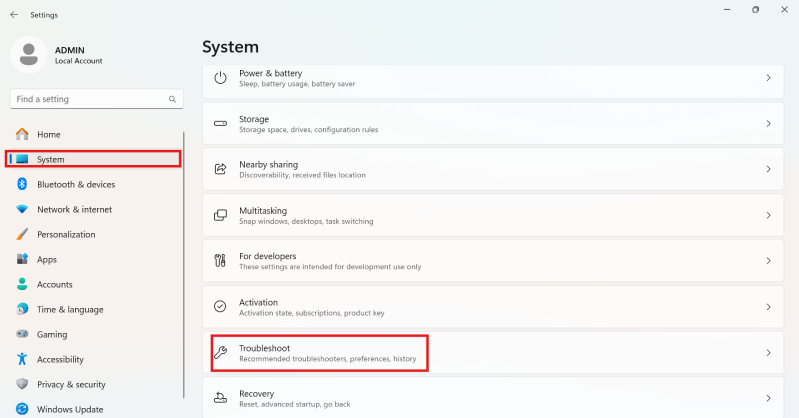
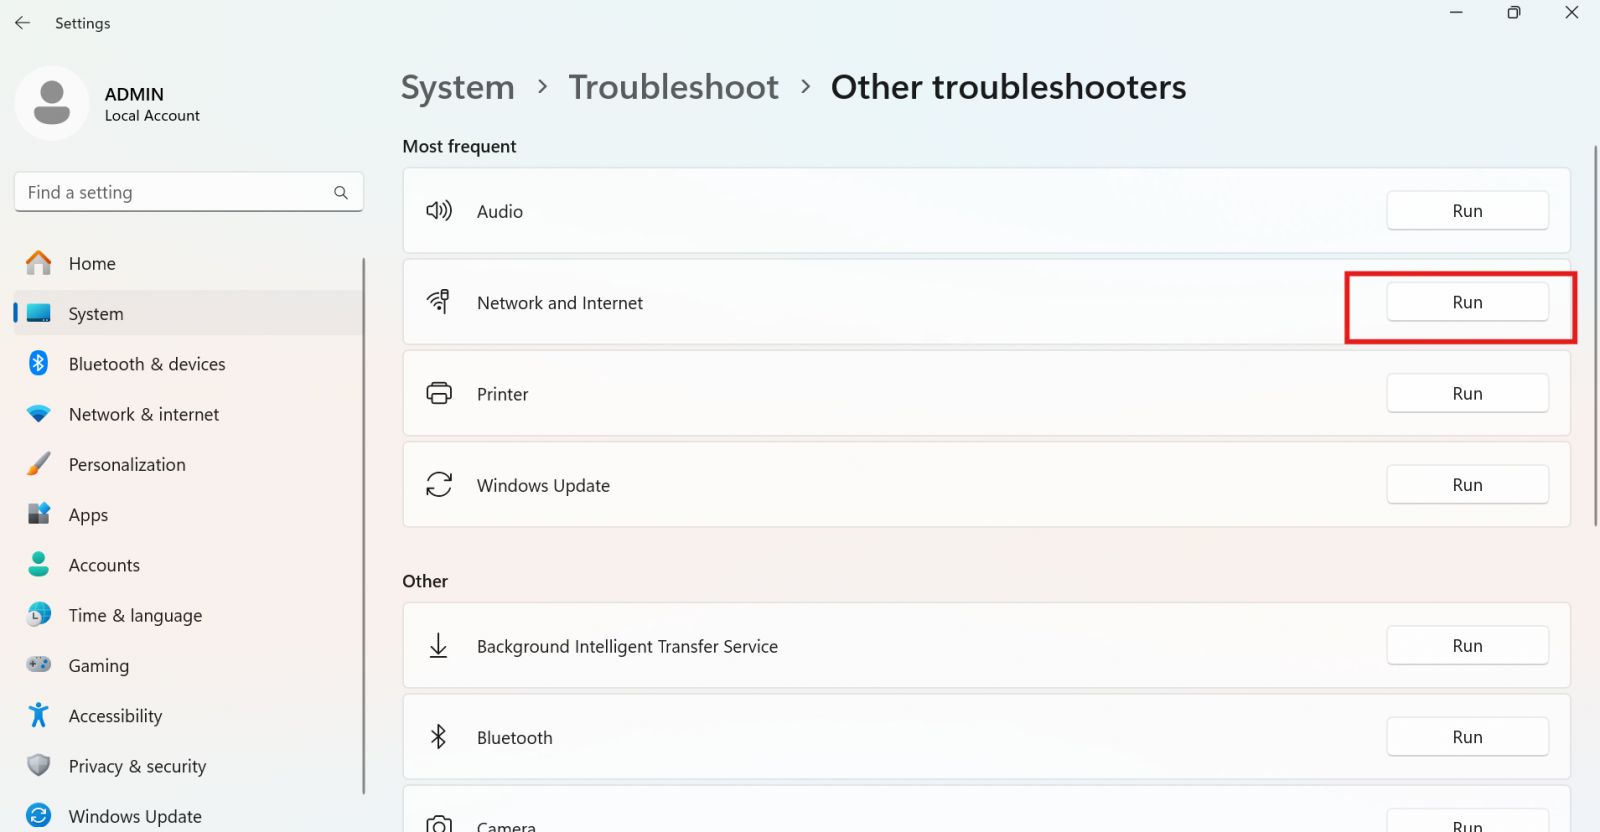
Step 1. Press Windows + I to open Settings , then select System => Troubleshoot .
-
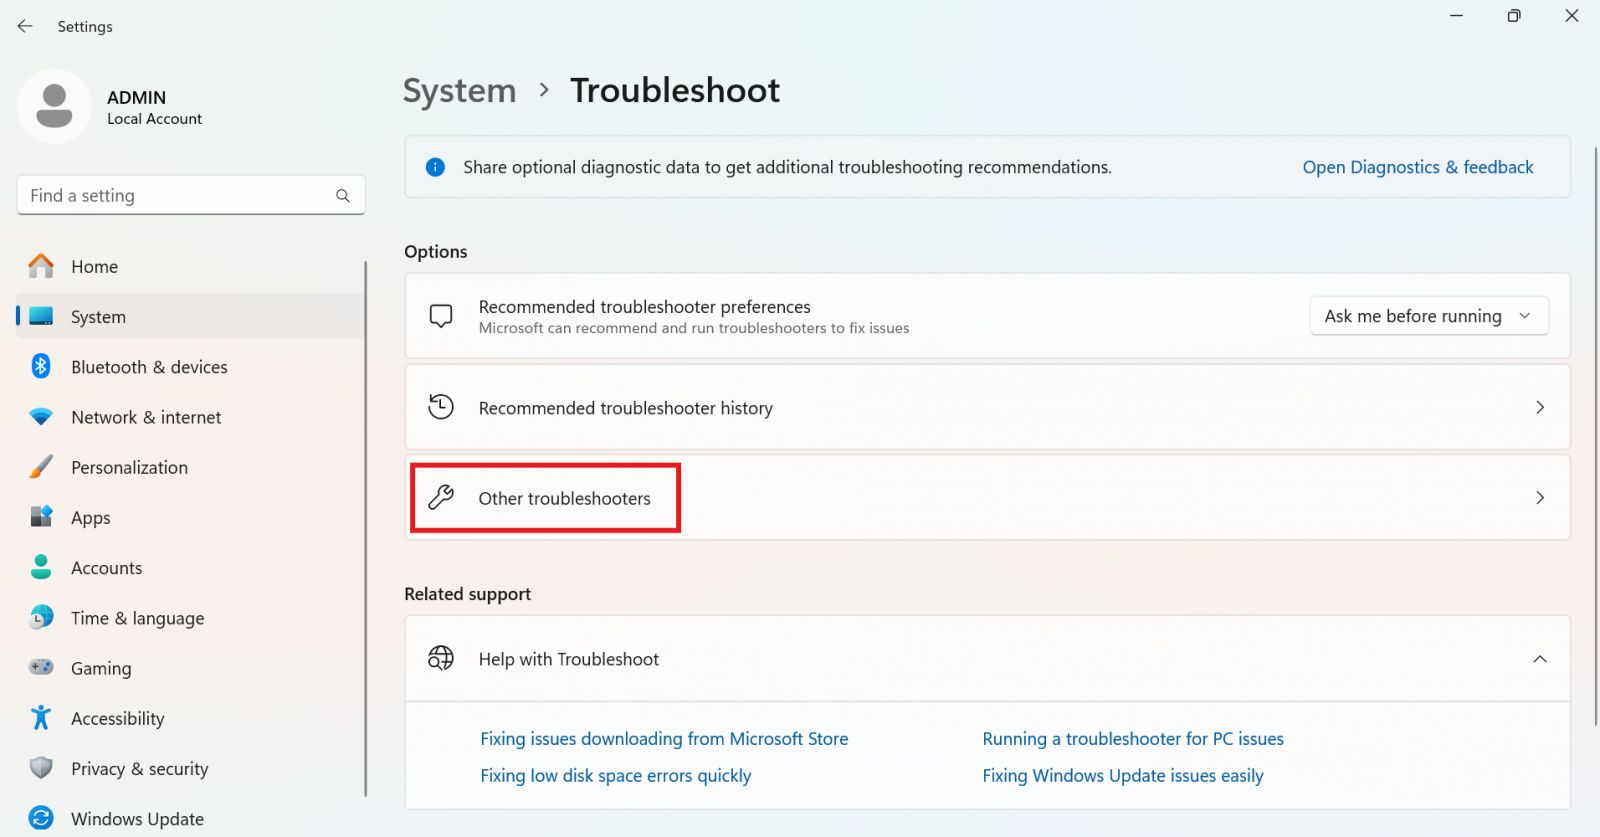
Step 2. Click on Other Troubleshooters , then find the Network Adapter section .
-
Step 3. Click Run next to this item to launch the troubleshooter.
-
Step 4. Windows will automatically check your network card, TCP/IP configuration, adapter , and may even suggest updating or repairing drivers if necessary.
After the process is complete, the troubleshooter will report the results of the applied solution, or provide specific instructions for further steps if the error persists.
3. Check your router/modem and test your LAN cable.
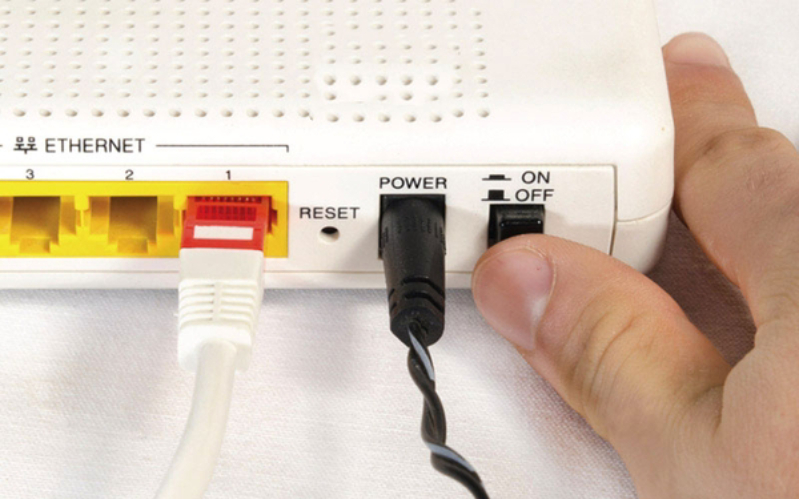
3.1 Restart your router/modem
-
Unplug both the modem and router, wait at least 30-60 seconds, then plug them back in. This will help the devices reconnect to your Internet service provider (ISP).
-
Check the LED indicator lights: if the error light is red or blinking abnormally, the device may be faulty or the ISP may be interrupted. Also, check that the power cord and WAN/LAN cables are securely plugged in.
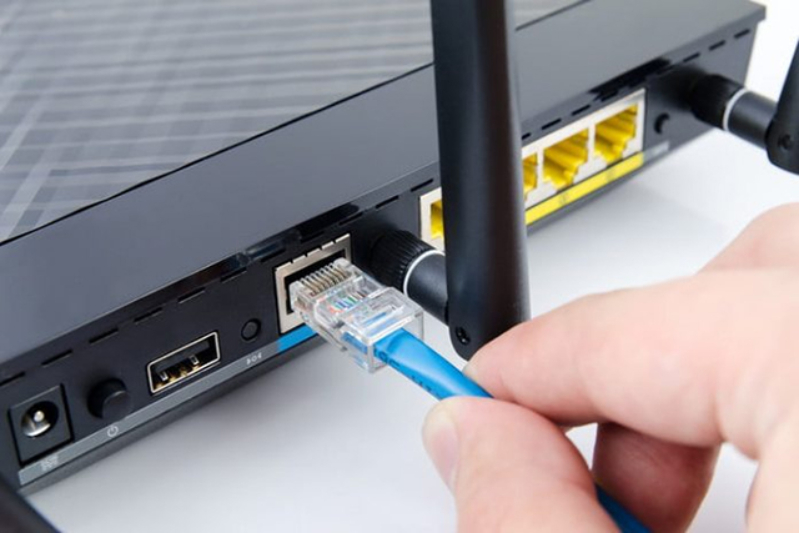
3.2 Try connecting via LAN cable
Connect your computer directly to the router using an Ethernet cable.
-
If you still don't have internet, the problem could be with your modem, your ISP connection, or your modem's configuration.
-
If the internet connection is stable on the LAN but Wi-Fi isn't working, the problem lies with the router (Wi-Fi signal, wireless configuration, firmware, etc.).
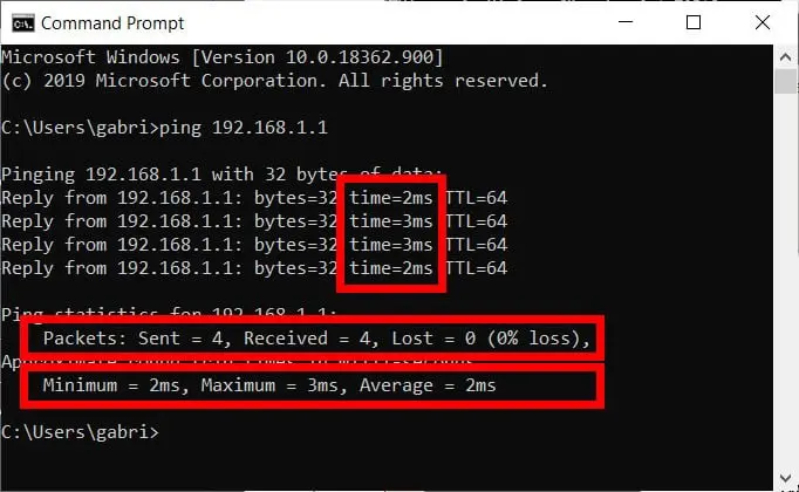
4. Ping the router to identify the problem (router vs. signal).
Open Command Prompt with administrator privileges, type ipconfig to search for Default Gateway (usually 192.168.x.1).
Type the command
pingDefault Gateway
-
If you receive a reply (e.g.,
Reply from 192.168.1.1: time=5 ms): the connection to the router is stable, the problem is most likely with the modem or ISP . -
If you experience a ping timeout or packet loss : your computer cannot connect to the router - this could be due to a weak/interfering Wi-Fi signal, a faulty Wi-Fi adapter, or a malfunctioning router.
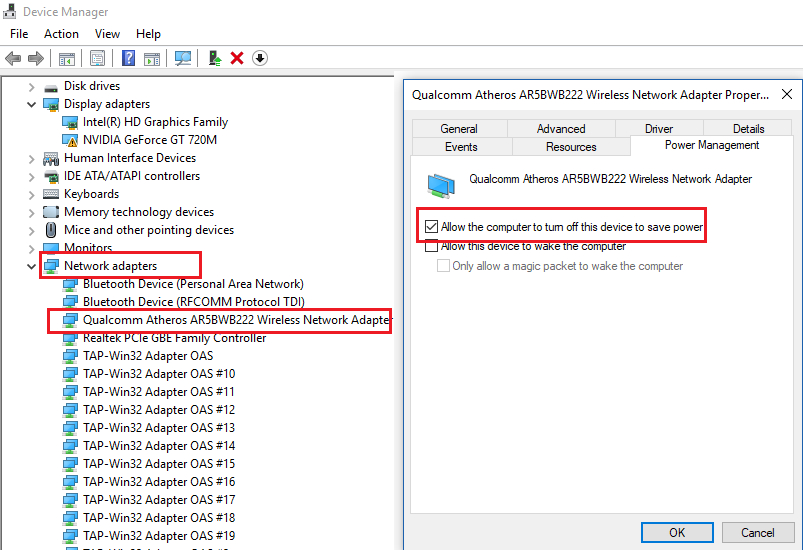
5. Turn off the power saving mode on your Wi-Fi adapter.
-
Open Device Manager => Network Adapter, right click => Properties => Power Management tab , uncheck Allow the computer to turn off this device to save power .
-
You can further change this in Power Options => Change advanced power settings => Wireless Adapter Settings to switch to Maximum Performance .
6. Re-enable the WLAN AutoConfig service.
The WLAN AutoConfig service (display name: WLAN AutoConfig, system name: wlansvc) is a core component that helps Windows automatically detect, connect to, and manage wireless networks. If this service is disabled or not started, you will encounter errors such as Wi-Fi networks not appearing or not connecting automatically.
How to re-enable the service:
-
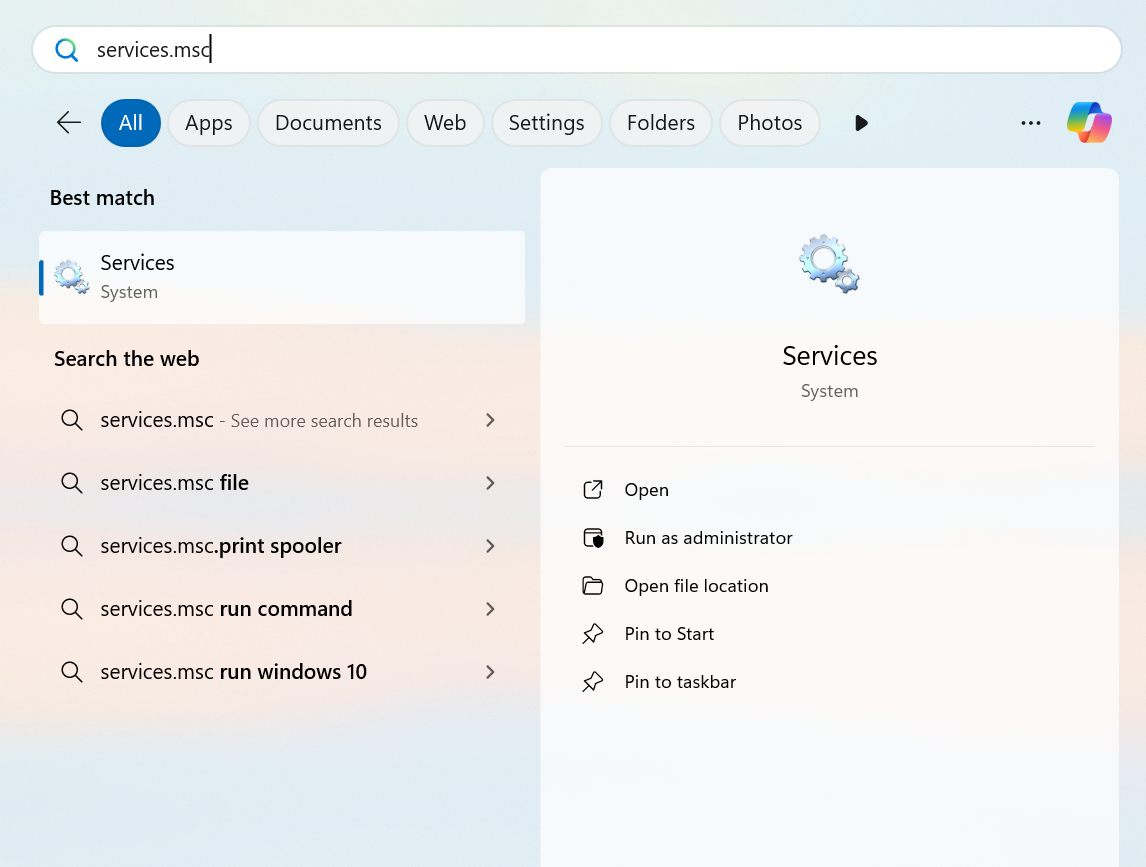
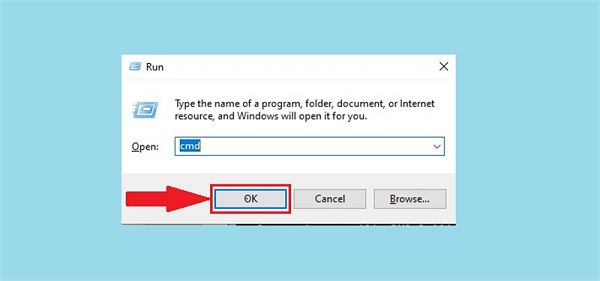
Step 1. Press the Windows + R key combination , type `sudo apt-get install`
services.msc, and then press Enter to open the Services window.
-
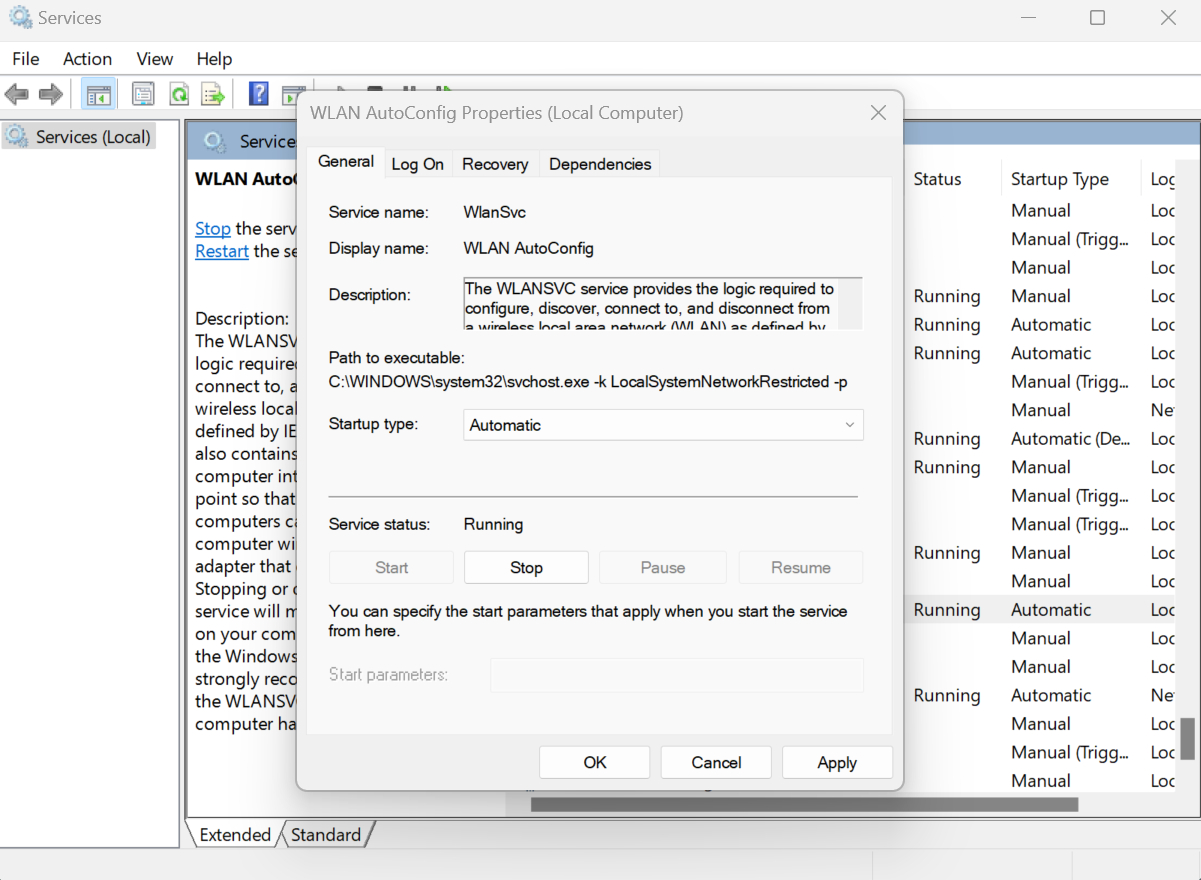
Step 2. Scroll down to find WLAN AutoConfig , then double-click to open the properties window.

-
Step 3. In the General tab :
- In the Startup type section , if it's set to Manual (Trigger Start) (the default in Windows 11), just leave it as is unless you encounter problems with the service not starting automatically; if the service doesn't run at startup , change it to Automatic.
- If the Service status is Stopped, press Start to manually start the service.
-
Step 4. Press OK , then restart your computer for the changes to take full effect.
7. Update your Wi-Fi driver via Device Manager.
A Wi-Fi driver is software that helps your computer communicate with your network adapter. If the driver is outdated or incompatible, updating it is crucial to ensure a stable connection.
-
Step 1. Right-click on Start , select Device Manager .
-
Step 2. Expand the Network adapters section , then find your Wi-Fi adapter.
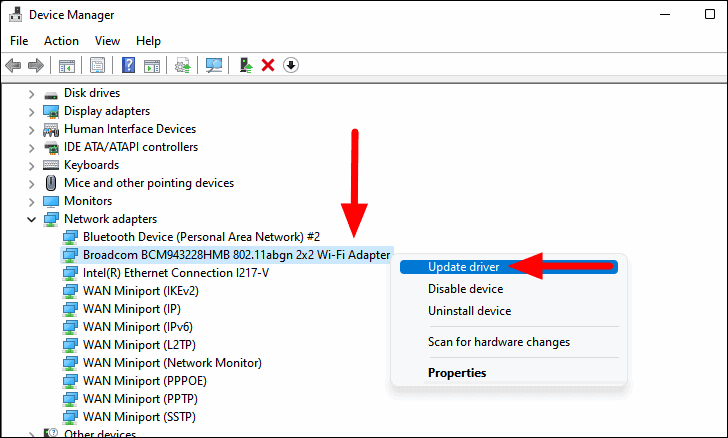
-
Step 3. Right-click on the adapter and select Update driver .
-
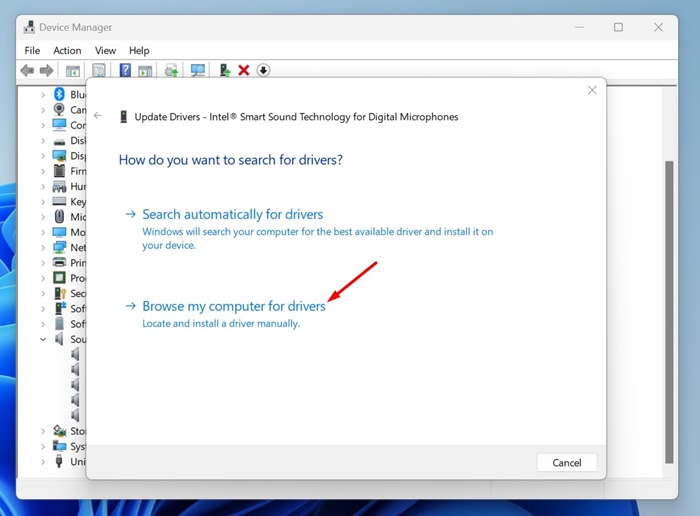
Step 4. In the Update Drivers window, select Search automatically for drivers - Windows will automatically find and install the latest available drivers. If it doesn't find them, you can select Browse my computer for drivers if you have already downloaded the drivers from the manufacturer's website.
-
Step 5. After the update is complete, restart your computer to ensure the driver is applied correctly.
8. Delete the saved network (Forget Network) and switch to a private network.
Deleting saved Wi-Fi networks and switching them to Private mode fixes old configuration errors, while also ensuring security and convenience when sharing internally between devices.
Delete saved networks (Forget Network):
-
Step 1. Open Settings (press Windows + I ), go to Network & Internet => Wi-Fi => Manage known networks .
-
Step 2. Find the network name you want to delete, press Forget to remove the previously saved configuration, forcing Windows to scan and connect as a new network the next time you enter the password.

Switch your network to Private mode:
-
Step 1. Still in Settings => Network & Internet => Wi-Fi , select the network you are connected to and click to access details.
-
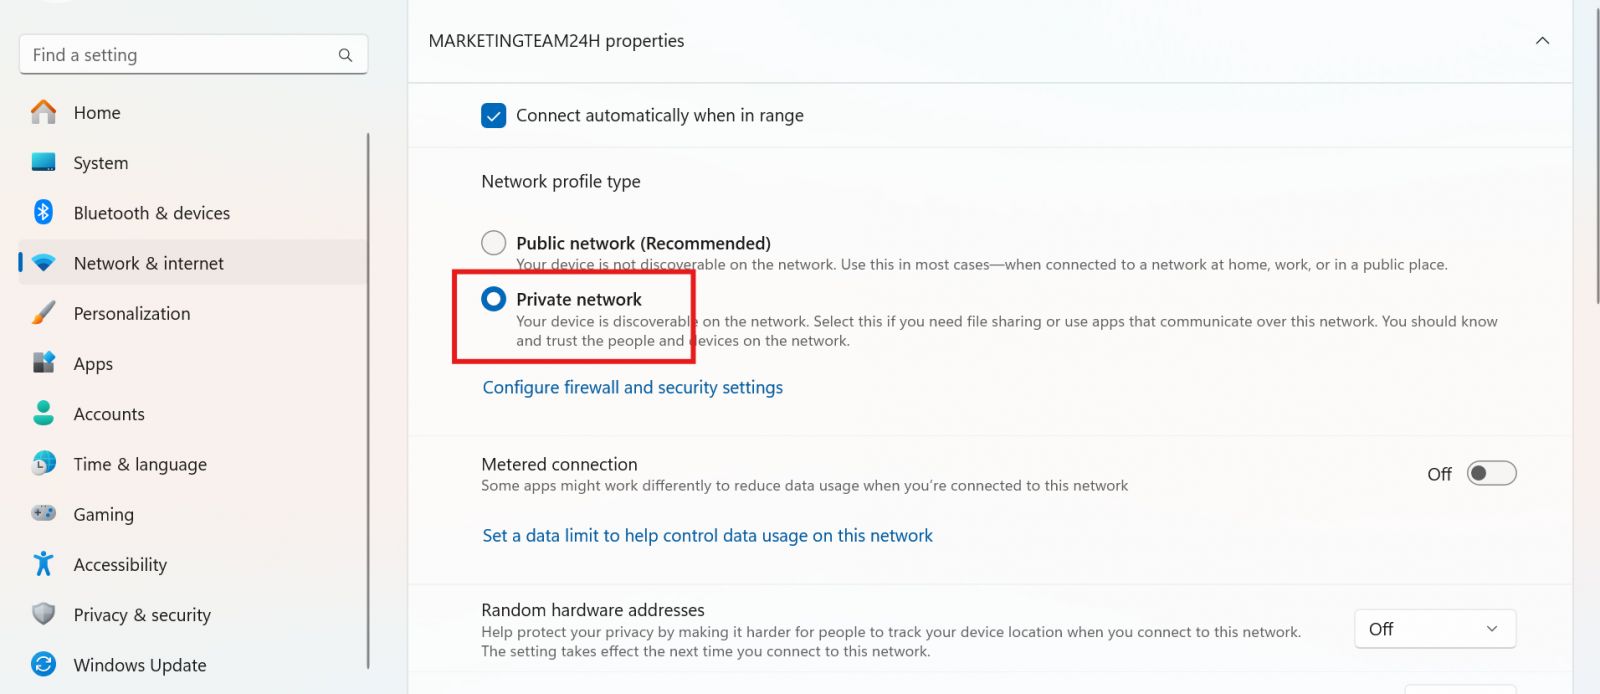
Step 2. In Network profile type , select Private to enable data and print sharing between devices on the same LAN - suitable for home or small office networks.
9. Change DNS
To improve internet speed and stability, you can configure your computer to use a public DNS server like Google:
-
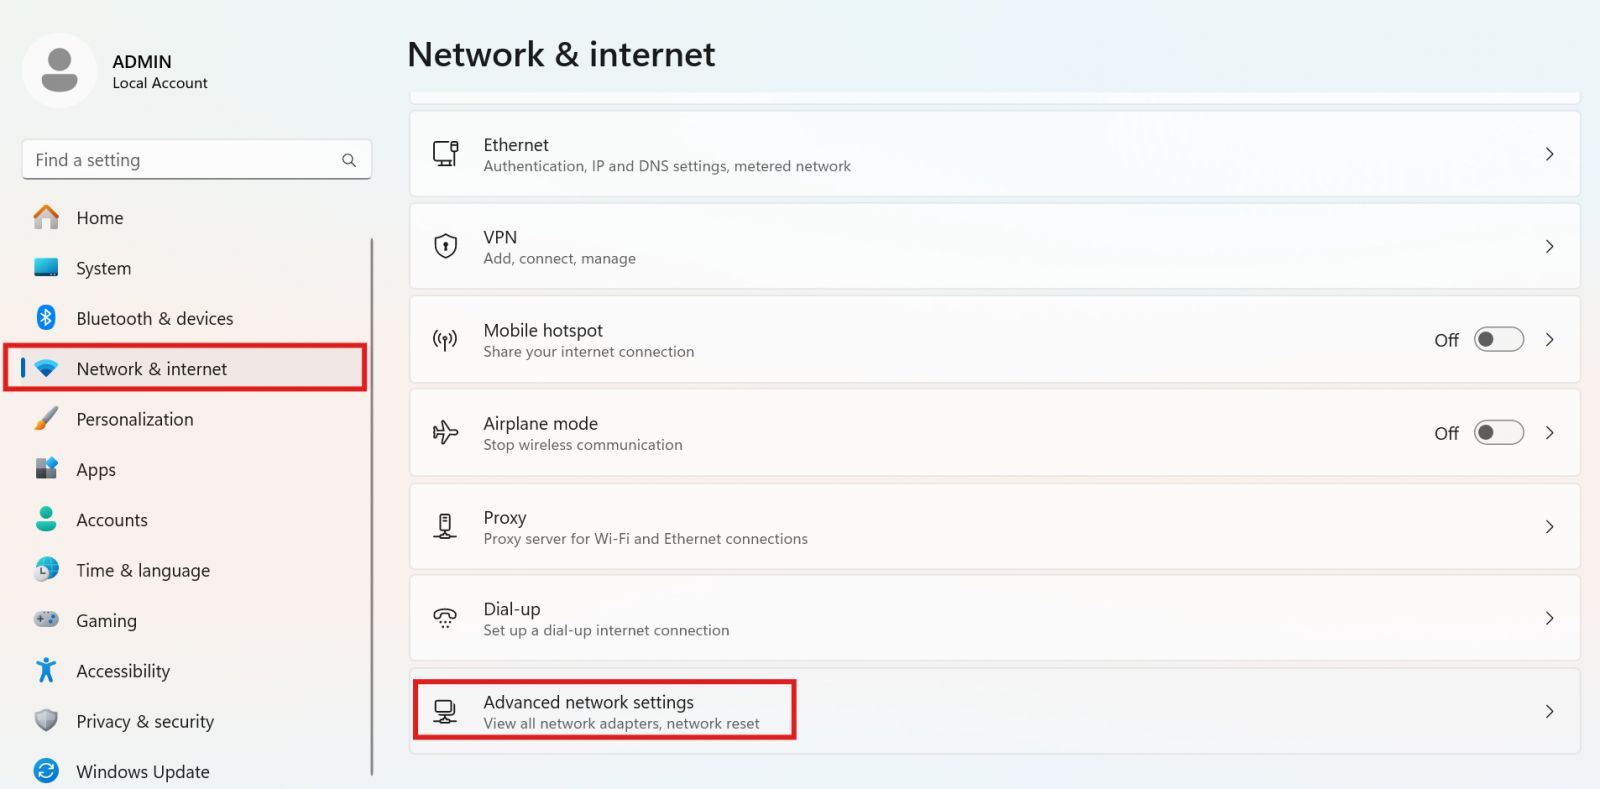
Step 1. Open Settings (press Windows + I ), go to Network & Internet , select Advanced network settings , then click More network adapter options to go to the adapter management window.
-
Step 2. Right-click on the adapter you are using (Wi-Fi or Ethernet), and select Properties .
-
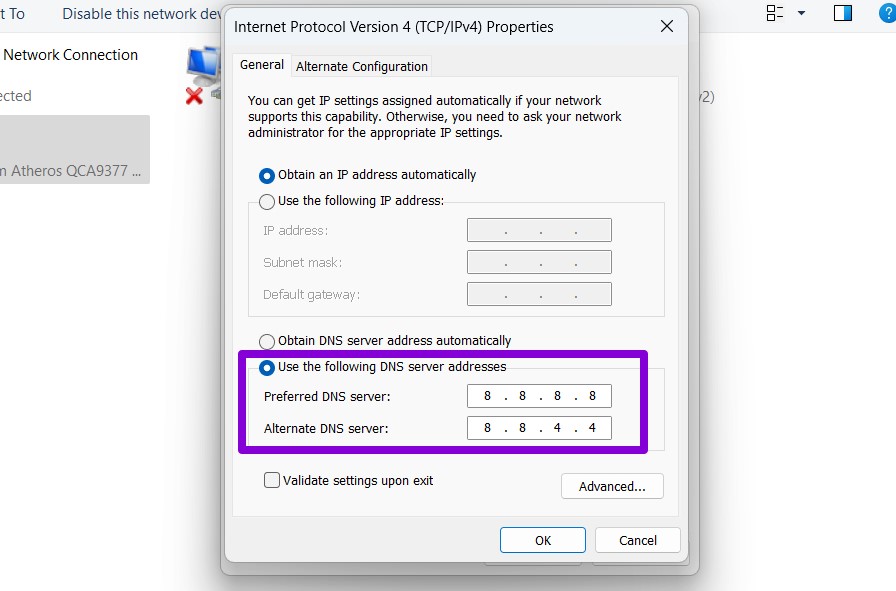
Step 3. Select Internet Protocol Version 4 (TCP/IPv4) and click Properties .
-
Step 4. Select " Use the following DNS server addresses ," then enter: Preferred DNS server :
8.8.8.8or Alternate DNS server :8.8.4.4
-
Step 5. Click OK to save and close the window.
Note: Google Public DNS ( 8.8.8.8, 8.8.4.4) is a popular, free, and stable option. Manually setting DNS helps reduce query latency, avoid errors caused by ISP's default DNS, and improve web browsing speed.
10. Change Wi-Fi frequency band
If your router broadcasts both 2.4 GHz and 5 GHz , try switching bands:
-
2.4 GHz typically has a long range and penetrates walls well.
-
5 GHz offers high speeds but a shorter range.
Go to Advanced in the Properties of your Wi-Fi adapter if there is a band option.
11. Use Network Reset
If troubleshooting steps such as running a troubleshooter, updating drivers, checking the WLAN service, changing network modes, or configuring DNS still don't resolve the Wi-Fi issue, you should use the Network Reset feature to restore the entire network configuration.
Steps to follow:
-
Step 1. Press Windows + I to open Settings .
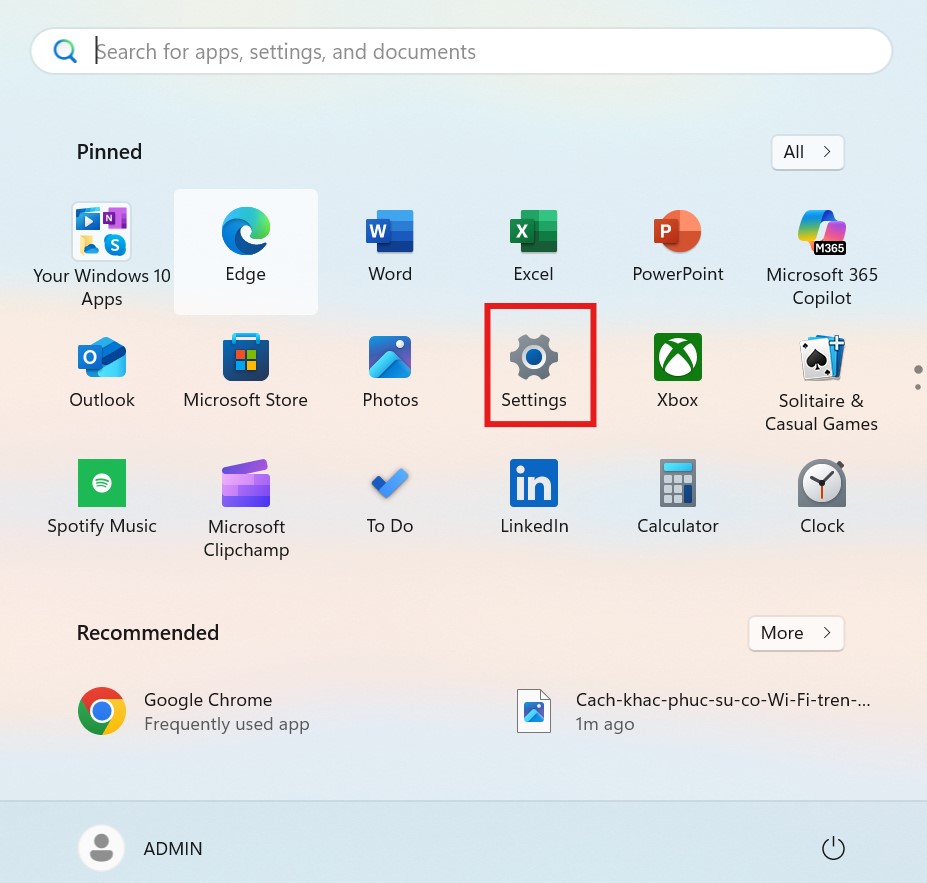
-
Step 2. Select Network & Internet , then click on Advanced network settings .
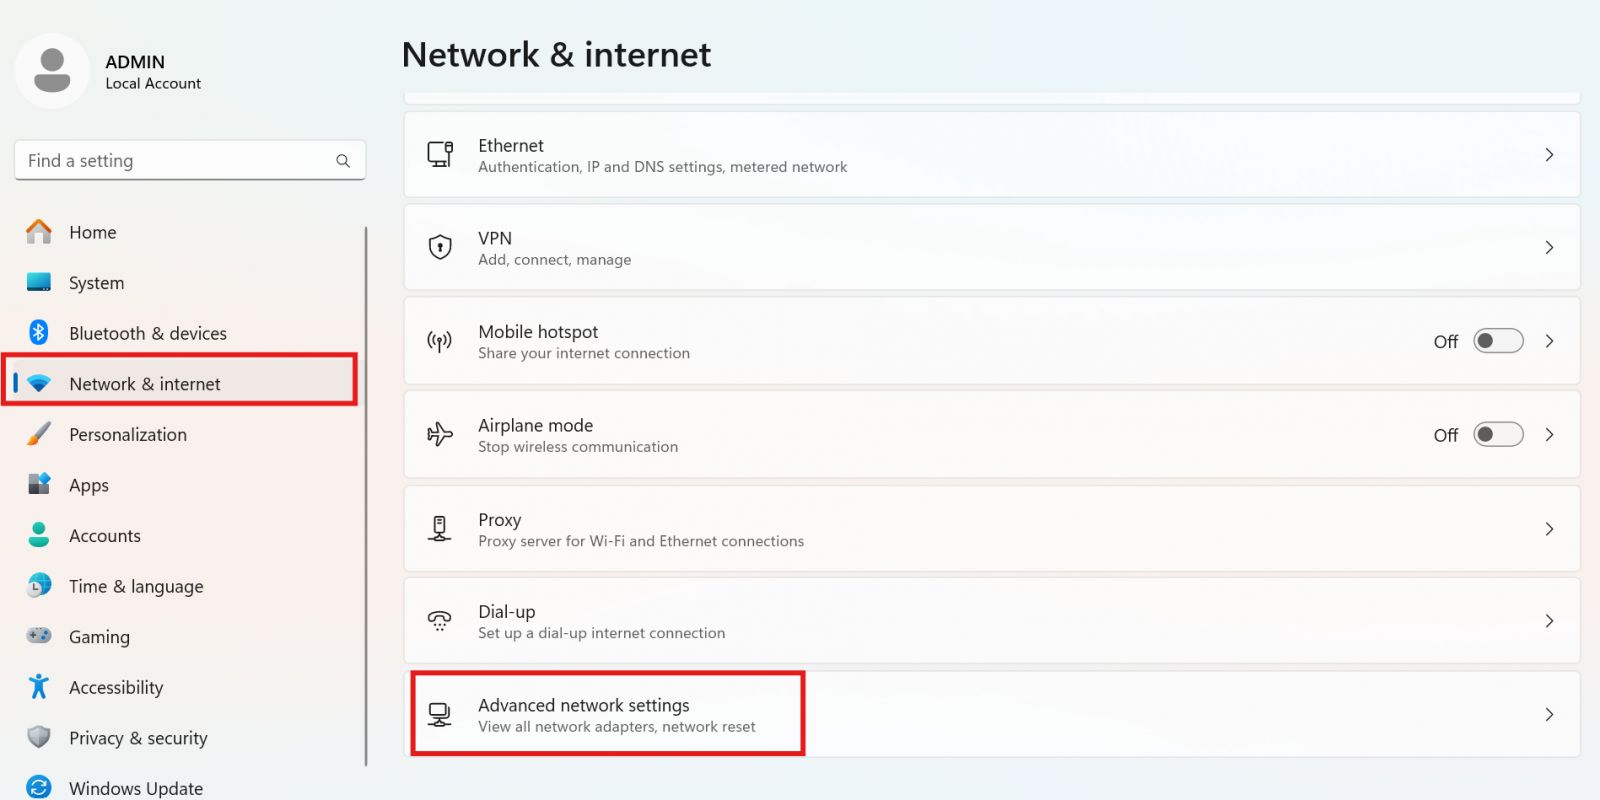
-
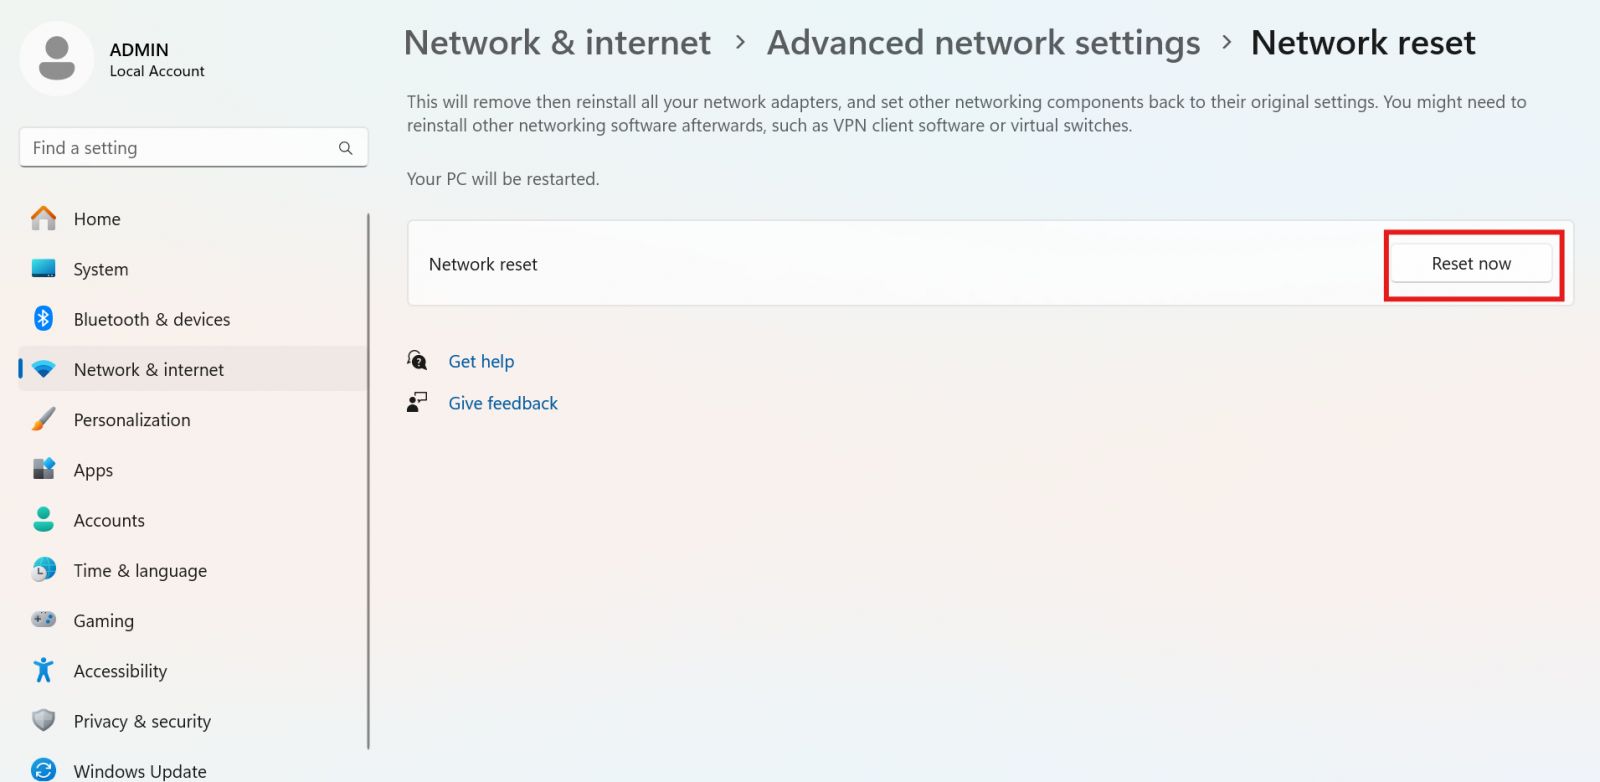
Step 3. Scroll down and select Network reset .

-
Step 4. Press the Reset now button , then select Yes to confirm that you want to erase all network settings and allow the system to restart automatically.
Important note:
Network configuration lost : All adapters (Wi-Fi, Ethernet, VPN, proxy, DNS, static IP, etc.) will be uninstalled and reinstalled from scratch. After restarting, you will need:
-
Reconnect to Wi-Fi using the password.
-
Reconfigure your VPN, using a static IP address/DNS if applicable.
-
Reset any network virtualization such as Hyper-V if used.
Switching the network to Public mode : All connections are considered public by default, which increases security, but you may need to switch the network to Private mode to allow internal sharing or printing.
12. Run the netsh and ipconfig commands in Command Prompt.
If all previous troubleshooting steps (troubleshooter, driver updates, Network Reset, etc.) fail to resolve your Wi-Fi or Internet issues, you can use Command Prompt with administrator privileges to execute the following series of commands:
(netsh winsock reset, netsh int ip reset, ipconfig/release, ipconfig/renew, ipconfig/flushdns).
-
netsh winsock reset: Restores the Winsock catalog to its default settings, helping to fix issues related to sockets or non-standard connections. -
netsh int ip reset: Restores the TCP/IP stack to its original state, fixing underlying configuration errors that cause connection loss. -
ipconfig/releaseAndipconfig/renew: Release and reassign IP addresses from DHCP, allowing the computer to receive a new IP address. -
ipconfig /flushdnsClear DNS cache to fix outdated or incorrect domain name queries.
After entering all the above commands, you should restart your computer for all changes to take full effect.
13. Check for and install Windows Update.
-
Go to Settings => Windows Update , select Check for updates , and install all relevant patches, drivers, and firmware.
-
Restart if necessary to complete the process.
Summary
Troubleshooting Wi-Fi issues on Windows 11 through steps ranging from running the network troubleshooter and updating drivers to resetting network configurations is an effective way to quickly restore connectivity. Among these, the Network Reset feature is particularly useful, easy to use, and suitable for many common error scenarios.
By following each step carefully, you can easily re-establish a stable connection, fix random errors, and avoid interruptions to your experience. If problems persist after performing these steps, you should check your router/modem, update to the latest Windows version, or contact TipsMake technicians for more in-depth support.
- How to troubleshoot OneDrive after resetting on Windows 10
- Troubleshoot Wi-Fi connectivity problems in iPad and iPhone
- Troubleshoot connectivity problems in the network - Part 4
- How to fix AirDrop problems on Mac
- 12 tips to overcome file sharing issues
- How to Troubleshoot Aero Effect Issues
- How to Reformat a PC Running Windows XP
- How to fix common Windows 10 problems with WinDBG
- 5 tips to troubleshoot network connectivity issues in Windows Vista
- How to use Device Manager to troubleshoot Windows 10
- List the default password of Cisco routers and switches
- Configure TP-Link WR841N as wifi repeater
- Combine 2 networks to speed up
- How to hide WiFi network in Windows 10
- How to hack Wifi password with Aircrack-Ng
- Top 10 free software to broadcast WiFi on Laptop
- How to find the default gateway IP address
- How to speed up Internet connection with cFosSpeed
- What is the Wi-Fi Mesh system? How does it work?
- How to hide hidden WiFi network SSID on Windows 10
-
 Which is better: Claude, ChatGPT, or Gemini for building an ad blocker for Chrome?
-
Can Gemma 4 replace ChatGPT for analyzing data from spreadsheets?
-
How to fix the Microsoft Outlook startup error on Windows
-
What is open-source AI?
-
All the characters in Five Hearts Under One Roof
-
AI checks AI content: The era of algorithmic editors.
 Which is better: Claude, ChatGPT, or Gemini for building an ad blocker for Chrome?
 Can Gemma 4 replace ChatGPT for analyzing data from spreadsheets?
 How to fix the Microsoft Outlook startup error on Windows
 What is open-source AI?
 All the characters in Five Hearts Under One Roof
 AI checks AI content: The era of algorithmic editors.