Top 10 steps to fix Windows Explorer taking up a lot of CPU and RAM on Windows 10
This article I will guide how to fix Windows Explorer taking up a lot of CPU and RAM on Win 10, helping the computer optimize CPU / RAM resources..
In fact, there are many software that require a large amount of RAM and CPU to work smoothly, and typically Chrome, IE, . on the system.

Windows Explorer is lightweight, but sometimes it crashes and takes up too much CPU. If so, don't worry, please use the methods below to fix it.
1. Use anti-virus software
Sometimes Windows Explorer error takes up a lot of CPU and RAM on Win 10 can happen because the computer has been infected with certain malware. The quick measure now is to use anti-virus software to remove the malware and regain speed for your PC.
You can refer to the best antivirus software, download and install to fix full load explorer.exe error.
2. Turn off the cloud storage application
According to many users, sometimes this problem can be caused by cloud storage services like Dropbox or OneDrive. These services can automatically sync files in the background and that can cause Windows Explorer to take up a lot of CPU and RAM on Win 10.
To fix the problem you can turn off OneDrive and uninstall Dropbox temporarily to see if that solves the problem.
If you have difficulty in the process of uninstalling them then try an uninstaller software like IObit Uninstaller. This software will delete all files and registry entries associated with the application, ensuring that there are no remaining files that could affect the system.

3. Delete old and temporary files
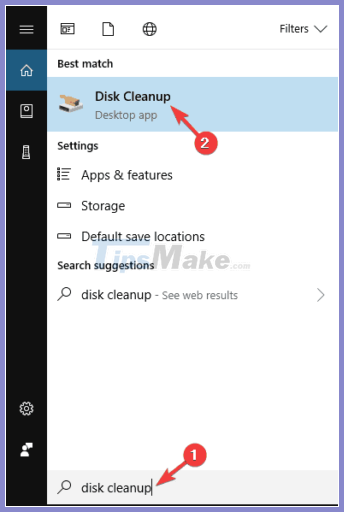
Press the shortcut key Windows + Sand type: disk
Select Disk Cleanup.
Select the partition containing your operating system (default is drive C) then click OK.

Your PC will now scan the selected drive. This usually takes a few seconds.
Select unneeded old files and delete them then click OK.
If you want, you can click the Clean system files button to remove additional files.

4. Clean your computer with CCleaner software

Delete temporary files, cookies, history and other files from your computer. This cleaning software will likely help you fix the Windows Explorer error that takes up a lot of CPU and RAM on Win 10.
5. Check the icons on the screen

Sometimes explorer.exe activity takes up a lot of RAM and CPU can happen due to your desktop having too many icons, files and shortcuts (shortcuts). To fix the problem, simply delete the files / shortcuts from the desktop, especially the broken shortcuts (source files have deviated from the path or deleted).
6. Update the operating system
Press the key combination Windows + Ito open Settings and select Update & Security settings.

Click the Check for updates button .

Windows will check for updates and automatically download / install them in the background.
Restart your PC and check to see if the problem is fixed.
7. Turn off services and applications that start with Windows
Press the key combination Windows + Rthen type: msconfig and click OK.

Go to the Services tab and check the option Hide all Microsoft services .
Click the Disable all button .

Select the Startup tab and click Open Task Manager.

Right-click all applications that start with Windows in the Startup section and select Disable . Do this until you turn off all applications.

Return to the System Configuration window .
Click Apply and OK to save changes then restart your PC.
After your PC reboots, check to see if the problem is fixed. If not, turn on each service and application until you fix the problem.
8. Delete the contents of the Temp folder

Open the Temp folder under the following path:
C: WindowsTemp
Delete all files inside the Temp folder.
Press the keyboard shortcut Ctrl + Shift + Escto open Task Manager.
Find Windows Explorer and right-click on it and select Restart.
After restarting Windows Explorer, the problem will be completely resolved.
9. Delete the audioses.dll file
Go to the following directory:
C: / Windows / System32
Find audioses.dll and right-click and choose 'Cut'

Find the path to the following directory:
C: / Windows / Sys / WOW64
Right-click and select " Paste" to paste the audioses.dll file here.
10. Using CHKDSK Scan
If the above nine methods that explorer.exe still runs full load RAM and CPU 100% then you can run CHKDSK to scan computer hard drive and find / fix the problem automatically.
Please perform the following simple steps to run CHKDSK.
Press the key combination Windows + S.
Search for 'cmd' then right-click and select Run as administrator.

Enter the following command and press Enter:
chkdsk / f / r

Immediately enter Y and press Enter to confirm the hard drive scan after reboot.
After the scan is finished, check to see if the error explorer.exe taking up a lot of RAM has been fixed.
The tutorial on how to fix Windows Explorer taking up a lot of CPU and RAM on Win 10 is over. I believe that with these ten methods, anyone can fix Windows Explorer taking up a lot of CPU on Windows 10 simply.
Before leaving, don't forget to share this tip when you find it helpful!