Table of Contents
This guide provides a practical overview of Manipulation Editing on a Table in Word, including its main features, benefits, limitations, and important considerations.
The editing operations on tables in Word include:
1. Insert more rows and columns.
- Insert additional columns into the table -> select the column position next to the columns you want to insert -> into the layout tab -> include the following options:
+ Insert left: Insert a column to the left of the selected column.
+ Insert right: Insert a column to the right of the selected column.
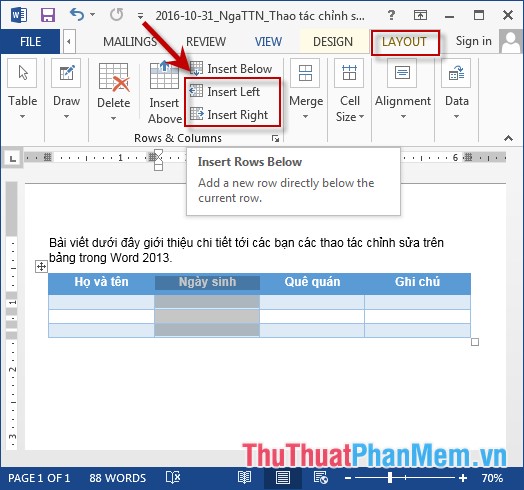
- The example here inserts the column to the left of the selected column results:

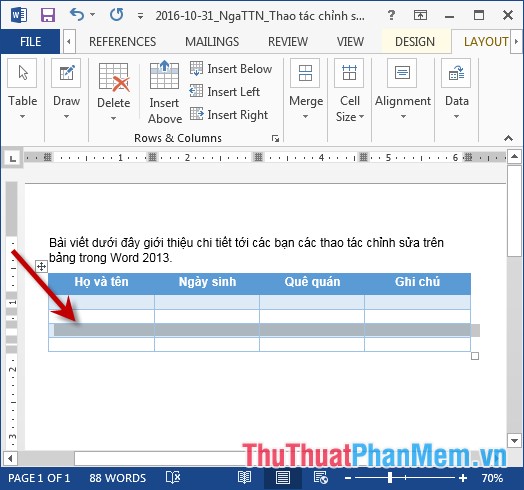
- Insert more rows into the table: Select the row you want to insert more rows above or below that row -> Click the Layout tab -> include the options:
+ Insert Above: Insert more rows above the selected rows.
+ Insert Below: Insert more rows below the selected row.

- Results when selecting Insert Above row inserted above the selected row:
2. Delete rows, columns and tables.
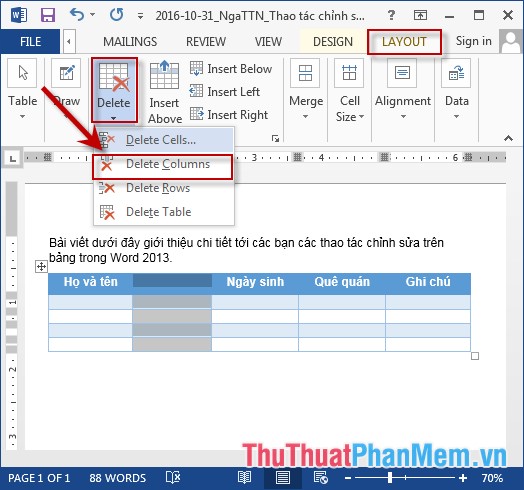
- To delete a column, do the following: Select the column you want to delete -> select the Layout tab -> Delete -> Delete Columns:
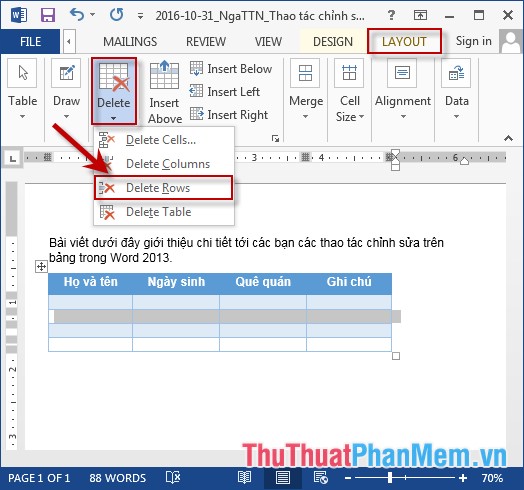
- To delete rows, do the following: Select the rows you want to delete -> select Layout tab -> Delete -> Delete Rows:
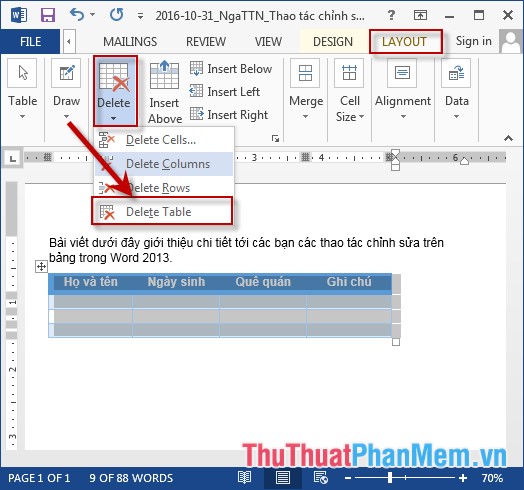
- To delete the entire table, do the following: Select the table you want to delete -> select the Layout tab -> Delete -> Delete Table:
3. Draw and separate cells in the table.
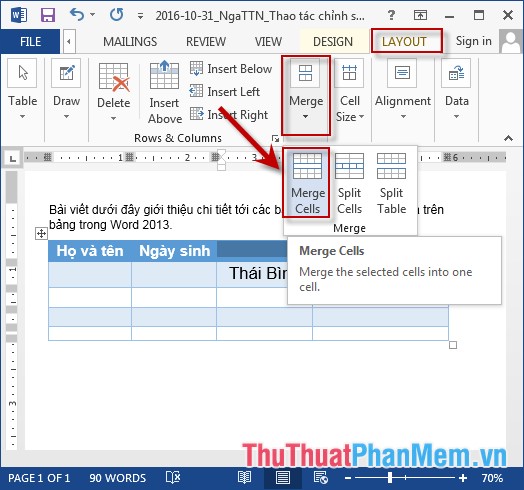
- Draw cells in the table, for example, the Homeland column has two values, peace and security .
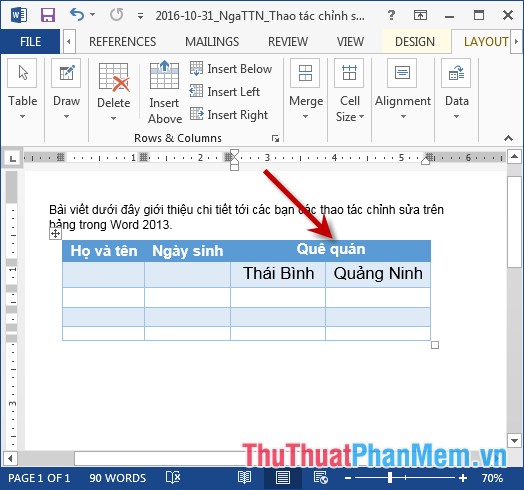
- The result after tie:
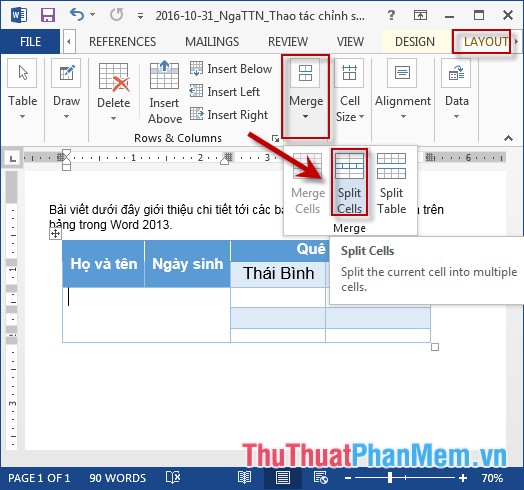
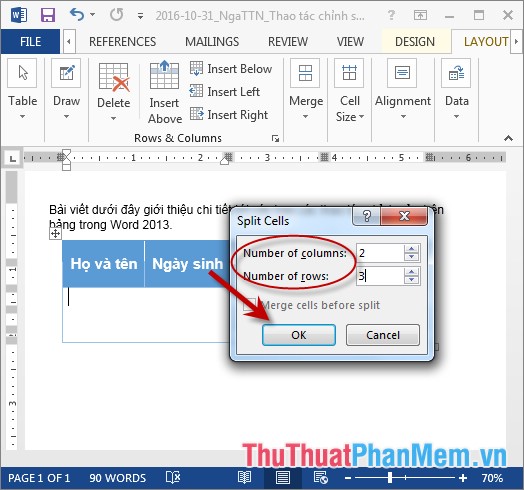
- In case you do not want to tie cells, want to split the cells as you like. Example separating cells in column Name and Date of Birth: Select the cells to split -> Layout -> Merge -> Split Cells:
- The dialog box selects the number of columns and the number of rows to split into -> finally click OK:

4. Split the board into 2 tables.
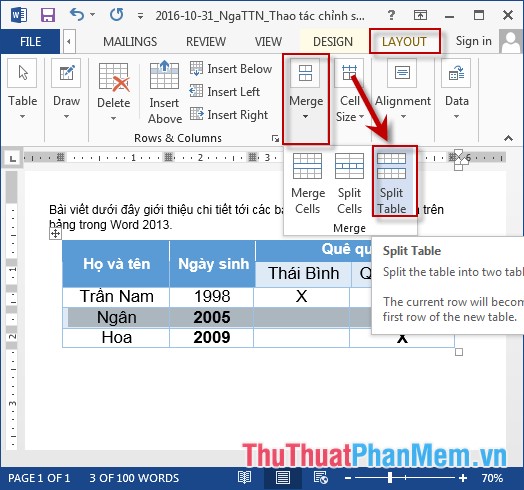
- Select the position of the row from which the row wants to split into 2 tables -> select the Layout tab -> Merge -> Split Table:
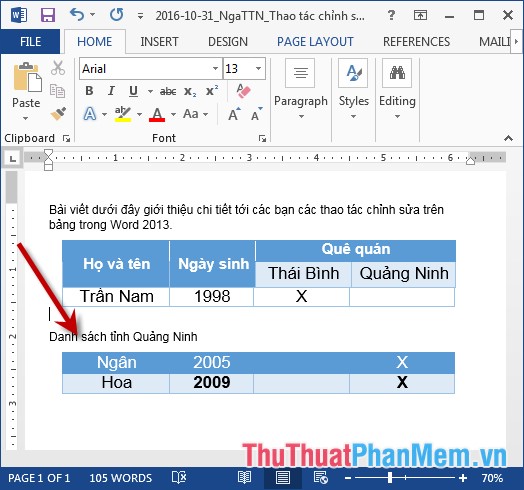
- The table results are split into 2 tables starting from the first selected row:
The above is a detailed guide of editing operations on tables in Word.
Good luck!
FAQ
What should I know about Manipulation Editing on a Table in Word?
Focus on the key features, requirements, limitations, and practical use cases explained in this guide.
How do I get the best results with Manipulation Editing on a Table in Word?
Follow the recommended steps, use current software or information, confirm compatibility, and review settings before major changes.
Are there any risks or limitations?
Potential limitations depend on compatibility, data quality, cost, privacy, support, and how the product or method is used.
Related Articles
 How to Create a Table in Word 20077 minutes read
 How to Insert and Create Tables in Word 2016: Step-by-Step Guide7 minutes read
 How to Fix Table Errors in Word Overflow: Step-by-Step Guide3 minutes read
 How to Adjust the Size of Word Table Cells Equally4 minutes read
 Instructions for Inserting Table Captions in Word3 minutes read
 Table Operations in Word4 minutes read
Reader Comments 0
Sign in with email or Google to join the discussion.