Table operations in Word
Introduce table operations in Word. Table operations in Word 2013 include: 1. Draw cells in a table. - Creating a table can not ignore Merge Cell operation, for example, if you want the column of the school day to have 2 values of even and odd dates, make 2 columns into one..
The following article introduces you to the operations on the table in Word.
Table operations in Word 2013 include:
1. Draw a box in the board.
- Creating a table cannot ignore Merge Cell operation , for example, if you want the column of the school day to have 2 values of even and odd dates, make 2 columns into one:
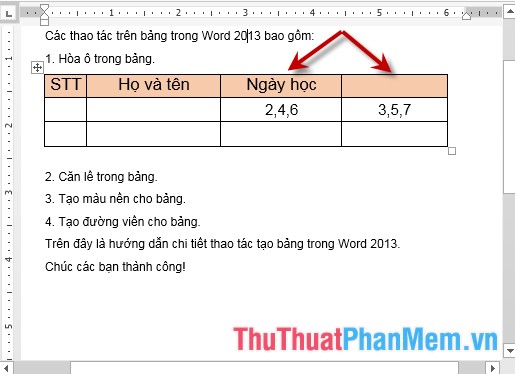
- To tie cells, do the following: Select the cells you want Meger Cell -> Layout -> Merge -> Merge Cells:

- The results have been merged into 1:

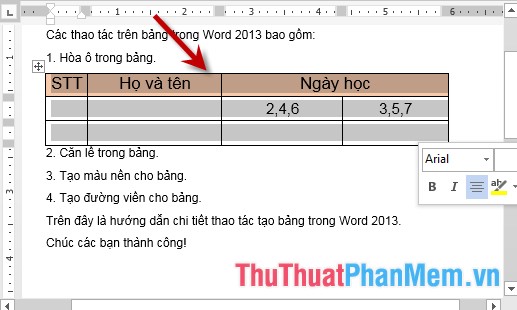
2. Align the table.
- When entering data in the table, you want the data to be in the middle of the cell and 4 equally spaced as follows: Select the table to align on the Layout tab -> Alignment -> select the alignment type:

- Results after choosing the alignment:
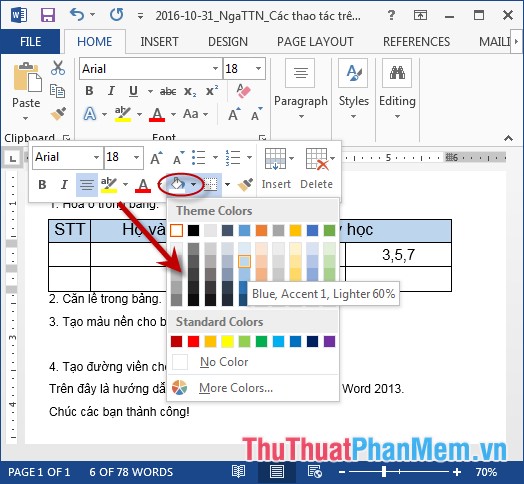
3. Create a background color for the board.
Method 1: Highlight the cells you want to create background color -> use the paint bucket icon or shadding in the quick toolbar -> select the colors to create the background:
- Results after pouring background color:

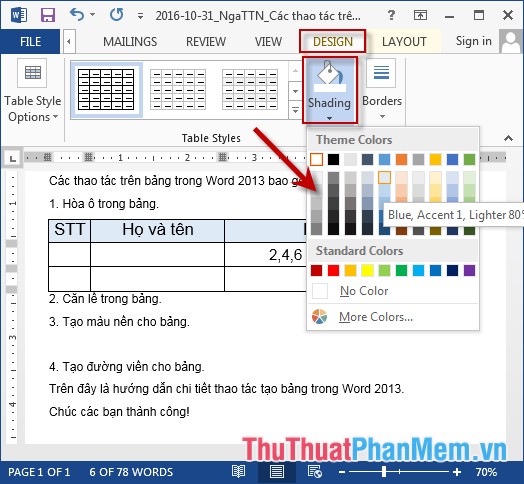
Method 2: Select cells to create background color -> Go to Design tab -> Shading -> select colors to fill background:
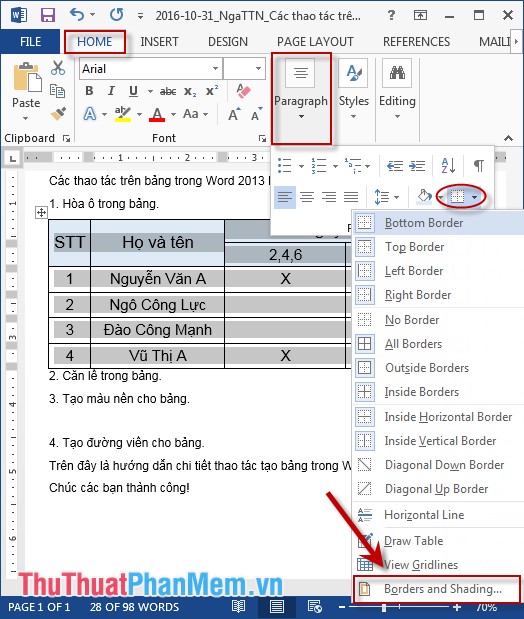
4. Create borders for the table.
- Open the Border and Shading dialog box with 2 ways:
Method 1: Select the table to create borders -> on the Home tab -> Paragraph -> click on the Border icon -> can choose the default types or click Border and Shading:
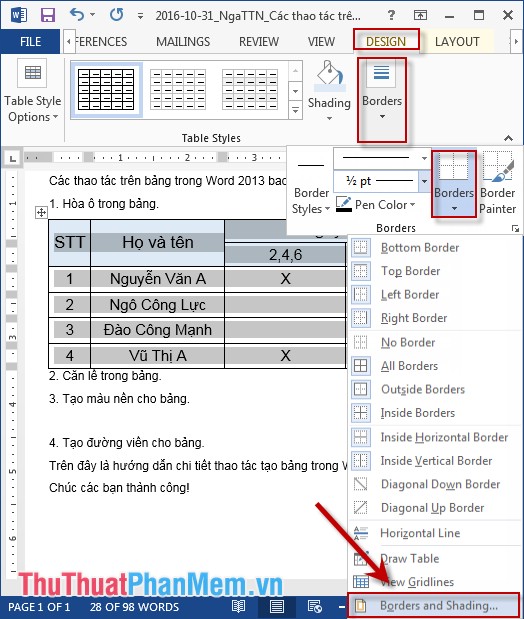
Method 2: Select the table to create borders -> go to Design tab -> Borders -> Borders can choose the default types available or click Border and Shading:
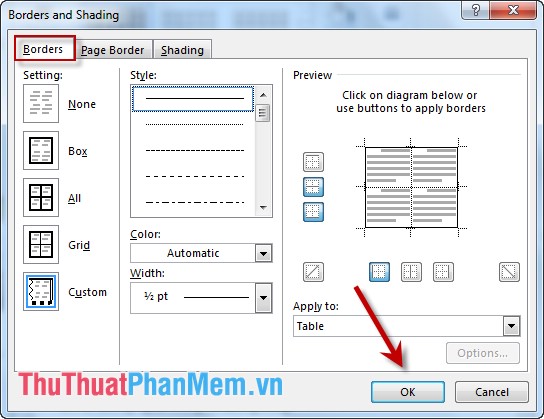
- In both ways, the Border and Shading dialog box appears and select the Border tab, including the following options:
+ Item Setting:
None: Cancels the table border.
Box: Only external roads have no internal roads.
All: Change the border style both inside and outside borders change
Grid: Change the border outside the inner line to keep the default.
Custom: Changing the border inside the outer line remains the default.
+ Item Style: select border style.
+ Item Color: select the color for the border.
+ Section Width: choose the width for the border.
For example, here, select the outer solid line, the inner line is three dots:
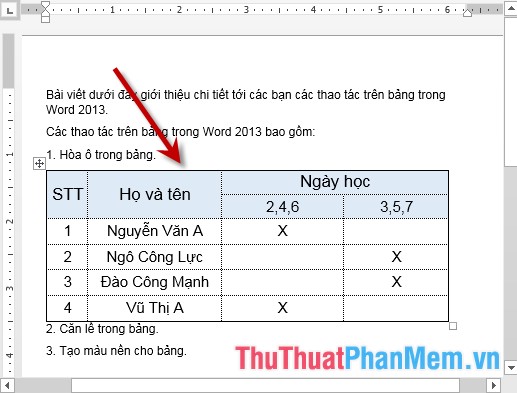
- The table border results have changed:
The above is a detailed guide on table operations in Word.
Good luck!